PDFKit Node.js Tutorial: Generate PDFs Programmatically

PDFKit is a JavaScript library that generates PDF documents programmatically in Node.js. It works without converting HTML – you build documents from scratch using a canvas-like API for vector graphics, text, images, and tables. This guide covers PDFKit setup, text styling, custom fonts, colors, images, tables, invoice generation, Express.js integration, and document security.
What is PDFKit?
PDFKit is a JavaScript PDF generation library for Node.js and the browser. It creates multi-page printable documents using a streaming API that pipes output to files or HTTP responses.
Key features of PDFKit include:
- Vector graphics with HTML5 canvas-like API, SVG path parsing, and gradient support.
- Text handling with line wrapping, alignments, bulleted lists, and formatting options.
- Font embedding (including custom fonts).
- Image embedding supporting JPEG and PNG files.
- Annotations including links, notes, highlights, underlines, and more.
- AcroForms for interactive form creation.
- Document outlines for navigation.
- PDF security with encryption and access privilege controls.
- Accessibility support (marked content, logical structure, and Tagged PDF/UA).
For a comparison of all major Node.js PDF libraries, see Top Node.js PDF Generation Libraries Compared.
PDFKit creates PDFs programmatically from scratch using JavaScript code – it is not an HTML to PDF converter. If you need to convert existing HTML pages to PDF, consider tools like Puppeteer, wkhtmltopdf, or the PDFBolt API instead.
Setting Up PDFKit in Node.js
Let's start by setting up a Node.js project with PDFKit. Make sure you have Node.js installed on your system, then follow these steps:
1. Create a new directory for your project and navigate to it:
mkdir pdf-generator
cd pdf-generator
2. Initialize a new Node.js project:
npm init -y
3. Install PDFKit:
npm install pdfkit
The fs module used in the examples below is part of Node.js core – no separate installation required.
4. Create a new JavaScript file (e.g., index.js) for your PDF generation code.
Basic PDF Generation with PDFKit
Let's start with a simple example to create a basic PDF document:
// Import dependencies
const PDFDocument = require('pdfkit');
const fs = require('fs');

// Create a document
const doc = new PDFDocument();

// Pipe its output somewhere, like to a file
doc.pipe(fs.createWriteStream('output.pdf'));

// Add some content to the first page
doc.fontSize(25).text('Hello there!', 100, 100);

// Add some space between text blocks
doc.moveDown();
doc.text('Scroll down...')

// Add another page
doc.addPage()
   .fontSize(25)
   .text('Here is another page!', 100, 100);

// Finalize the PDF and end the stream
// This is important - without doc.end(), the PDF won't be properly created
doc.end();
When you run this script using node index.js, it will generate a PDF file named output.pdf in your project directory. The PDF will contain two pages with simple text content.
Working with Text
PDFKit has several options for working with text: font size, style, alignment, and positioning.
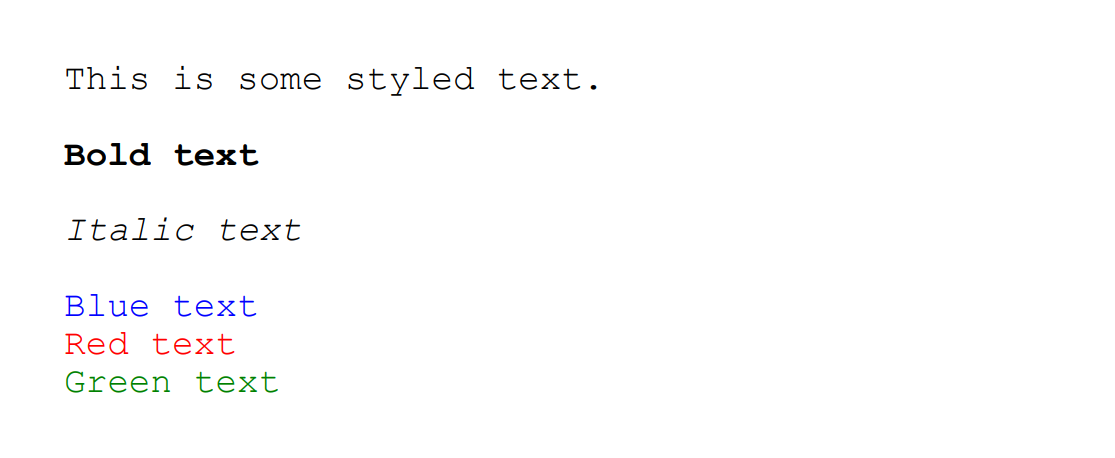
Text Styling
// Set font size and font family
doc.font('Courier')
    .fontSize(18)
    .text('This is some styled text.');

// Add space between text blocks
doc.moveDown();

// Text styling: bold, italics, etc. (requires appropriate font)
doc.font('Courier-Bold').text('Bold text');
doc.font('Courier-Oblique').text('Italic text');

doc.moveDown();

// Text color can be changed using fillColor with color names or hex codes
doc.font('Courier') // Reset to regular font
    .fillColor('blue').text('Blue text');

doc.fillColor('#FF0000').text('Red text');
doc.fillColor('green').text('Green text');
Here is the output:
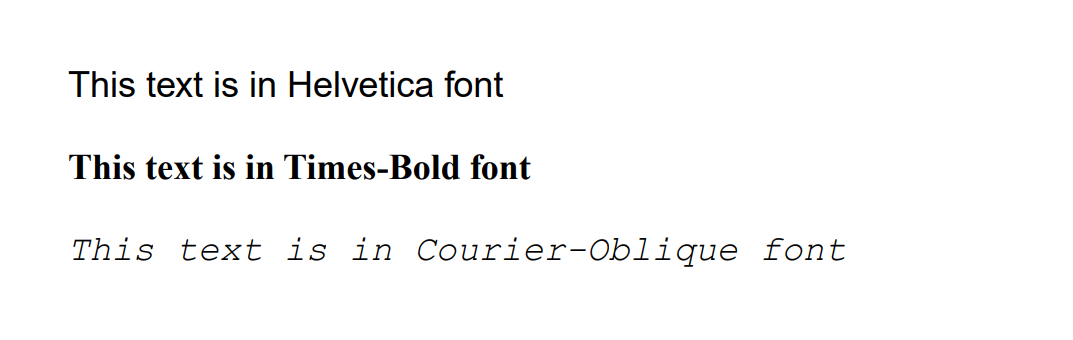
Standard and Custom Fonts
PDFKit supports all 14 standard PDF fonts (Helvetica, Times, Courier, Symbol, and ZapfDingbats with their variations) without requiring embedding.
To use these standard fonts, simply call the font method with the font name:
doc.fontSize(18);

// Standard fonts
doc.font('Helvetica')
    .text('This text is in Helvetica font')
    .moveDown(1);

doc.font('Times-Bold')
    .text('This text is in Times-Bold font')
    .moveDown(1);

doc.font('Courier-Oblique')
    .text('This text is in Courier-Oblique font');
Here is the output:
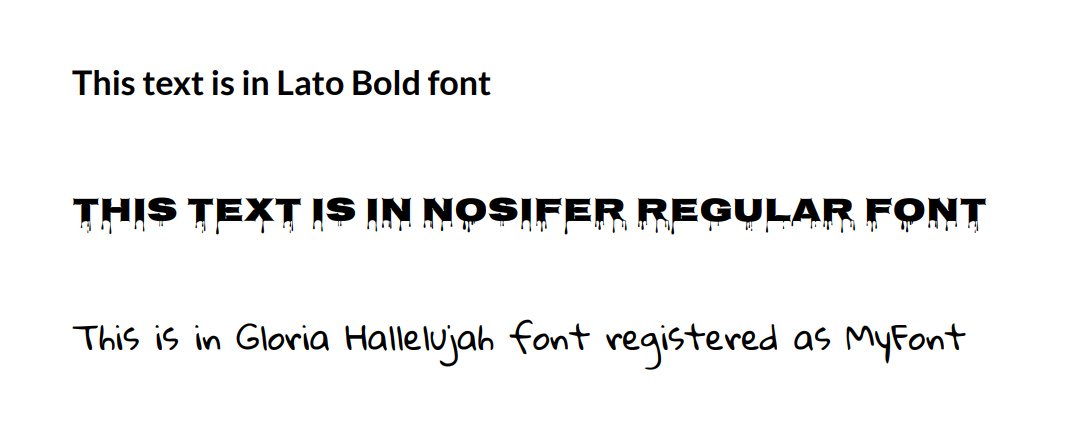
For custom designs, PDFKit supports embedding TrueType (.ttf), OpenType (.otf), WOFF, WOFF2, TrueType Collection (.ttc), and Datafork TrueType (.dfont) fonts.
Below is an example with custom fonts:
// Load and use custom fonts from file
doc.font('fonts/Lato-Bold.ttf')
    .text('This text is in Lato Bold font')
    .moveDown(2);

doc.font('fonts/Nosifer-Regular.ttf')
    .text('This text is in Nosifer Regular font')
    .moveDown(1);

// Register a font with a name for easier reference later
doc.registerFont('MyFont', 'fonts/GloriaHallelujah-Regular.ttf');

// Use the registered font
doc.font('MyFont')
    .text('This is in Gloria Hallelujah font registered as MyFont');
Here is the output:
Integrating Google Fonts
- Visit Google Fonts - select and download your desired font (.ttf files).
- Create a fonts directory in your project for the font files.
- Place the downloaded fonts in your fonts directory.
- Register the fonts - use
registerFont()to make them available to PDFKit. - Use in your document - reference them with the
font()method.
Remember that embedding fonts increases file size, so use standard fonts for basic documents when possible.
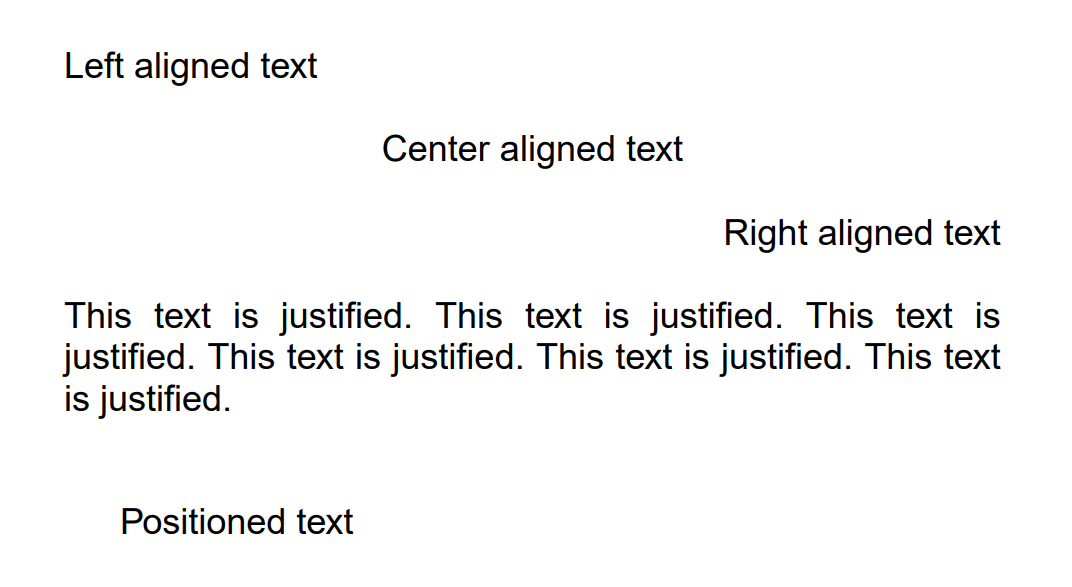
Text Alignment and Positioning
doc.fontSize(18);

// Left aligned text (default)
doc.text('Left aligned text');

doc.moveDown();

// Center aligned text
doc.text('Center aligned text', {
    align: 'center'
});

doc.moveDown();

// Right aligned text
doc.text('Right aligned text', {
    align: 'right'
});

doc.moveDown();

// Justified text
doc.text('This text is justified. This text is justified. This text is justified. This text is justified. This text is justified. This text is justified.', {
    align: 'justify'
});

doc.moveDown();

// Text at specific coordinates (x, y) from the top-left corner
doc.text('Positioned text', 100, 300);
Here is the output:
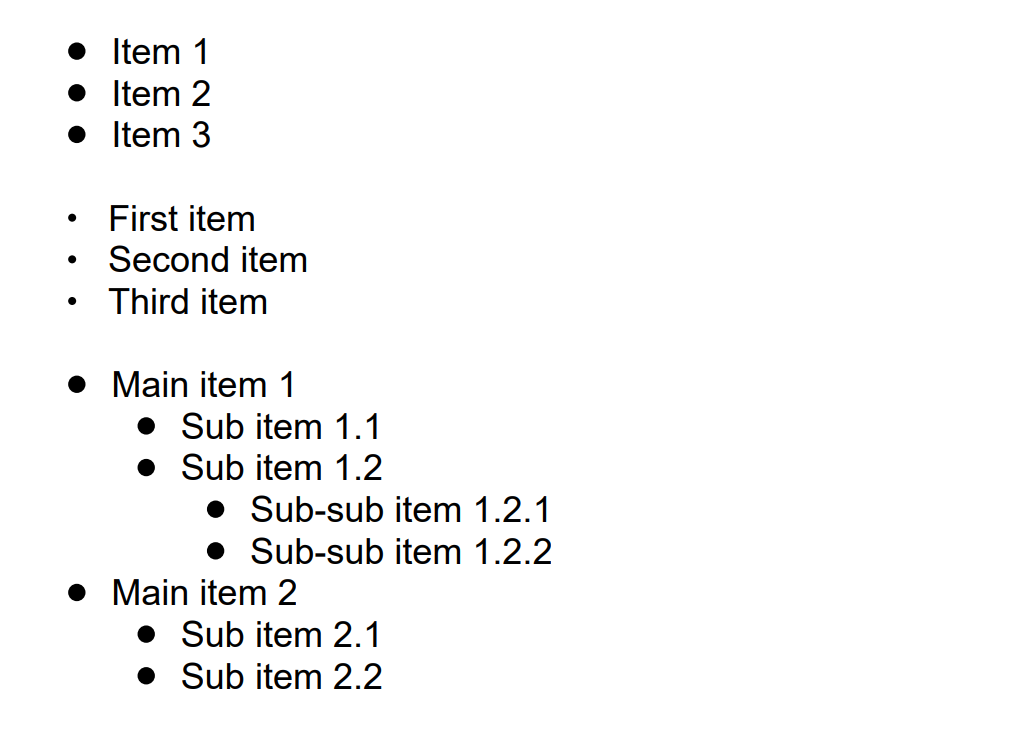
Lists
doc.fontSize(18);

// Create a simple bulleted list
doc.list(['Item 1', 'Item 2', 'Item 3'], 100, 100);

doc.moveDown();

// Create a list with custom options
doc.list(['First item', 'Second item', 'Third item'], {
    bulletRadius: 2,       // Radius of the bullet points
    textIndent: 20,        // Indentation of text from bullet
    bulletIndent: 10       // Indentation of bullet from left margin
});

doc.moveDown();

// Create a multilevel list using nested arrays
doc.list([
    'Main item 1',
    [
        'Sub item 1.1',
        'Sub item 1.2',
        [
            'Sub-sub item 1.2.1',
            'Sub-sub item 1.2.2'
        ]
    ],
    'Main item 2',
    [
        'Sub item 2.1',
        'Sub item 2.2'
    ]
]);
Here is the output:
Working with Colors and Gradients
Colors and gradients can add visual appeal to your PDFs. Here's how to use them:
// Add labels for each rectangle
doc.fontSize(14);
doc.text('Solid Color', 100, 80);
doc.text('Linear Gradient', 250, 80);
doc.text('Radial Gradient', 400, 80);

// Create a solid color-filled rectangle
// Parameters: x, y, width, height
doc.rect(100, 100, 100, 100).fill('blue');

// Create a rectangle with linear gradient fill
doc.rect(250, 100, 100, 100).fill(
    doc.linearGradient(250, 100, 350, 200)
        .stop(0, 'red')
        .stop(1, 'yellow')
);

// Create a rectangle with radial gradient fill
doc.rect(400, 100, 100, 100).fill(
    doc.radialGradient(450, 150, 0, 450, 150, 50)
        .stop(0, 'yellow')  // Inner color
        .stop(1, 'green')   // Outer color
);
Here is the output:
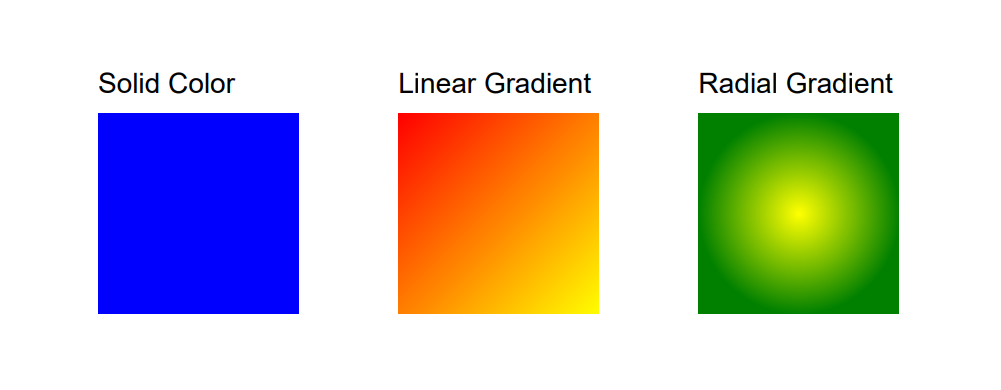
- The
doc.rect(x, y, width, height)method creates a rectangle at position (x, y) with the specified width and height. - It returns the document object for chaining with other methods like
fill()orstroke(). - For more information, see the PDFKit Documentation.
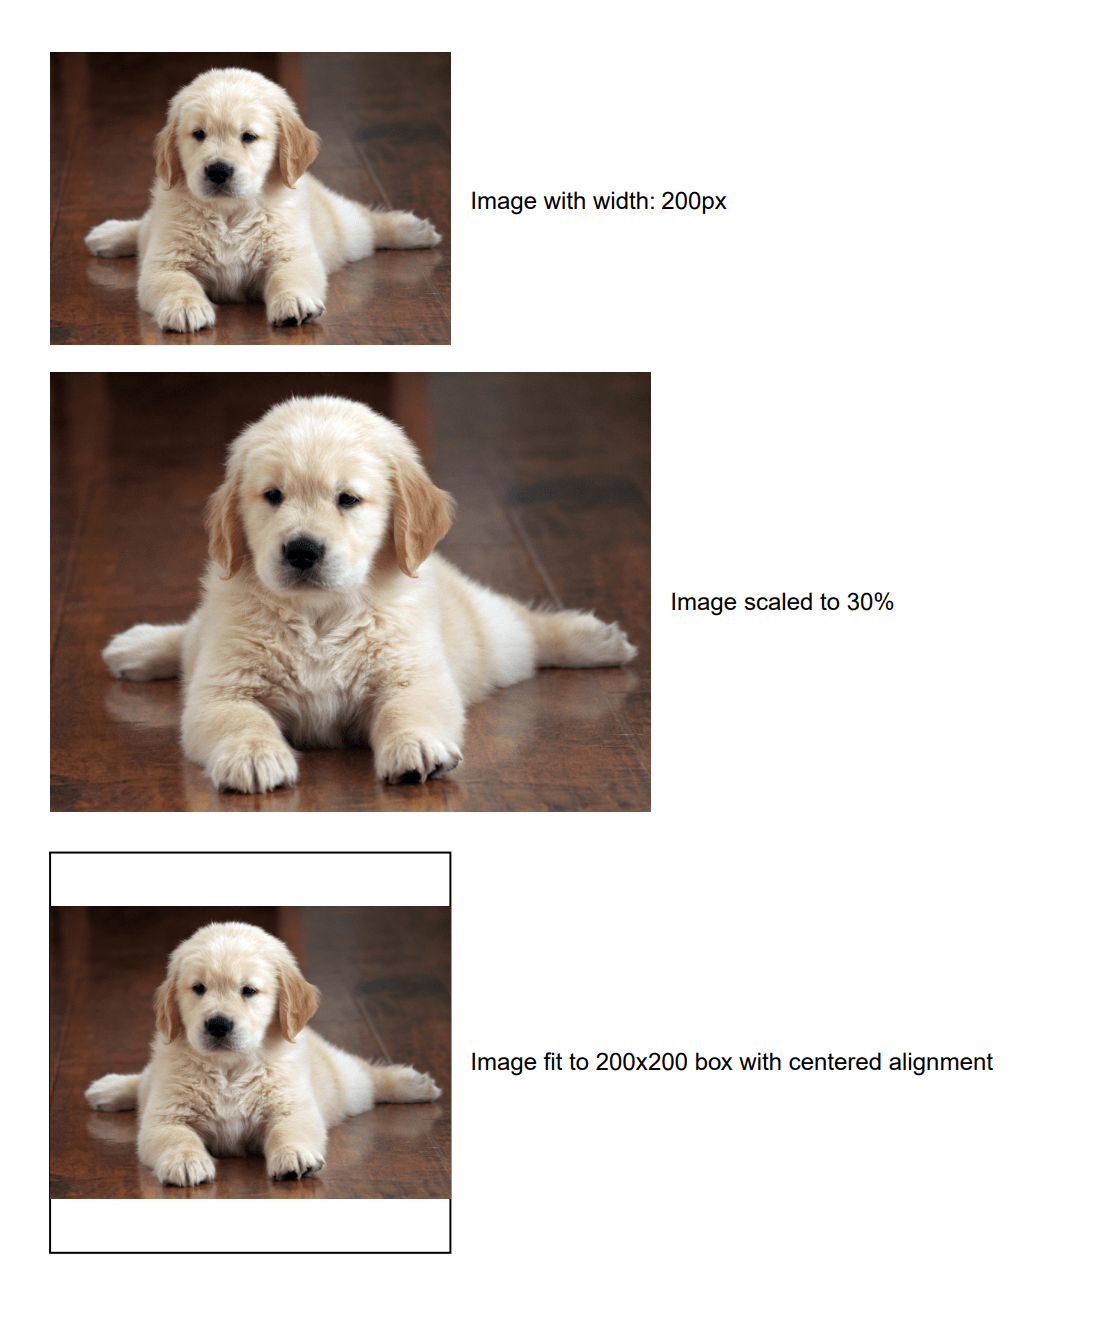
Working with Images
PDFKit makes it easy to include images in your PDF documents:
// Add an image with width option
doc.image('images/example.jpg', 50, 50, { width: 200 });
doc.text('Image with width: 200px', 260, 120);

// Add an image with scaling
doc.image('images/example.jpg', 50, 210, { scale: 0.3 });
doc.text('Image scaled to 30%', 360, 320);

// Add an image with fit options - fits image within a bounding box
// First, create a rectangle outline to show the bounding box
doc.rect(50, 450, 200, 200).stroke();
// Then add the image with fit parameters
doc.image('images/example.jpg', 50, 450, {
    fit: [200, 200],    // Width and height constraints
    align: 'center',    // Horizontal alignment within the box
    valign: 'center'    // Vertical alignment within the box
});
doc.text('Image fit to 200x200 box with centered alignment', 260, 550);
Here is the output:
Creating Tables with PDFKit
PDFKit provides built-in support for creating tables through the table() method.
Here's a simple example:
// Add a title for the table
doc.fontSize(12).text('Simple Table Example', {align: 'center'});
doc.moveDown();

// Create a table with specified column styles
doc.table({
    columnStyles: [120, '*', 180, '*'],
    data: [
        ['Column 1', 'Flexible', 'Fixed Width', 'Flexible'],
        [
            {text: 'The cell with specified width'},
            {text: 'This column expands to fill available space'},
            {text: 'This cell has a fixed width'},
            {text: 'This column also adjusts based on remaining space'}
        ]
    ]
});
Here is the output:

This creates a simple table with basic styling. For more advanced features such as row/column spans, custom borders, zebra striping, and other styling options, refer to the PDFKit Docs.
Document Metadata and Security
Setting Document Metadata
PDFKit allows you to set various document metadata properties which help with document categorization, search, and identification:
// Create a new PDF document
const doc = new PDFDocument();

// Set document metadata
doc.info = {
  Title: 'Sample Document',
  Author: 'John Doe',
  Subject: 'PDFKit Example',
  Keywords: 'pdf,node.js,pdfkit',
};

// Alternatively, you can set properties individually
doc.info.Title = 'Sample Document';
doc.info.Author = 'John Doe';
PDF Security
You can secure your PDF with passwords and set specific permissions by providing security options when creating your document:
// Create a password-protected PDF with restricted permissions
const doc = new PDFDocument({
  // Security options
  userPassword: 'user123',     // Password required to open the document
  ownerPassword: 'owner123',   // Password required to change permissions
  permissions: {
    printing: 'lowResolution', // Can be 'highResolution' or 'lowResolution'
    modifying: false,          // Prevent document modification
    copying: false,            // Prevent content copying
    annotating: false,         // Prevent adding annotations
    fillingForms: true,        // Allow filling form fields
    contentAccessibility: true, // Allow content accessibility
    documentAssembly: false    // Prevent document assembly
  },
  pdfVersion: '1.7'            // Specify PDF version (1.7 supports stronger encryption)
});
PDF security has limitations. It can deter casual users, but specialized tools may bypass these restrictions. For sensitive documents, implement additional security measures.
PDFKit Invoice Example in Node.js
Here's a complete invoice example using PDFKit in Node.js. For ready-made invoice layouts, see the PDFBolt template gallery.
Click to view complete code for invoice
const fs = require('fs');
const PDFDocument = require('pdfkit');

// Example invoice data
const companyInfo = {
    name: 'Digital Systems',
    address: '247 Tech Park Drive',
    city: 'Seattle',
    state: 'WA',
    postalCode: '98101',
    email: '[email protected]',
    logo: 'images/logo.jpg'
};

const invoice = {
    shipping: {
        name: 'Robert Johnson',
        address: '328 Pine Avenue',
        city: 'Portland',
        state: 'OR',
        country: 'USA',
        postal_code: '97204',
        email: '[email protected]'
    },
    items: [
        {
            item: 'Monitor-HD',
            description: 'HD Monitor 24-inch',
            quantity: 2,
            amount: 32000
        },
        {
            item: 'Kb-wireless',
            description: 'Premium Wireless Keyboard',
            quantity: 1,
            amount: 4500
        },
        {
            item: 'Mouse-bt',
            description: 'Bluetooth Ergonomic Mouse',
            quantity: 1,
            amount: 2800
        },
        {
            item: 'Srv-warranty',
            description: 'Extended Service Plan - 1 Year',
            quantity: 3,
            amount: 5700
        },
        {
            item: 'Laptop-Pro',
            description: 'Professional Laptop 15" with SSD',
            quantity: 1,
            amount: 129900
        },
        {
            item: 'SW-Office',
            description: 'Office Software Suite',
            quantity: 2,
            amount: 17900
        }
    ],
    subtotal: 192800,
    tax: 19280,
    invoice_nr: 'INV-2023'
};

// Main function to create a PDF invoice
function createInvoice(invoice, path) {
    // Initialize the PDF document with basic settings
    let doc = new PDFDocument({
        size: 'A4',
        margin: 50,
        info: {
            Title: 'Invoice',
            Author: companyInfo.name,
            Subject: 'Invoice ' + invoice.invoice_nr
        }
    });

    // Generate each section of the invoice
    generateHeader(doc);
    generateCustomerInformation(doc, invoice);
    generateInvoiceTable(doc, invoice);
    generateFooter(doc);

    // Finalize and save the document
    doc.end();
    doc.pipe(fs.createWriteStream(path));
}

// Generate the invoice header with company logo and information
function generateHeader(doc) {
    doc
        .image(companyInfo.logo, 50, 10, {width: 120})
        .font('Helvetica-Bold')
        .fontSize(10)
        .fillColor('black')
        .text(companyInfo.name, 430, 50)
        .font('Helvetica')
        .text(companyInfo.address, 430, 65)
        .text(`${companyInfo.city}, ${companyInfo.state} ${companyInfo.postalCode}`, 430, 80)
        .text(companyInfo.email, 430, 95)
        .moveDown();

    // Add a decorative line
    generateHr(doc, 130);
}

// Generate the customer and invoice information section
function generateCustomerInformation(doc, invoice) {
    // Add the invoice title
    doc
        .fillColor('#007B21')
        .fontSize(22)
        .font('Helvetica-Bold')
        .text('Invoice', 50, 140);

    generateHr(doc, 170);

    const customerInformationTop = 190;

    // Add invoice details on the left
    doc
        .fillColor('#333333')
        .fontSize(10)
        .text('Invoice Number:', 50, customerInformationTop)
        .font('Helvetica-Bold')
        .text(invoice.invoice_nr, 150, customerInformationTop)
        .font('Helvetica')
        .text('Invoice Date:', 50, customerInformationTop + 15)
        .text(formatDate(new Date()), 150, customerInformationTop + 15)
        .text('Due Date:', 50, customerInformationTop + 30)
        .text(formatDate(calculateDueDate(new Date(), 15)), 150, customerInformationTop + 30)

        // Add customer details on the right
        .fillColor('#333333')
        .font('Helvetica-Bold')
        .text(invoice.shipping.name, 300, customerInformationTop)
        .font('Helvetica')
        .text(invoice.shipping.address, 300, customerInformationTop + 15)
        .text([invoice.shipping.city + ', ' + invoice.shipping.state + ', ' + invoice.shipping.country], 300, customerInformationTop + 30)
        .text('Email: ' + invoice.shipping.email, 300, customerInformationTop + 45)
        .moveDown();

    generateHr(doc, 260);
}

// Generate the invoice items table with header, rows, and totals
function generateInvoiceTable(doc, invoice) {
    let i;
    const invoiceTableTop = 300;

    // Create table header with colored background
    doc
        .fillColor('#007B21')
        .rect(50, invoiceTableTop - 10, 500, 30)
        .fill();

    // Add table header text
    doc
        .fillColor('#FFFFFF')
        .font('Helvetica-Bold')
        .fontSize(10);

    generateTableRow(
        doc,
        invoiceTableTop,
        'Item',
        'Description',
        'Unit Cost',
        'Quantity',
        'Amount'
    );

    doc.fillColor('#333333');
    generateHr(doc, invoiceTableTop + 20);
    doc.font('Helvetica');

    // Add items with alternating row colors for better readability
    for (i = 0; i < invoice.items.length; i++) {
        const item = invoice.items[i];
        const position = invoiceTableTop + (i + 1) * 30;

        // Light background for even rows
        if (i % 2 == 1) {
            doc
                .fillColor('#F5F5F5')
                .rect(50, position - 10, 500, 30)
                .fill()
                .fillColor('#333333');
        }

        generateTableRow(
            doc,
            position,
            item.item,
            item.description,
            formatCurrency(item.amount / item.quantity),
            item.quantity,
            formatCurrency(item.amount)
        );
    }

    // Add subtotal row
    const subtotalPosition = invoiceTableTop + (i + 1) * 30;
    generateTableRow(
        doc,
        subtotalPosition,
        '',
        '',
        'Subtotal',
        '',
        formatCurrency(invoice.subtotal)
    );

    // Add tax row
    const taxPosition = subtotalPosition + 20;
    generateTableRow(
        doc,
        taxPosition,
        '',
        '',
        'Tax',
        '',
        formatCurrency(invoice.tax)
    );

    // Add total row with highlighting
    const totalPosition = taxPosition + 25;
    doc.font('Helvetica-Bold');

    doc
        .fillColor('#007B21')
        .fontSize(12);

    generateTableRow(
        doc,
        totalPosition,
        '',
        '',
        'Total',
        '',
        formatCurrency(invoice.subtotal + invoice.tax)
    );

    generateHr(doc, totalPosition + 30);

    doc.font('Helvetica').fillColor('#333333').fontSize(10);
}

// Generate the invoice footer with payment terms and contact information
function generateFooter(doc) {
    doc
        .fontSize(10)
        .fillColor('#666666')
        .text(
            'Thank you for your business.',
            50,
            600,
            {align: 'center', width: 500}
        )
        .font('Helvetica-Oblique')
        .text(
            'For questions regarding this invoice, please contact [email protected]',
            50,
            615,
            {align: 'center', width: 500}
        );
}

// Helper function to generate a table row with proper formatting and alignment
function generateTableRow(
    doc,
    y,
    item,
    description,
    unitCost,
    quantity,
    lineTotal
) {
    doc
        .fontSize(10)
        .text(item, 60, y)
        .text(description, 150, y, {width: 150})
        .text(unitCost, 300, y, {width: 90, align: 'right'})
        .text(quantity, 390, y, {width: 70, align: 'center'})
        .text(lineTotal, 0, y, {align: 'right'});
}

// Helper function to generate a horizontal line at specified y-position
function generateHr(doc, y) {
    doc
        .strokeColor('#CCCCCC')
        .lineWidth(1)
        .moveTo(50, y)
        .lineTo(550, y)
        .stroke();
}

// Format cents to a currency string with dollar sign and two decimal places
function formatCurrency(cents) {
    return '$' + (cents / 100).toFixed(2);
}

// Format a date object to a string in YYYY/MM/DD format
function formatDate(date) {
    const day = date.getDate();
    const month = date.getMonth() + 1;
    const year = date.getFullYear();

    return year + '/' + month + '/' + day;
}

// Calculate due date by adding specified number of days to a date
function calculateDueDate(date, daysToAdd) {
    const dueDate = new Date(date);
    dueDate.setDate(dueDate.getDate() + daysToAdd);
    return dueDate;
}

// Generate the invoice
createInvoice(invoice, 'invoice.pdf');
console.log('Invoice created successfully!');
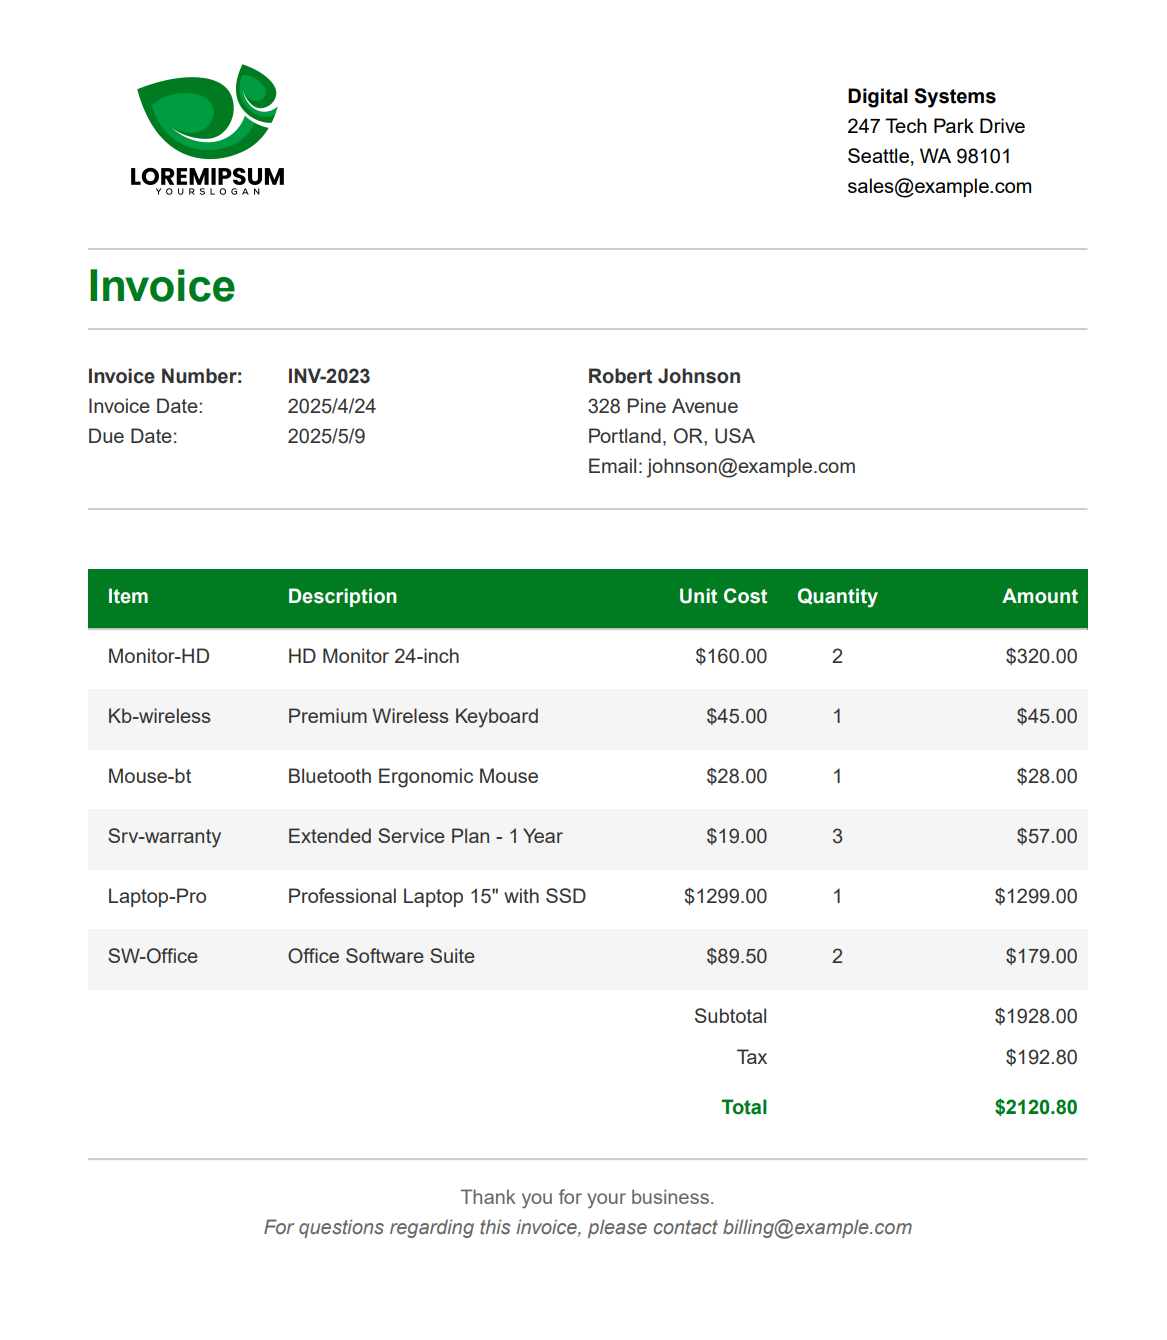
This code generates a professional invoice PDF with the following components:
- Company information with logo.
- Customer details.
- Invoice number and dates.
- Item list with prices.
- Subtotal, tax, and total.
- Footer with payment information.
You would need to replace 'images/logo.jpg' with your actual logo file path.
The generated invoice will look like:
PDFKit Best Practices
Creating PDFs with PDFKit is straightforward, and following these best practices can help you avoid common pitfalls.
The table below lists key recommendations for working with PDFKit:
| Category | Best Practice | Why It Matters |
|---|---|---|
| Performance | Use streams instead of buffers for large documents. | Reduces memory usage and improves response time. |
| File Size | Use standard fonts when possible. | Custom fonts increase file size significantly. |
| Images | Compress images before adding to PDF. | Smaller file sizes and faster generation. |
| Text | Use moveDown() instead of absolute positioning. | More maintainable code when content changes. |
| Security | Set document permissions for sensitive content. | Prevents unauthorized copying or printing. |
| Memory | Avoid generating many PDFs simultaneously. | Prevents Node.js memory issues in production. |
| Errors | Implement proper error handling for file operations. | Prevents application crashes when disk operations fail. |
| Structure | Use functions for repeatable components. | Makes code more maintainable and DRY. |
| Fonts | Bundle required fonts with your application. | Ensures consistent rendering across environments. |
PDFKit Integration with Express.js
Here's how to integrate PDFKit with Express.js to serve PDFs directly in the browser:
const express = require('express');
const PDFDocument = require('pdfkit');
const app = express();

// Configure port
const port = process.env.PORT || 3002;

app.get('/generate-pdf', (req, res) => {
    // Create a document
    const doc = new PDFDocument();

    // Set response headers for PDF
    res.setHeader('Content-Type', 'application/pdf');
    res.setHeader('Content-Disposition', 'inline; filename="document.pdf"');

    // Pipe the PDF directly to the response
    doc.pipe(res);

    // Add content to the PDF
    doc.fontSize(25)
        .text('Dynamic PDF Generated with Express', 100, 100);

    doc.fontSize(14)
        .text(`Generated at: ${new Date().toLocaleString()}`, 100, 150);

    // Finalize the PDF and end the stream
    doc.end();
});

app.listen(port, () => {
    console.log(`Server running on port ${port}`);
});
Modern Alternative: PDF Generation with Templates
While PDFKit gives you full control over building PDFs from scratch, recreating similar layouts or positioning elements precisely can take time. For teams that prefer designing the layout once and passing in data, template-based PDF generation services like PDFBolt are an alternative.
How Template-Based PDF Generation Works
Create your document template using PDFBolt's template designer with HTML, CSS, and Handlebars syntax, then call the API from your Node.js application:
Click to view complete code example
const fs = require('fs');

async function generatePdf() {
    const response = await fetch('https://api.pdfbolt.com/v1/direct', {
        method: 'POST',
        headers: {
            'API-KEY': 'XXXXXXXX-XXXX-XXXX-XXXX-XXXXXXXXXXXX',
            'Content-Type': 'application/json'
        },
        body: JSON.stringify({
            templateId: 'your-template-id',
            templateData: {
                 "companyInfo": {
                    "name": "Digital Systems",
                    "address": "247 Tech Park Drive",
                    "city": "Seattle",
                    "state": "WA",
                    "postalCode": "98101",
                    "email": "[email protected]"
                 },
                "shipping": {
                    "name": "Robert Johnson",
                    "address": "328 Pine Avenue",
                    "city": "Portland",
                    "state": "OR",
                    "country": "USA",
                    "postal_code": "97204",
                    "email": "[email protected]"
                },
                "items": [
                    {
                        "item": "Monitor-HD",
                        "description": "HD Monitor 24-inch",
                        "quantity": 2,
                        "amount": 32000
                    },
                    // ...other items
                ],
                "subtotal": 192800,
                "tax": 19280,
                "invoice_nr": "INV-2023"
            }
        })
    });

    if (!response.ok) {
        const errorText = await response.text();
        throw new Error(`HTTP ${response.status} - ${errorText}`);
    }

    const pdfBuffer = await response.arrayBuffer();
    fs.writeFileSync('invoice.pdf', Buffer.from(pdfBuffer));
    console.log('PDF generated successfully');
}

generatePdf().catch(console.error);
With this approach, you don't need to manage positioning, fonts, or styling calculations in code. You prepare the data, and the service handles rendering.
Learn more about template-based PDF generation API:
Frequently Asked Questions About PDFKit in Node.js
What is PDFKit in Node.js?
PDFKit is a JavaScript PDF generation library for Node.js (and the browser) that builds multi-page documents programmatically from scratch. Instead of converting markup, you use a canvas-like streaming API to add text, custom fonts, images, tables, and vector graphics, then pipe the output to a file or HTTP response. Install it with npm install pdfkit and finalize every document by calling doc.end().
Does PDFKit convert HTML to PDF?
No. PDFKit creates PDFs programmatically in code using its drawing API and does not parse or render HTML or CSS. If you already have HTML pages or CSS layouts you want to turn into PDFs, use a browser-based tool like Puppeteer, Playwright, wkhtmltopdf, or an HTML to PDF API instead.
How do you stream a PDFKit document to the browser with Express?
Set the response headers to application/pdf, then pipe the document straight to the response object with doc.pipe(res):
res.setHeader('Content-Type', 'application/pdf');
res.setHeader('Content-Disposition', 'inline; filename="document.pdf"');
doc.pipe(res);
doc.end();
Streaming keeps memory usage low because the PDF is sent as it is generated rather than buffered in full.
Can PDFKit use custom fonts like Google Fonts?
Yes. PDFKit ships with the 14 standard PDF fonts (Helvetica, Times, Courier, Symbol, ZapfDingbats) and can also embed custom fonts in .ttf, .otf, .woff, .woff2, .ttc, and .dfont formats. Download the font files, load them with doc.font('fonts/MyFont.ttf'), or register one with doc.registerFont() for reuse. Note that embedding fonts increases the output file size.
PDFKit vs Puppeteer: which should I use for generating PDFs?
Choose PDFKit when you want to build documents from scratch in code, such as invoices, reports, or certificates, with no browser dependency. Choose Puppeteer (or Playwright) when your design already exists as HTML and CSS and you want a browser to render it to PDF. They solve different problems, so the right pick depends on whether your source is data plus drawing commands or existing web markup.
Conclusion
PDFKit generates PDF documents in Node.js through a low-level canvas-like API. You control every element – text, shapes, images, tables – without browser dependencies.
The library works best when you need to build documents from scratch: invoices, reports, certificates. With built-in support for tables, AcroForms, document security, and accessibility tagging, PDFKit covers most server-side PDF generation needs without external dependencies. For converting HTML or CSS layouts to PDF, Puppeteer, Playwright, or the PDFBolt API are better suited.
May all your PDFs render smoothly, and may you never forget to call doc.end()! 🤓