QuestPDF Tutorial: Generate PDFs in C# with a Fluent API

PDF generation in .NET has always been a bit of a pain – absolute positioning, manual pagination, fiddly styling calculations. QuestPDF takes a different approach with a layout-based system and a fluent API that feels natural to C# developers. This guide walks through how QuestPDF handles PDF creation, from basic setup to building a full invoice with QR codes.
What is QuestPDF?
QuestPDF is an open-source, modern .NET library built specifically for programmatic PDF document creation. It provides a full-featured layout engine powered by a concise C# Fluent API that handles the complexities of document structure automatically.
Key Features and Capabilities
QuestPDF offers a wide set of features that distinguish it from other C# PDF generation libraries:
- Container-based layout system that eliminates the need for absolute positioning and coordinates.
- Automatic pagination with content overflow handling between pages.
- Dynamic data binding using standard C# patterns (loops, conditionals).
- Rich text formatting with full control over fonts, styles, and alignment.
- Responsive tables and grids with flexible column definitions.
- SVG and image support with multiple sizing options.
From invoices and reports to contracts and data exports, QuestPDF's layout approach cuts development time while producing polished documents.
This guide walks you through everything from basic setup to advanced techniques for implementing PDF document generation in your C#/.NET applications.
QuestPDF is not an HTML to PDF converter. It provides a programming interface for creating and manipulating PDF documents directly in C#.
If you're looking to convert HTML to PDF in C#, you'll need a separate tool or library such as DinkToPdf, PuppeteerSharp, or Playwright. See HTML to PDF Conversion Options for a full comparison.
Getting Started with QuestPDF in C#/.NET Projects
Installation
Add QuestPDF to your .NET project using one of the following methods:
Using the .NET CLI:
dotnet add package QuestPDF
Using the Package Manager Console:
Install-Package QuestPDF
You can also add a reference in your .csproj file:
<PackageReference Include="QuestPDF" Version="2025.12.4" />
Setting Up the License
QuestPDF offers a tiered licensing model:
- Community License: Free for individuals, non-profits, open-source projects, and businesses with annual revenue below $1M USD. Suitable for most use cases.
- Professional/Enterprise Licenses: Required for larger organizations.
Add this line at startup to set the license:
QuestPDF.Settings.License = LicenseType.Community;
// or LicenseType.Professional or LicenseType.Enterprise
For detailed licensing information, visit the QuestPDF License and Pricing page.
Our First PDF Document
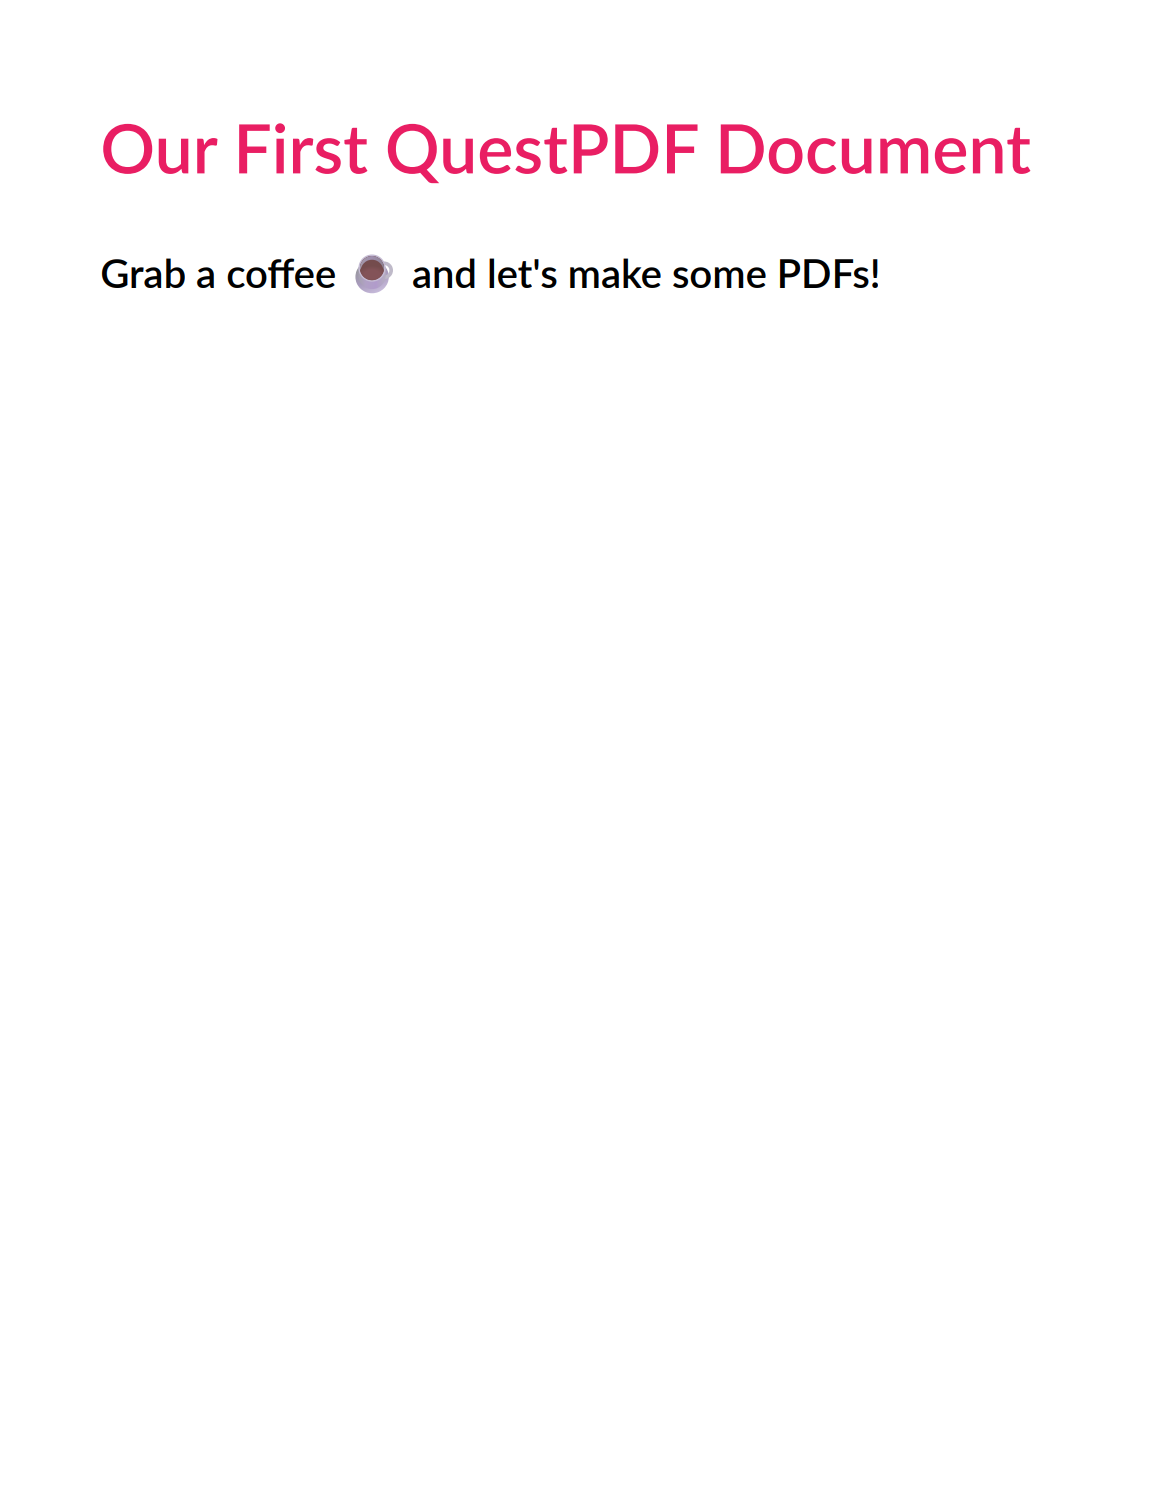
Let's create a simple PDF with some text:
using QuestPDF.Fluent;
using QuestPDF.Helpers;
using QuestPDF.Infrastructure;

// Set license type at startup
QuestPDF.Settings.License = LicenseType.Community;

// Create and generate a PDF document
Document.Create(container =>
    {
        container.Page(page =>
        {
            // Configure page settings
            page.Size(PageSizes.A4);
            page.Margin(2, Unit.Centimetre);
            page.PageColor(Colors.White);
            page.DefaultTextStyle(x => x.FontSize(12));

            // Add a header
            page.Header()
                .Text("Our First QuestPDF Document")
                .SemiBold()
                .FontSize(34)
                .FontColor(Colors.Pink.Medium);

            // Add content
            page.Content()
                .PaddingVertical(1, Unit.Centimetre)
                .Column(column =>
                {
                    column.Item().Text("Grab a coffee ☕ and let's make some PDFs!")
                        .FontSize(20)
                        .SemiBold();
                });
        });
    })
    .GeneratePdf("first-doc.pdf");
Mission accomplished – take a look at the result:
Working with Text in PDFs Using QuestPDF
QuestPDF provides a variety of text formatting options for creating well-styled documents.
Text Formatting Code Example
using QuestPDF.Fluent;
using QuestPDF.Helpers;
using QuestPDF.Infrastructure;

// Set license type at startup
QuestPDF.Settings.License = LicenseType.Community;

Document.Create(container =>
    {
        container.Page(page =>
        {
            page.Size(PageSizes.A4);
            page.Margin(2, Unit.Centimetre);
            page.PageColor(Colors.White);
            page.DefaultTextStyle(x => x.FontSize(14));

            page.Header()
                .Text("Text Formatting Options in QuestPDF")
                .SemiBold()
                .FontSize(24);

            page.Content()
                .PaddingVertical(1, Unit.Centimetre)
                .Column(column =>
                {
                    column.Spacing(25);

                    column.Item()
                        .Text("Standard text with purple color")
                        .FontColor(Colors.Purple.Medium);

                    column.Item()
                        .Text("Bold text with orange color")
                        .Bold()
                        .FontColor(Colors.Orange.Medium);

                    column.Item()
                        .Text("Italic text with right alignment")
                        .Italic()
                        .AlignRight();

                    column.Item()
                        .Text("Underlined text with letter spacing")
                        .Underline()
                        .LetterSpacing((float)0.5);

                    column.Item()
                        .Text("Strikethrough text with large font")
                        .Strikethrough()
                        .FontSize(18);

                    column.Item()
                        .Text("Centered, bold and italic text")
                        .Bold()
                        .Italic()
                        .AlignCenter();


                    column.Item()
                        .Text(text =>
                        {
                            text.Span("Mixed ").FontSize(12);
                            text.Span("formatting ").Bold().FontColor(Colors.Blue.Medium);
                            text.Span("in ").Italic();
                            text.Span("one ").Underline();
                            text.Span("line").FontSize(18).FontColor(Colors.Red.Medium);
                        });

                    column.Item()
                        .Text(
                            "Justified text with longer content. This text demonstrates how QuestPDF handles justified alignment with multiple lines of content in a single text block.")
                        .Justify();
                });
        });
    })
    .GeneratePdf("text-formatting.pdf");
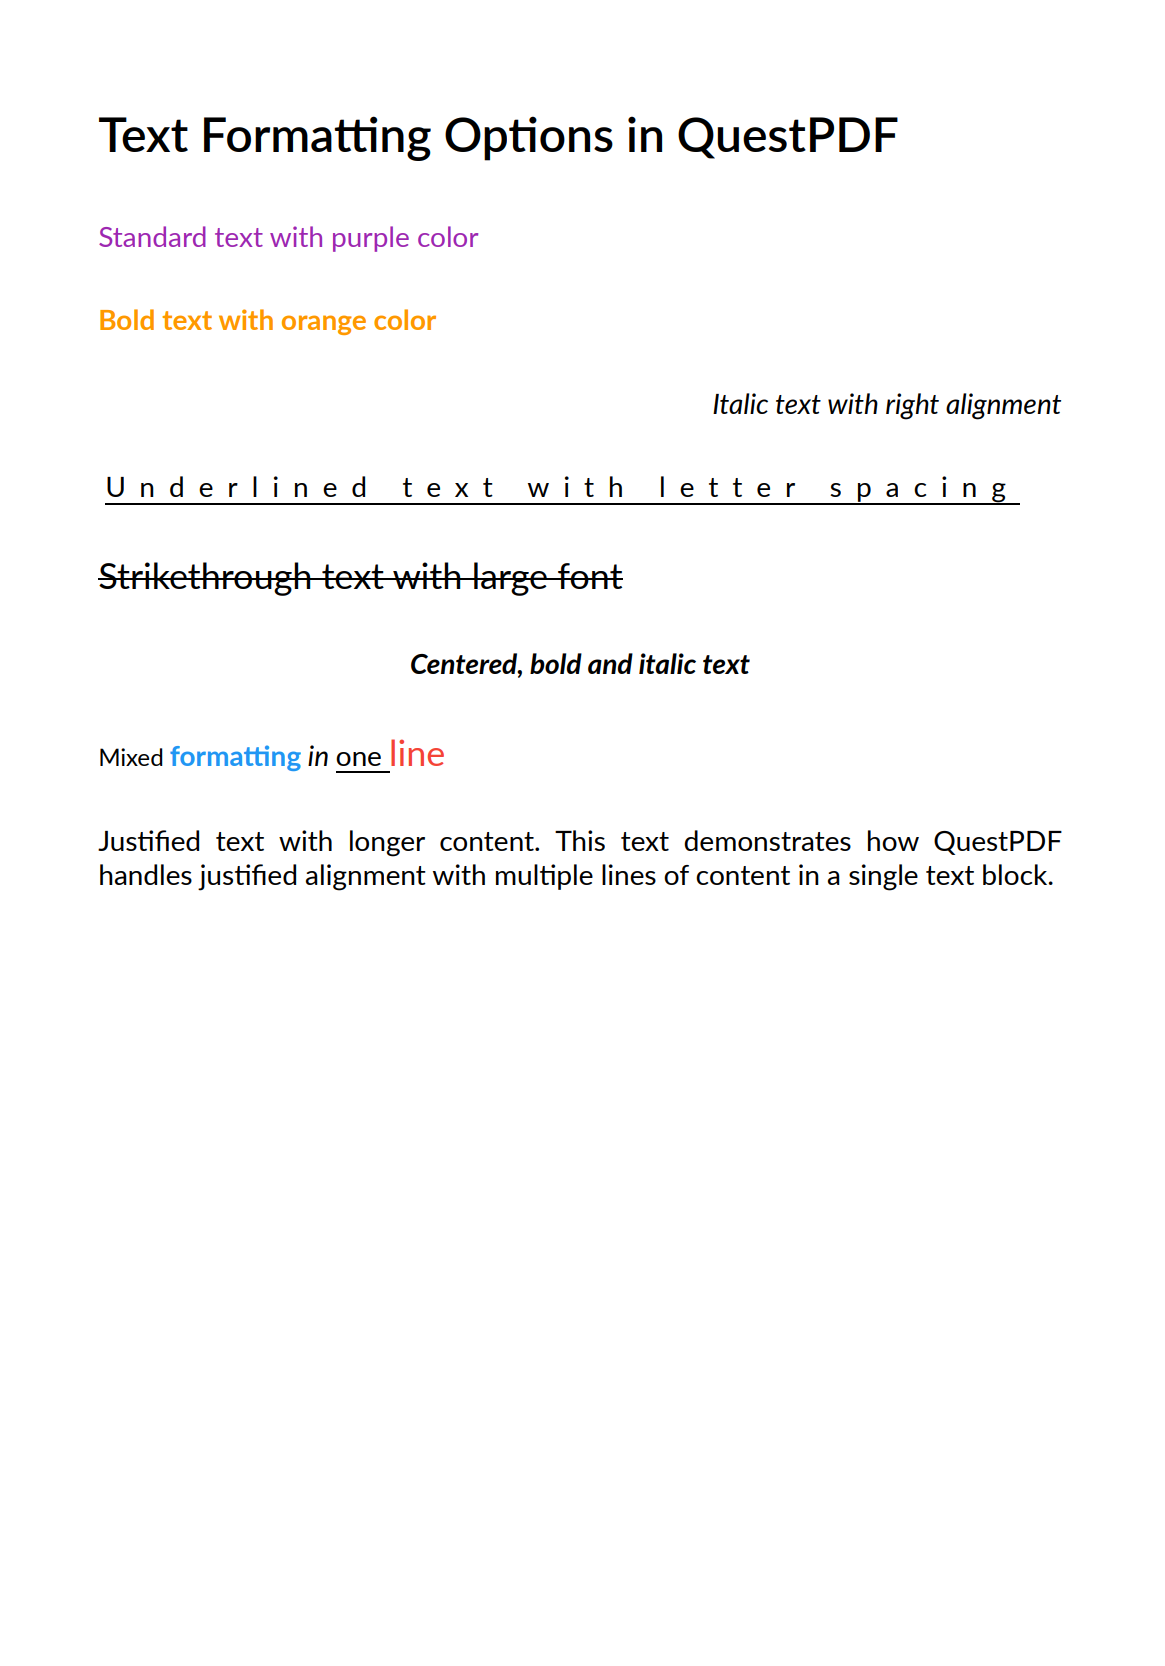
This example demonstrates a variety of text formatting options available in QuestPDF:
| Option | Description | Example |
|---|---|---|
| Font Colors | Sets the color of text. | .FontColor() |
| Font Weights | Controls the thickness of the text. | .Bold() .SemiBold() |
| Font Styles | Creates slanted text (italic). | .Italic() |
| Text Decorations | Adds lines to text, such as underlining or strikethrough. | .Underline() .Strikethrough() |
| Text Alignment | Controls the positioning of the text. | .AlignLeft() .AlignRight() .AlignCenter().Justify() |
| Font Sizing | Changes the size of the text in points. | .FontSize() |
| Letter Spacing | Adjusts the space between characters. | .LetterSpacing() |
| Mixed Formatting | Combines multiple styles in one line using Span(). | .Text(text => { text.Span()... }) |
Here is the output:
Working with Images in PDFs Using QuestPDF
QuestPDF makes it easy to embed images in your documents with flexible positioning and sizing options.
Image Code Example
using QuestPDF.Fluent;
using QuestPDF.Helpers;
using QuestPDF.Infrastructure;

// Set license type at startup
QuestPDF.Settings.License = LicenseType.Community;

Document.Create(container =>
{
    container.Page(page =>
    {
        page.Size(PageSizes.A4);
        page.Margin(1, Unit.Centimetre);
        page.PageColor(Colors.White);
        page.DefaultTextStyle(x => x.FontSize(12));

        page.Content()
            .PaddingVertical(1, Unit.Centimetre)
            .Column(column =>
            {
                // Standard image - will scale to fit width
                column.Item()
                    .Padding(10)
                    .Column(imageSection =>
                    {
                        imageSection.Item().Text("Default Image (FitWidth)").Bold();
                        imageSection.Item().PaddingBottom(10);
                        imageSection.Item().Image("image.jpg");
                    });

                column.Spacing(10);

                // Image with specific width
                column.Item()
                    .Padding(10)
                    .Column(imageSection =>
                    {
                        imageSection.Item().Text("Image with Specific Width").Bold();
                        imageSection.Item().PaddingBottom(10);
                        imageSection.Item().Width(150).Image("image.jpg");
                    });

                column.Spacing(10);

                // Row of images
                column.Item()
                    .Padding(10)
                    .Column(imageSection =>
                    {
                        imageSection.Item().Text("Multiple Images in a Row").Bold();
                        imageSection.Item().PaddingBottom(10);

                        imageSection.Item().Row(row =>
                        {
                            row.Spacing(10);
                            row.RelativeItem().Image("image.jpg");
                            row.RelativeItem().Image("image.jpg");
                            row.RelativeItem().Image("image.jpg");
                        });
                    });
            });
    });
})
.GeneratePdf("image-examples.pdf");
PDF preview:
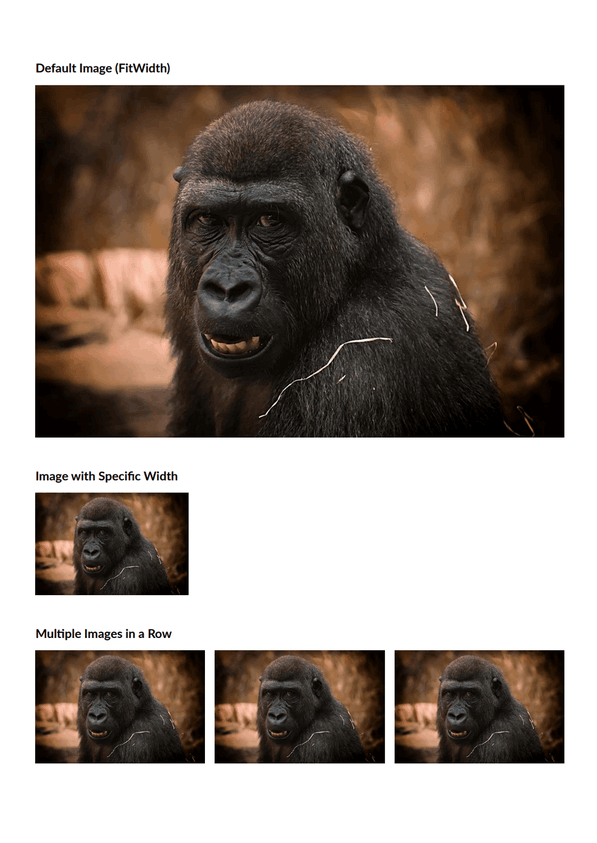
QuestPDF supports the most common image formats including JPEG, PNG, BMP, and WEBP. The library handles image scaling and positioning automatically.
In QuestPDF, specify only Width() or Height() for images, not both. The library preserves aspect ratio by default and handles the pixel-to-point conversion automatically.
container
    .Width(1, Unit.Inch)
    .Image("image.jpg")
Working with Tables in PDFs Using QuestPDF
Tables in QuestPDF offer great flexibility for displaying structured data.
Table Code Example
using QuestPDF.Fluent;
using QuestPDF.Helpers;
using QuestPDF.Infrastructure;
// Set license type at startup
QuestPDF.Settings.License = LicenseType.Community;
Document.Create(container =>
{
container.Page(page =>
{
page.Size(PageSizes.A4);
page.Margin(1, Unit.Centimetre);
page.PageColor(Colors.White);
page.DefaultTextStyle(x => x.FontSize(12));
page.Header()
.Text("Simple Table")
.SemiBold()
.FontSize(20);
page.Content()
.PaddingVertical(1, Unit.Centimetre)
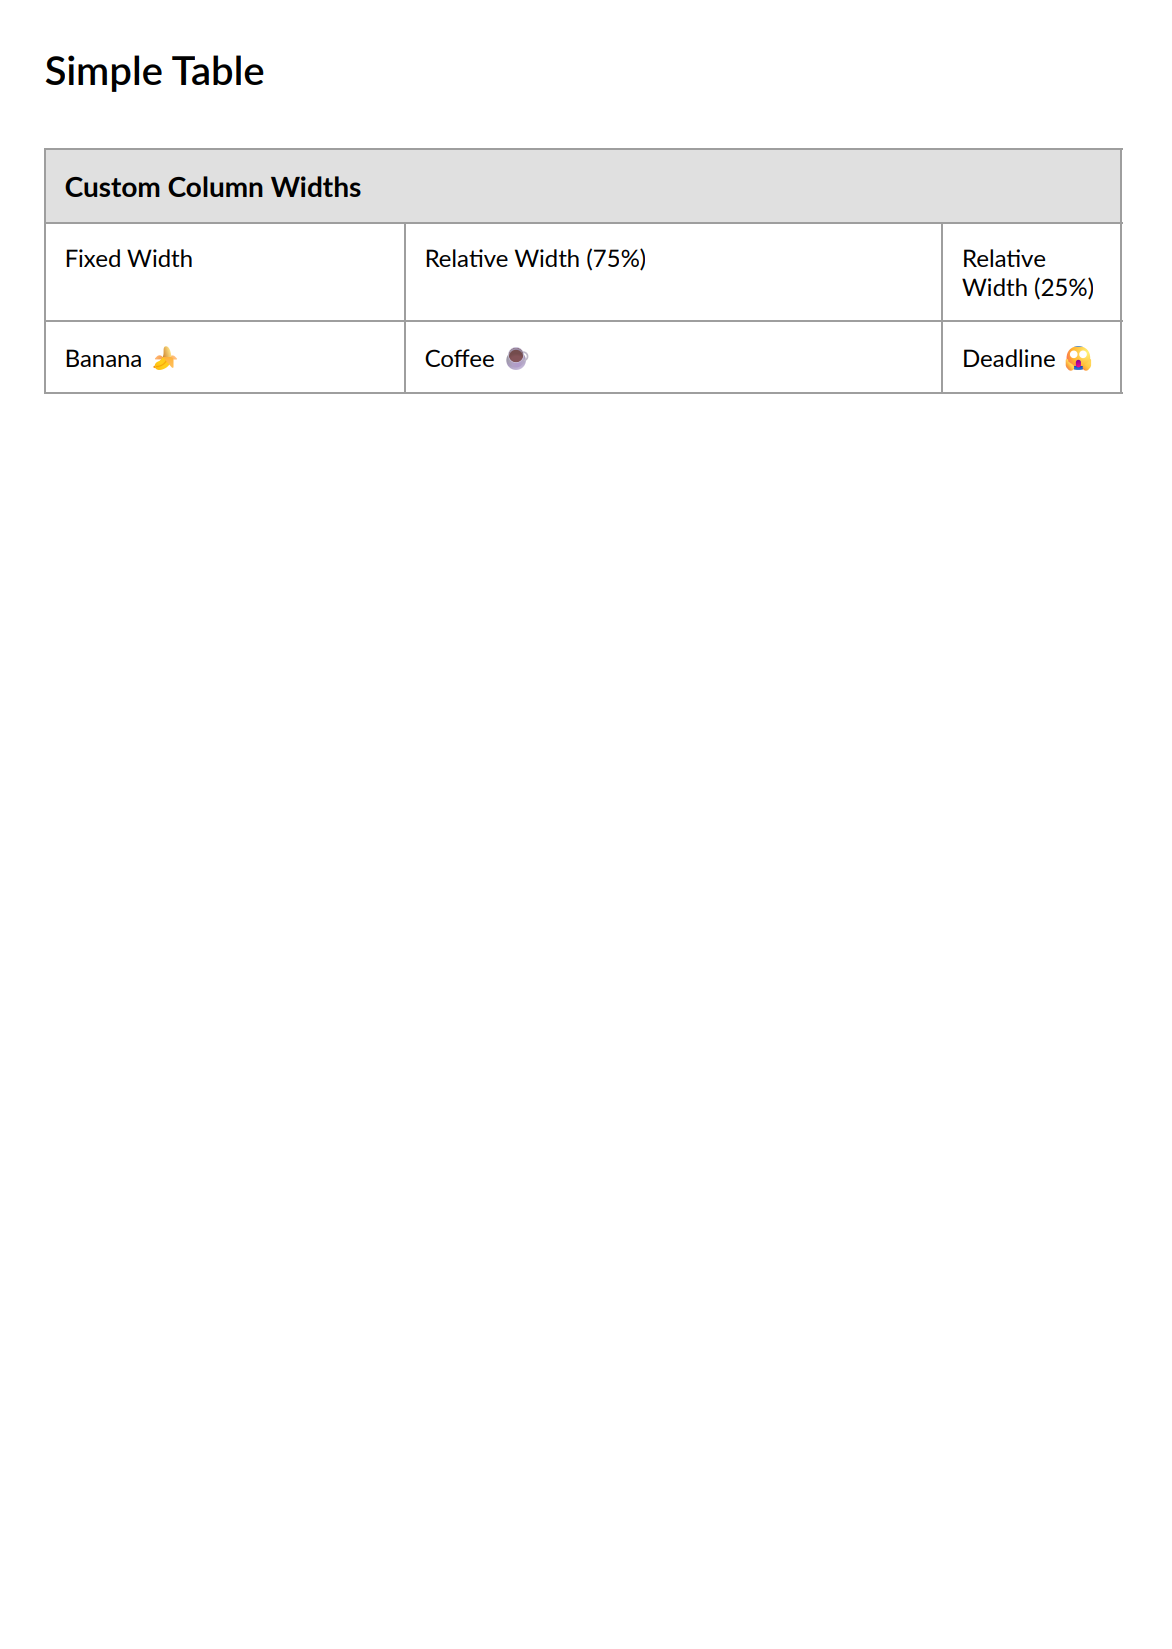
.Table(table =>
{
table.ColumnsDefinition(columns =>
{
columns.ConstantColumn(180); // Fixed width column
columns.RelativeColumn(3); // Takes 3 parts of remaining width
columns.RelativeColumn(1); // Takes 1 part of remaining width
});
// Header row spanning all columns
table.Cell().ColumnSpan(3)
.Background(Colors.Grey.Lighten2).Element(CellStyle)
.Text("Custom Column Widths")
.FontSize(14)
.Bold();
// Column description row
table.Cell().Element(CellStyle).Text("Fixed Width");
table.Cell().Element(CellStyle).Text("Relative Width (75%)");
table.Cell().Element(CellStyle).Text("Relative Width (25%)");
// Example width values
table.Cell().Element(CellStyle).Text("Banana 🍌");
table.Cell().Element(CellStyle).Text("Coffee ☕");
table.Cell().Element(CellStyle).Text("Deadline 😱");
// Helper method for consistent cell styling
static IContainer CellStyle(IContainer container)
=> container.Border(1).BorderColor(Colors.Grey.Medium).Padding(10);
});
});
})
.GeneratePdf("table-example.pdf");
Preview of the Generated PDF:
Working with Headers and Footers in PDFs Using QuestPDF
QuestPDF makes it easy to create consistent headers and footers across multiple pages.
Headers and Footers Code Example
using QuestPDF.Fluent;
using QuestPDF.Helpers;
using QuestPDF.Infrastructure;
// Set license type at startup
QuestPDF.Settings.License = LicenseType.Community;
Document.Create(container =>
{
container.Page(page =>
{
page.Size(PageSizes.A4);
page.Margin(1, Unit.Centimetre);
page.PageColor(Colors.White);
page.DefaultTextStyle(x => x.FontSize(11));
// Add a header
page.Header().Element(ComposeHeader);
// Add content
page.Content().Element(ComposeContent);
// Add a footer
page.Footer().Element(ComposeFooter);
});
})
.GeneratePdf("header-footer-example.pdf");
// Simple header composition
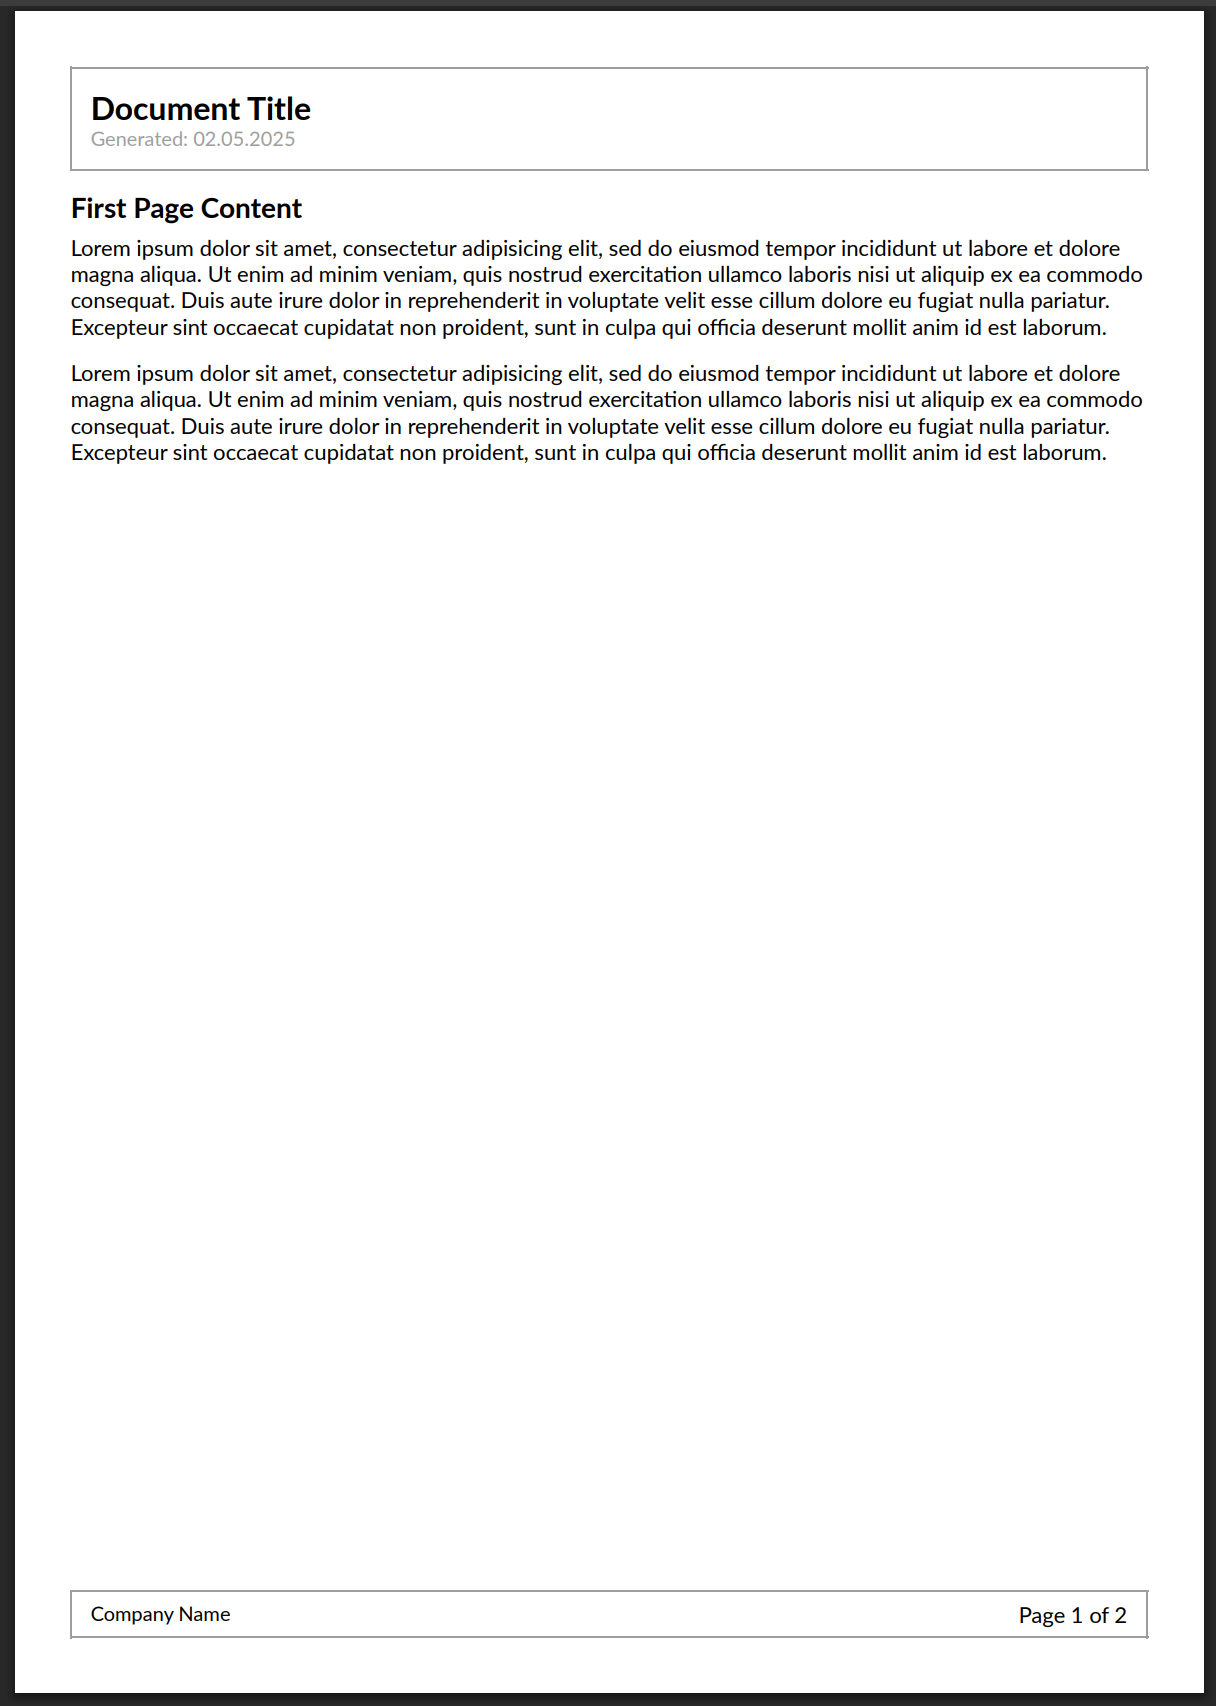
void ComposeHeader(IContainer container)
{
container.Border(1).BorderColor(Colors.Grey.Medium).Padding(10)
.Row(row =>
{
row.RelativeItem().Column(column =>
{
column.Item().Text("Document Title")
.FontSize(16)
.Bold();
column.Item().Text($"Generated: {DateTime.Now:d}")
.FontSize(10)
.FontColor(Colors.Grey.Medium);
});
});
}
// Main content composition
void ComposeContent(IContainer container)
{
container.PaddingVertical(10).Column(column =>
{
// Add some content for demonstration
column.Item().Text("First Page Content").FontSize(14).Bold();
column.Item().PaddingTop(5).Text(Placeholders.LoremIpsum());
column.Item().PaddingTop(10).Text(Placeholders.LoremIpsum());
// Add a line break to demonstrate multi-page content
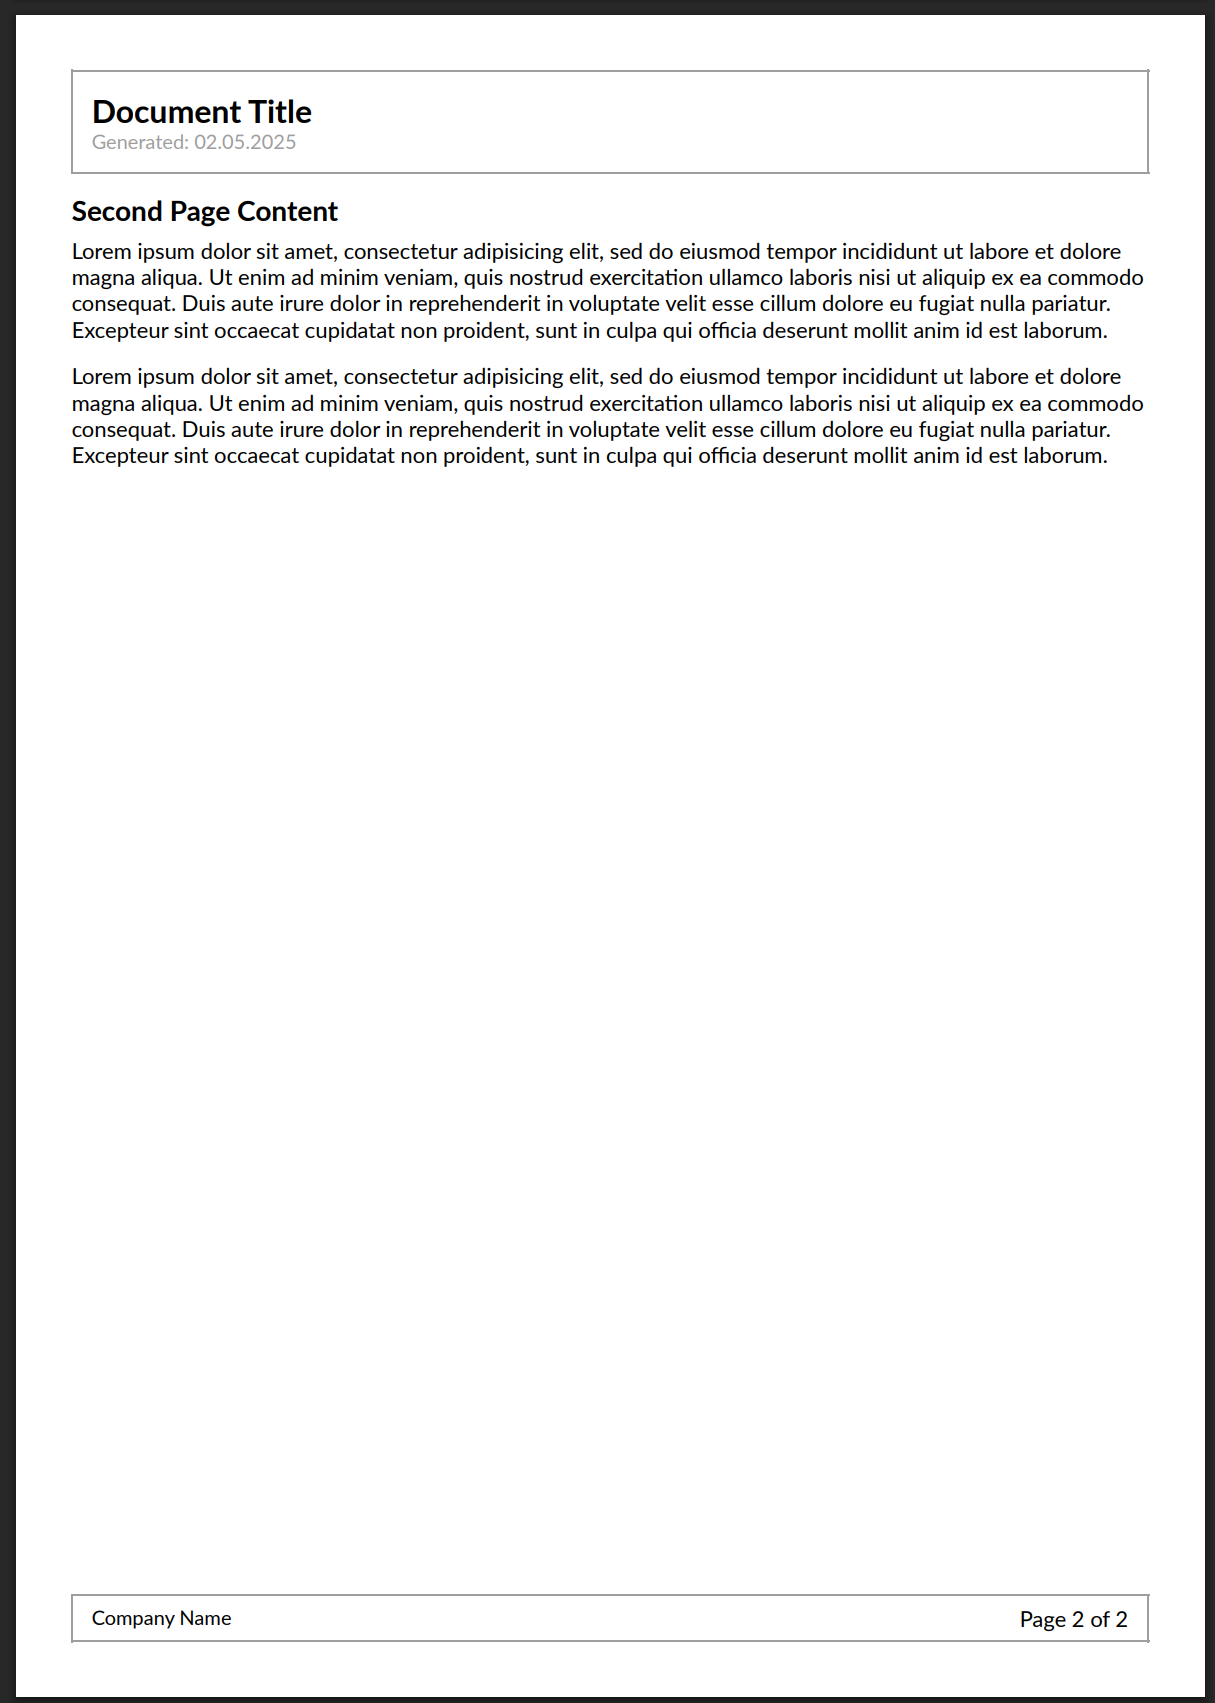
column.Item().PageBreak();
// Continue content on next page
column.Item().Text("Second Page Content").FontSize(14).Bold();
column.Item().PaddingTop(5).Text(Placeholders.LoremIpsum());
column.Item().PaddingTop(10).Text(Placeholders.LoremIpsum());
});
}
// Simple footer composition
void ComposeFooter(IContainer container)
{
container.Border(1).BorderColor(Colors.Grey.Medium)
.PaddingVertical(5).PaddingHorizontal(10)
.Row(row =>
{
row.RelativeItem().AlignLeft().Text("Company Name")
.FontSize(10);
row.RelativeItem().AlignRight().Text(text =>
{
text.Span("Page ");
text.CurrentPageNumber();
text.Span(" of ");
text.TotalPages();
});
});
}
The header and footer appear on every page automatically. QuestPDF repeats them across all pages without any extra configuration.
Output Preview
Adding Barcodes and QR Codes to PDFs with QuestPDF
QuestPDF supports generating various types of barcodes through integration with the ZXing.Net library. This allows you to embed both linear barcodes and QR codes directly in your PDF documents.
Before using any of these examples, you must install the ZXing.Net package:
dotnet add package ZXing.Net
Here's a simple example showing how to create both linear barcodes and QR codes in your documents.
Barcode and QR Code Example
using QuestPDF.Fluent;
using QuestPDF.Helpers;
using QuestPDF.Infrastructure;
using ZXing;
using ZXing.OneD;
using ZXing.QrCode;
using ZXing.Rendering;
// Set license type at startup
QuestPDF.Settings.License = LicenseType.Community;
Document.Create(container =>
{
container.Page(page =>
{
page.Size(PageSizes.A4);
page.Margin(1, Unit.Centimetre);
page.DefaultTextStyle(x => x.FontSize(14));
page.Content()
.PaddingVertical(1, Unit.Centimetre)
.Column(column =>
{
// 1. Linear Barcode Example (Code 128)
column.Item()
.Background(Colors.Grey.Lighten4)
.Padding(15)
.Column(barcodeSection =>
{
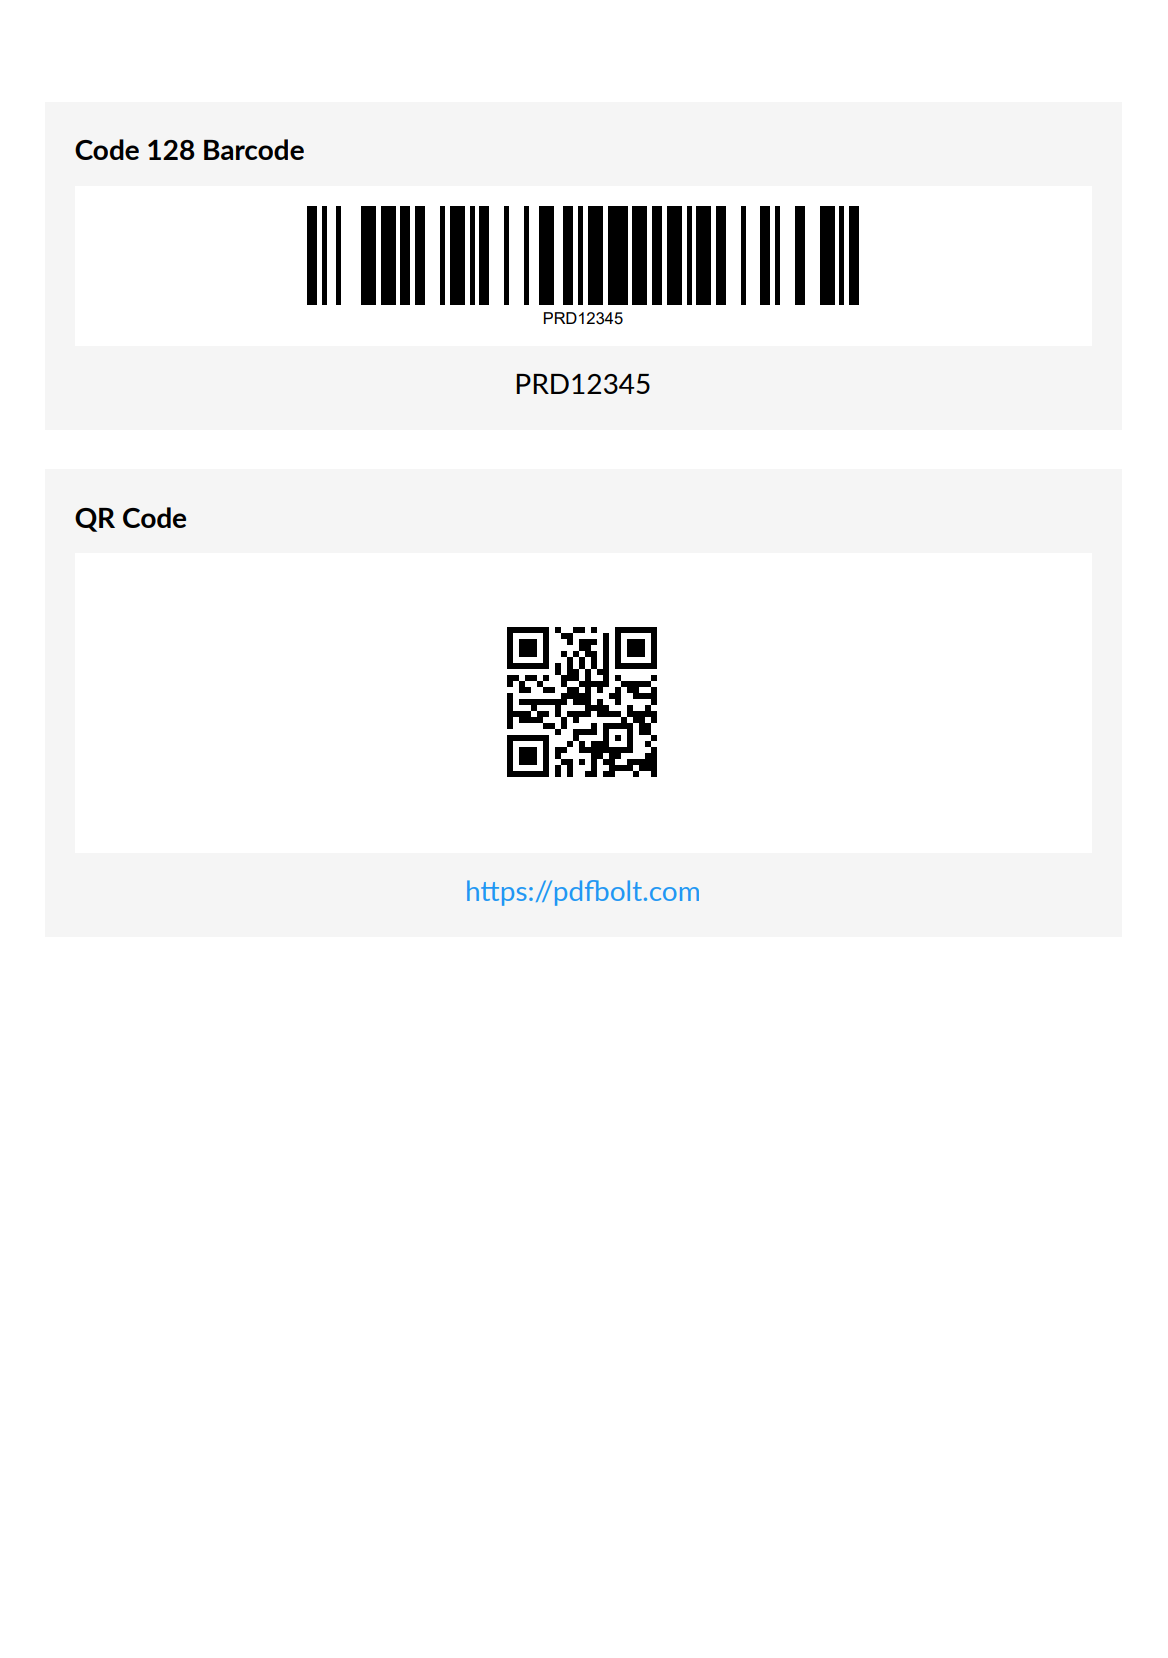
barcodeSection.Item().Text("Code 128 Barcode").Bold();
barcodeSection.Item().PaddingBottom(10);
// Product code to encode
var productCode = "PRD12345";
barcodeSection.Item()
.Height(80)
.AlignCenter()
.Background(Colors.White)
.Padding(10)
.Svg(size =>
{
var writer = new Code128Writer();
var matrix = writer.encode(productCode, BarcodeFormat.CODE_128,
(int)size.Width, (int)size.Height);
var renderer = new SvgRenderer();
return renderer.Render(matrix, BarcodeFormat.CODE_128, productCode).Content;
});
barcodeSection.Item().PaddingBottom(10);
barcodeSection.Item()
.AlignCenter()
.Text(productCode);
});
column.Spacing(20);
// 2. QR Code Example
column.Item()
.Background(Colors.Grey.Lighten4)
.Padding(15)
.Column(qrSection =>
{
qrSection.Item().Text("QR Code").Bold();
qrSection.Item().Height(10);
// URL to encode
var url = "https://pdfbolt.com";
qrSection.Item()
.Height(150)
.AlignCenter()
.Background(Colors.White)
.Padding(10)
.Svg(size =>
{
var writer = new QRCodeWriter();
var matrix = writer.encode(url, BarcodeFormat.QR_CODE,
(int)size.Width, (int)size.Height);
var renderer = new SvgRenderer();
return renderer.Render(matrix, BarcodeFormat.QR_CODE, null).Content;
});
qrSection.Item().PaddingBottom(10);
qrSection.Item()
.AlignCenter()
.Text(url)
.FontColor(Colors.Blue.Medium);
});
});
});
})
.GeneratePdf("barcode-qrcode-examples.pdf");
These examples demonstrate:
- Linear Barcode (Code 128): Suitable for product IDs, tracking numbers, and other alphanumeric data.
- QR Code: Ideal for encoding URLs, contact information, or larger amounts of text.
Both examples use SVG rendering for high-quality output at any resolution, so your barcodes stay sharp and scannable in the final PDF.
- You can adjust the height and padding of the barcodes to fit your needs.
- QR codes can encode much more data than shown in this example (URLs, contact info, etc.).
See the Result:
Step-by-Step: Creating an Invoice PDF with QR Code in C#
Let's create a complete invoice example with QuestPDF, including a company logo, structured layout, and a QR code for payment information.
Step 1: Project Setup
First, Let's Create the Project Structure
InvoiceGenerator/
│
├── Program.cs                # Main application entry point
├── InvoiceDocument.cs        # Invoice document definition
├── InvoiceModel.cs           # Data model for the invoice
├── Assets/
│   └── logo.png              # Company logo
└── Helpers/
    └── InvoiceStyle.cs       # Styling helpers for the invoice
Make Sure Your Project Has the Necessary Dependencies Installed
dotnet list package
You should see output that includes entries like:
QuestPDFZXing.Net
If they’re not listed, install them using:
dotnet add package QuestPDF
dotnet add package ZXing.Net
Step 2: Create the Invoice Model
Now let's create our data model that will hold all the invoice information.
Create a file named InvoiceModel.cs with the following code:
InvoiceModel.cs
namespace InvoiceGenerator
{
    public class InvoiceModel
    {
        // Invoice metadata
        public string? InvoiceNumber { get; set; }
        public DateTime IssueDate { get; set; } = DateTime.Now;
        public DateTime DueDate { get; set; } = DateTime.Now.AddDays(14);

        // Company information
        public CompanyInfo? Seller { get; set; }
        public CompanyInfo? Customer { get; set; }

        // Invoice content
        public List<InvoiceItem> Items { get; set; } = new();
        public string? Comments { get; set; }

        // Payment details for QR code
        public string? PaymentAccountNumber { get; set; }
        public string? PaymentReference { get; set; }

        // Calculated properties
        public decimal Subtotal => Items.Sum(x => x.TotalPrice);
        public decimal TaxRate { get; set; } = 0.23m; // Default 23% VAT
        public decimal TaxAmount => Subtotal * TaxRate;
        public decimal GrandTotal => Subtotal + TaxAmount;
    }

    public class CompanyInfo
    {
        public string? Name { get; set; }
        public string? Street { get; set; }
        public string? City { get; set; }
        public string? State { get; set; }
        public string? Zip { get; set; }
        public string? Email { get; set; }
        public string? Phone { get; set; }
    }

    public class InvoiceItem
    {
        public string? Name { get; set; }
        public decimal UnitPrice { get; set; }
        public int Quantity { get; set; }
        public decimal TotalPrice => UnitPrice * Quantity;
    }
}
Step 3: Create the Invoice Styling Helper
Next, we'll create a helper class to maintain consistent styling throughout our invoice document. This centralizes our colors and text styles in one place.
Create a file named Helpers/InvoiceStyle.cs with common styling methods:
InvoiceStyle.cs
using QuestPDF.Fluent;
using QuestPDF.Helpers;
using QuestPDF.Infrastructure;

namespace InvoiceGenerator.Helpers
{
    public static class InvoiceStyle
    {
        // Colors
        public static Color PrimaryColor => Color.FromHex("#916E56");
        public static Color TextColor => Colors.Black;

        // Text Styles
        public static TextStyle Title => TextStyle.Default.FontSize(24).SemiBold().FontColor(PrimaryColor);
        public static TextStyle Subtitle => TextStyle.Default.FontSize(13).SemiBold().FontColor(TextColor);
        public static TextStyle Normal => TextStyle.Default.FontSize(11).FontColor(TextColor).LineHeight((float?)1.4);
    }
}
Step 4: Create the Invoice Document Class
Now we'll create the core class that implements the QuestPDF IDocument interface. This class will define the overall structure of our invoice and handle the rendering of all components.
Create a file named InvoiceDocument.cs:
InvoiceDocument.cs
using QuestPDF.Fluent;
using QuestPDF.Helpers;
using QuestPDF.Infrastructure;
using ZXing;
using ZXing.QrCode;
using ZXing.Rendering;
using InvoiceGenerator.Helpers;
using System.Globalization;

namespace InvoiceGenerator
{
    public class InvoiceDocument : IDocument
    {
        public InvoiceModel Model { get; }

        public InvoiceDocument(InvoiceModel model) => Model = model;

        public DocumentMetadata GetMetadata() => DocumentMetadata.Default;

        // Main document composition
        public void Compose(IDocumentContainer container)
        {
            // Set US culture for $ currency formatting
            var culture = new CultureInfo("en-US");
            Thread.CurrentThread.CurrentCulture = culture;

            container
                .Page(page =>
                {
                    page.Size(PageSizes.A4);
                    page.Margin(50);
                    page.DefaultTextStyle(x => x.FontSize(10));

                    page.Header().Element(ComposeHeader);
                    page.Content().Element(ComposeContent);
                    page.Footer().Element(ComposeFooter);
                });
        }

        // Simple footer composition
        void ComposeFooter(IContainer container)
        {
            container.Border(1).BorderColor(Colors.Grey.Lighten2)
                .PaddingVertical(5).PaddingHorizontal(10)
                .Row(row =>
                {
                    row.RelativeItem().AlignLeft().Text(Model.Seller?.Name)
                        .FontSize(10);

                    row.RelativeItem().AlignRight().Text(text =>
                    {
                        text.Span("Page ");
                        text.CurrentPageNumber();
                        text.Span(" of ");
                        text.TotalPages();
                    });
                });
        }

        // Document header with logo, invoice details and QR code
        private void ComposeHeader(IContainer container)
        {
            container.Row(row =>
            {
                // Left column: Logo and basic invoice info
                row.RelativeItem().Column(column =>
                {
                    column.Item().Height(80).Image("Assets/logo.png");
                    column.Item().PaddingBottom(10);
                    column.Item().Text($"Invoice Number: {Model.InvoiceNumber}").Style(InvoiceStyle.Normal);
                    column.Item().Text($"Issue Date: {Model.IssueDate:d}").Style(InvoiceStyle.Normal);
                    column.Item().Text($"Due Date: {Model.DueDate:d}").Style(InvoiceStyle.Normal);
                });

                // Right column: Title and QR code
                row.RelativeItem().Column(column =>
                {
                    column.Item().AlignRight().Text("INVOICE").Style(InvoiceStyle.Title);
                    column.Item().PaddingBottom(10);

                    // Payment QR code for scanning
                    column.Item().AlignRight().Width(90).AspectRatio(1).Svg(GenerateQrCode);
                });
            });
        }

        // Generate QR code with payment information
        private string GenerateQrCode(Size size)
        {
            string qrData =
                $"Recipient:{Model.Seller?.Name}|AccNo:{Model.PaymentAccountNumber}|Ref:{Model.PaymentReference}|Amount:{Model.GrandTotal:F2}";
            var matrix = new QRCodeWriter().encode(qrData, BarcodeFormat.QR_CODE, (int)size.Width, (int)size.Height);
            return new SvgRenderer().Render(matrix, BarcodeFormat.QR_CODE, null).Content;
        }

        // Main content area
        private void ComposeContent(IContainer container)
        {
            container.Column(column =>
            {
                column.Item().PaddingTop(20).Element(ComposeBillingAndShippingInfo);
                column.Item().PaddingTop(20).Element(ComposeInvoiceItems);
                column.Item().PaddingTop(10).AlignRight().Width(250).Element(ComposeTotals);

                // Only show comments if present
                if (!string.IsNullOrEmpty(Model.Comments))
                    column.Item().PaddingTop(20).Element(ComposeComments);
            });
        }

        // Billing and shipping information section
        private void ComposeBillingAndShippingInfo(IContainer container)
        {
            container.Row(row =>
            {
                // Bill To section
                ComposeAddressSection(row.RelativeItem(), "BILL TO", Model.Customer);

                row.ConstantItem(50); // Spacing between sections

                // Ship To section
                ComposeAddressSection(row.RelativeItem(), "SHIP TO", Model.Seller);
            });
        }

        // Reusable address section formatter
        private void ComposeAddressSection(IContainer container, string title, CompanyInfo? company)
        {
            container.Column(column =>
            {
                column.Item().Text(title).Style(InvoiceStyle.Subtitle).FontColor(InvoiceStyle.PrimaryColor);
                column.Item().PaddingBottom(5);
                column.Item().LineHorizontal(1).LineColor(Colors.Grey.Lighten1);
                column.Item().PaddingBottom(5);

                if (company != null)
                {
                    column.Item().Text(company.Name).Bold().Style(InvoiceStyle.Normal);
                    column.Item().Text(company.Street).Style(InvoiceStyle.Normal);
                    column.Item().Text($"{company.City}, {company.State} {company.Zip}").Style(InvoiceStyle.Normal);
                    column.Item().Text($"Phone: {company.Phone}").Style(InvoiceStyle.Normal);
                    column.Item().Text($"Email: {company.Email}").Style(InvoiceStyle.Normal);
                }
            });
        }

        // Invoice items table
        private void ComposeInvoiceItems(IContainer container)
        {
            container.Table(table =>
            {
                // Table columns definition
                table.ColumnsDefinition(columns =>
                {
                    columns.RelativeColumn(3); // Description
                    columns.ConstantColumn(100); // Unit Price
                    columns.ConstantColumn(80); // Quantity
                    columns.ConstantColumn(100); // Total
                });

                // Table header
                AddTableHeader(table);

                // Table rows with alternating colors
                bool isAlternateRow = false;
                foreach (var item in Model.Items)
                {
                    AddTableRow(table, item, isAlternateRow);
                    isAlternateRow = !isAlternateRow;
                }
            });
        }

        // Table header helper
        private void AddTableHeader(TableDescriptor table)
        {
            table.Header(header =>
            {
                header.Cell().Background(Colors.Grey.Lighten3)
                    .Padding(5).Text("Description")
                    .Style(InvoiceStyle.Subtitle);

                header.Cell().Background(Colors.Grey.Lighten3)
                    .Padding(5).AlignRight().Text("Unit Price")
                    .Style(InvoiceStyle.Subtitle);

                header.Cell().Background(Colors.Grey.Lighten3)
                    .Padding(5).AlignRight().Text("Quantity")
                    .Style(InvoiceStyle.Subtitle);

                header.Cell().Background(Colors.Grey.Lighten3)
                    .Padding(5).AlignRight().Text("Amount")
                    .Style(InvoiceStyle.Subtitle);
            });
        }

        // Table row helper
        private void AddTableRow(TableDescriptor table, InvoiceItem item, bool isAlternateRow)
        {
            var bgColor = isAlternateRow ? Colors.White : Colors.Grey.Lighten5;

            // Description cell
            table.Cell().Background(bgColor)
                .Border(1).BorderColor(Colors.Grey.Lighten2)
                .Padding(5).AlignRight().AlignMiddle()
                .Text($"{item.Name}");

            // Unit price cell
            table.Cell().Background(bgColor)
                .Border(1).BorderColor(Colors.Grey.Lighten2)
                .Padding(5).AlignRight().AlignMiddle()
                .Text($"{item.UnitPrice:C}");

            // Quantity cell
            table.Cell().Background(bgColor)
                .Border(1).BorderColor(Colors.Grey.Lighten2)
                .Padding(5).AlignRight().AlignMiddle()
                .Text($"{item.Quantity}");

            // Total cell
            table.Cell().Background(bgColor)
                .Border(1).BorderColor(Colors.Grey.Lighten2)
                .Padding(5).AlignRight().AlignMiddle()
                .Text($"{item.TotalPrice:C}");
        }

        // Invoice totals section
        private void ComposeTotals(IContainer container)
        {
            container.Table(table =>
            {
                table.ColumnsDefinition(columns =>
                {
                    columns.RelativeColumn();
                    columns.ConstantColumn(180);
                });

                // Subtotal row
                table.Cell().PaddingBottom(8).AlignRight().Text("Subtotal:").Style(InvoiceStyle.Normal);
                table.Cell().Padding(5).AlignRight().Text($"{Model.Subtotal:C}");

                // Tax row
                table.Cell().PaddingBottom(8).AlignRight()
                    .Text($"Tax ({Model.TaxRate:P0}):").Style(InvoiceStyle.Normal);
                table.Cell().Padding(5).AlignRight().Text($"{Model.TaxAmount:C}");

                // Total row
                table.Cell().BorderLeft(3).BorderColor(InvoiceStyle.PrimaryColor)
                    .Background(Colors.Grey.Lighten4).Padding(8).AlignRight()
                    .Text("TOTAL:").Style(InvoiceStyle.Subtitle);
                table.Cell().Background(Colors.Grey.Lighten4).Padding(8)
                    .AlignRight().Text($"{Model.GrandTotal:C}").Bold().FontSize(12);
            });
        }

        // Optional comments section
        private void ComposeComments(IContainer container)
        {
            container.Background(Colors.Grey.Lighten4)
                .BorderLeft(4).BorderColor(InvoiceStyle.PrimaryColor).Padding(12)
                .Column(column =>
                {
                    column.Item().Text("Note").Style(InvoiceStyle.Subtitle);
                    column.Spacing(10);
                    column.Item().Text(Model.Comments).Style(InvoiceStyle.Normal);
                });
        }
    }
}
Step 5: Create the Program Entry Point
Finally, let's create the main program that ties everything together. This file will set up the QuestPDF license, create sample invoice data, and generate the final PDF document.
Create a file named Program.cs:
Program.cs
using QuestPDF.Fluent;
using QuestPDF.Infrastructure;

namespace InvoiceGenerator
{
    class Program
    {
        static void Main(string[] args)
        {
            // Set license
            QuestPDF.Settings.License = LicenseType.Community;

            // Create and generate the invoice
            var document = new InvoiceDocument(GetSampleInvoice());
            document.GeneratePdf("invoice.pdf");

            Console.WriteLine("Invoice generated successfully: invoice.pdf");
        }

        // Create a sample invoice for testing
        static InvoiceModel GetSampleInvoice() => new()
        {
            InvoiceNumber = $"INV-{DateTimeOffset.Now.ToUnixTimeSeconds()}",
            IssueDate = DateTime.Now,
            DueDate = DateTime.Now.AddDays(30),
            PaymentAccountNumber = "9876543210",
            PaymentReference = "INV-PAYMENT",

            Seller = new CompanyInfo
            {
                Name = "Coffee Point",
                Street = "404 Bean Not Found",
                City = "Latteville",
                State = "NY",
                Zip = "12345",
                Email = "[email protected]",
                Phone = "(555) 123-4567"
            },

            Customer = new CompanyInfo
            {
                Name = "Latte Lovers",
                Street = "101 Cappuccino St.",
                City = "Milktown",
                State = "NY",
                Zip = "10001",
                Email = "[email protected]",
                Phone = "(555) 987-6543"
            },

            Items = new List<InvoiceItem>
            {
                new()
                {
                    Name = "Custom Coffee Blend",
                    UnitPrice = 15.00m,
                    Quantity = 20
                },
                new()
                {
                    Name = "Monthly Bean Subscription",
                    UnitPrice = 59.00m,
                    Quantity = 3
                },
                new()
                {
                    Name = "Espresso Machine Maintenance",
                    UnitPrice = 115.00m,
                    Quantity = 1
                },
                new()
                {
                    Name = "Espresso Support Package",
                    UnitPrice = 195.00m,
                    Quantity = 1
                }
            },

            Comments =
                "Please use the QR code for quick payment or include the invoice number with your payment. Thank you for your business!",
        };
    }
}
Step 6: Add a Logo
- Create an
Assetsfolder in your project directory. - Add your company logo as
logo.pngin this folder.
Step 7: Run the Application
dotnet run
This will generate an invoice.pdf file in your project directory.
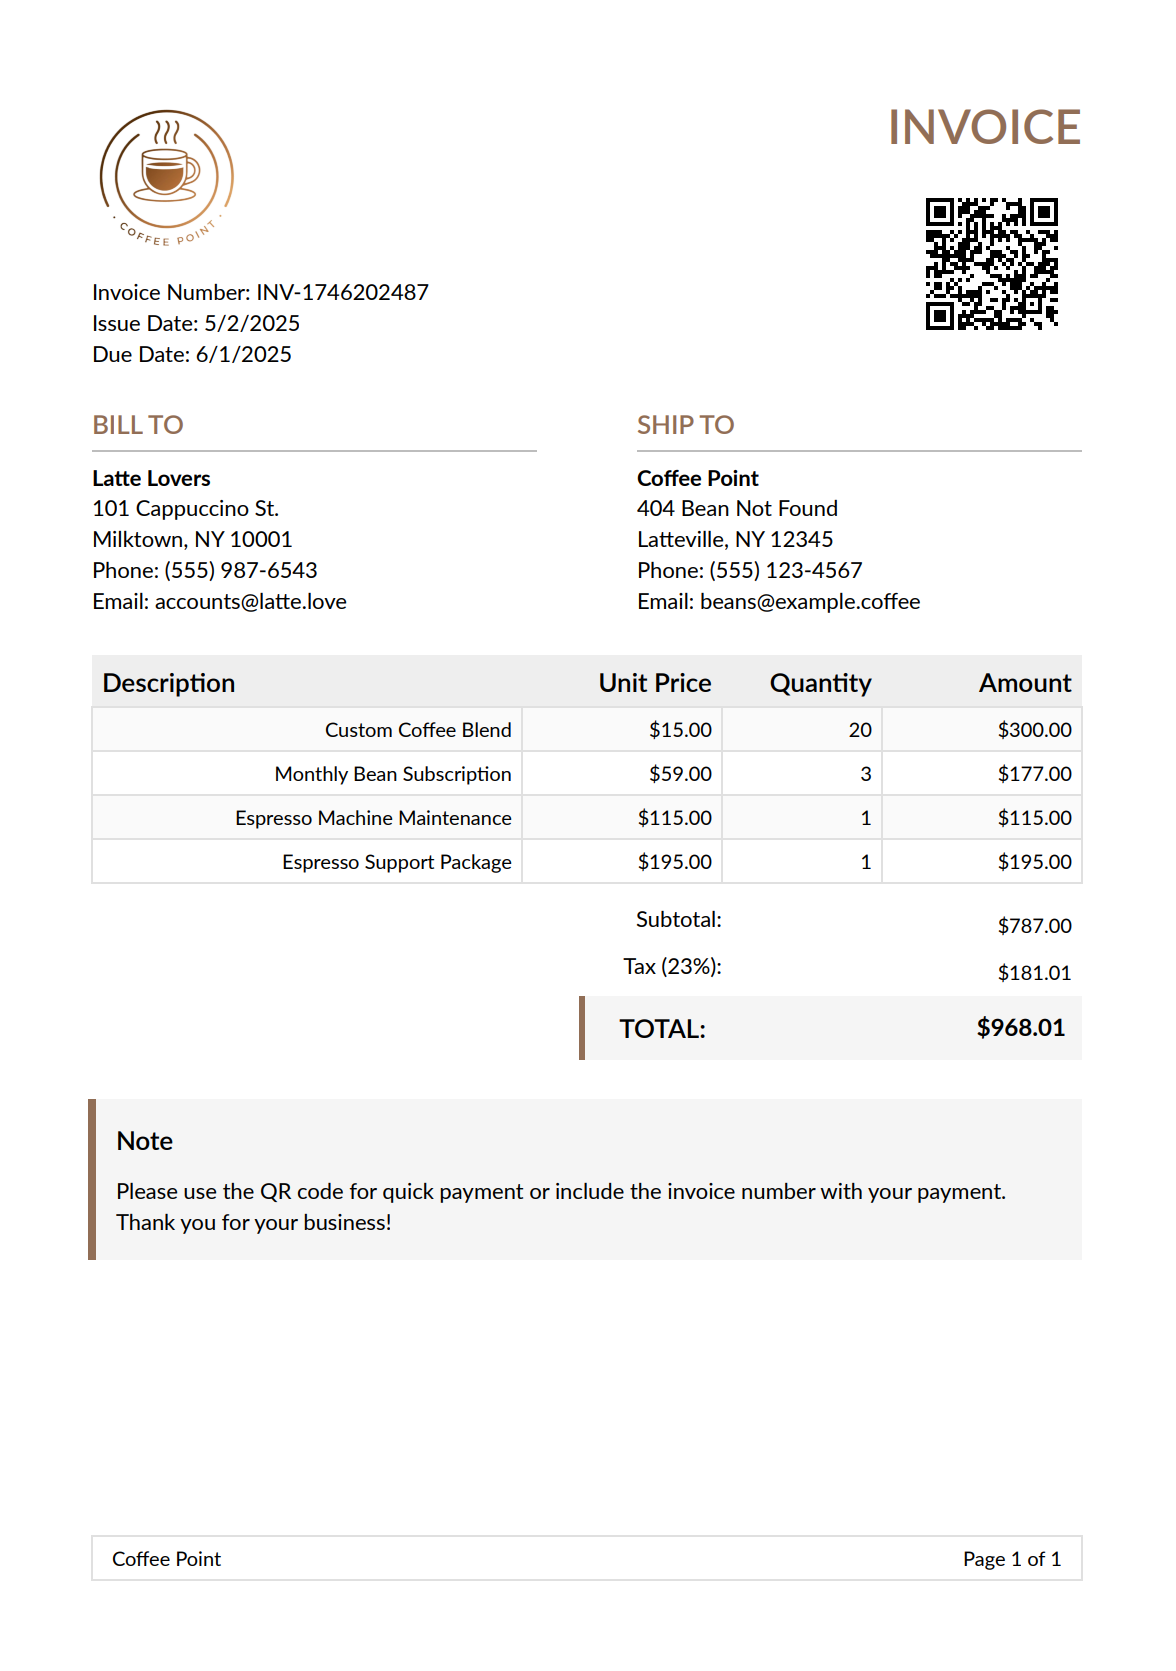
The generated invoice will have:
-
Header Section:
- Company logo.
- Invoice number and dates.
- QR code containing payment information.
-
Main Content:
- Billing and shipping information sections.
- Detailed table of invoice items.
- Subtotal, tax, and grand total calculations.
- Optional comments section.
-
Footer:
- Company name.
- Page numbering
Coffee in hand ☕ – time to check out our Invoice PDF preview:
Best Practices for Efficient PDF Generation with QuestPDF in .NET
To keep your PDF generation fast and maintainable, follow these best practices when working with QuestPDF in your .NET applications. For a broader look at approaches to generating PDFs in C#, see our library comparison guide. If you prefer a coordinate-based approach over QuestPDF's layout engine, our PDFsharp guide covers that alternative.
| Practice | Description |
|---|---|
| Modular Design | Break down complex documents into reusable components and methods. |
| Memory Management | Use streams for large documents to reduce memory usage. |
| Error Handling | Wrap PDF generation in try-catch blocks with meaningful error messages. |
| Image Optimization | Optimize image size and resolution before adding to documents. |
| Font Management | Use standard fonts or properly embed custom fonts. |
| Code Organization | Separate document structure, data, and styling concerns. |
| Hot-Reload | Use ShowInPreviewer() during development for real-time preview. |
HTML to PDF Conversion Options
QuestPDF is designed for programmatic PDF creation through C# code, not HTML conversion. If you already have HTML content that needs to become a PDF, here are your options:
| Approach | Tools | Best For | Cons | Learn More |
|---|---|---|---|---|
| HTML Parsing | iText 7 | Complex HTML documents with CSS styling support. | Free under AGPL; commercial license required for closed-source apps. | • HTML to PDF with iText 7 in C# |
| HTML to PDF APIs | PDFBolt | Full-featured conversions with complex layouts. | External service. | • HTML to PDF API Guide |
| Browser Automation | PuppeteerSharp Playwright | High-fidelity rendering of modern web apps. | Higher resource usage, more complex setup | • Generate PDF Using Playwright in C#/.NET • HTML to PDF in C#/.NET Using PuppeteerSharp |
API-Based Alternative: Template-Driven PDF Generation
While QuestPDF gives you full programmatic control over PDF layout, it requires you to build every element in C# code – headers, tables, footers, and styling all live in your application. For teams that prefer designing templates visually or need to generate PDFs from existing HTML, a PDF generation API like PDFBolt offers a different workflow.
- Design templates visually: Create invoice or report layouts in a template designer or pick from the template gallery.
- Separate design from logic: Template changes do not require code deployments.
- Simple integration: A single HTTP request from your C# application returns a finished PDF (see also our API integration essentials guide).
- Full HTML/CSS support: Use standard web technologies for styling and layout.
Template-based API call in C#
using System;
using System.Net.Http;
using System.IO;
using System.Threading.Tasks;
using System.Text.Json;

public class PdfApiExample {
    public static async Task Main(string[] args) {
        using var client = new HttpClient();

        var requestData = new {
            templateId = "your-template-id",
            templateData = new {
                invoice_number = "INV-2025-503",
                invoice_date = "May 3, 2025",
                due_date = "June 2, 2025",
                company_name = "Coffee Point",
                company_address = "404 Bean Not Found, Latteville, NY 12345",
                company_email = "[email protected]",
                company_phone = "(555) 123-4567",
                company_logo = "https://img.pdfbolt.com/logo.png",
                client_name = "Latte Lovers",
                client_address = "101 Cappuccino St., Milktown, NY 10001",
                client_email = "[email protected]",
                line_items = new object[] {
                    new {
                        description = "Custom Coffee Blend",
                        quantity = 20,
                        unit_price = 15.00
                    },
                    new {
                        description = "Monthly Bean Subscription",
                        quantity = 3,
                        unit_price = 59.00
                    }
                }
            }
        };

        var request = new HttpRequestMessage {
            Method = HttpMethod.Post,
            RequestUri = new Uri("https://api.pdfbolt.com/v1/direct"),
            Content = new StringContent(
                JsonSerializer.Serialize(requestData),
                System.Text.Encoding.UTF8,
                "application/json"
            )
        };

        request.Headers.Add("API-KEY", "XXXXXXXX-XXXX-XXXX-XXXX-XXXXXXXXXXXX");

        try {
            using var response = await client.SendAsync(request);

            if (!response.IsSuccessStatusCode) {
                var errorContent = await response.Content.ReadAsStringAsync();
                Console.WriteLine($"HTTP {(int)response.StatusCode}");
                Console.WriteLine($"Error Message: {errorContent}");
                return;
            }

            var pdfBytes = await response.Content.ReadAsByteArrayAsync();
            await File.WriteAllBytesAsync("invoice_pdfbolt.pdf", pdfBytes);
            Console.WriteLine("PDF generated successfully");
        } catch (Exception ex) {
            Console.WriteLine($"Error: {ex.Message}");
        }
    }
}
This approach works well when you need consistent document output without building every layout element in code, or when non-developers need to update PDF designs without touching the C# codebase.
Frequently Asked Questions About QuestPDF in C#
What is QuestPDF?
QuestPDF is an open-source .NET library for creating PDF documents programmatically in C#. Instead of absolute positioning and manual coordinates, it uses a container-based layout engine driven by a concise fluent API, with automatic pagination and content overflow handling between pages. It is well suited for invoices, reports, contracts, and data exports built directly in code.
Does QuestPDF convert HTML to PDF?
No. QuestPDF is not an HTML-to-PDF converter; it provides a programming interface for building and styling PDF documents directly in C#, where every element (text, tables, headers, footers) is defined in code. If you already have HTML to turn into a PDF, you need a different tool such as PuppeteerSharp, Playwright, iText 7, or an HTML to PDF API.
How do you add QR codes and barcodes in QuestPDF?
QuestPDF itself does not generate barcodes, so you add them through the ZXing.Net library. Install it with dotnet add package ZXing.Net, then encode your data with a writer such as Code128Writer or QRCodeWriter and render the result as an SVG inside a .Svg() container. Using SVG rendering keeps barcodes and QR codes sharp and scannable at any resolution.
Is QuestPDF free to use?
QuestPDF uses a tiered licensing model. The Community License is free for individuals, non-profits, open-source projects, and businesses with annual revenue below $1M USD, while larger organizations need a Professional or Enterprise license. You set the license at startup, for example QuestPDF.Settings.License = LicenseType.Community;.
QuestPDF vs iText for PDFs in C#?
They solve different problems. QuestPDF builds PDFs programmatically from a C# fluent layout API and does not parse HTML, whereas iText 7 can render complex HTML documents with CSS styling support. Note that iText 7 is dual-licensed – free under the AGPL for open-source projects, but a paid commercial license is required for closed-source applications. Choose QuestPDF when you want to compose layouts in code, and iText (or an API) when your starting point is existing HTML.
Conclusion
QuestPDF works well for C# PDF generation. Its layout-based approach and fluent API make document creation much simpler than traditional libraries that rely on absolute positioning, and automatic pagination handles multi-page layouts without extra effort.
Between its text formatting, table support, and image handling, QuestPDF covers most programmatic PDF needs in .NET. The community around it is active too.
For HTML to PDF conversion, consider a dedicated tool like PDFBolt's HTML to PDF API – it handles rendering with headless Chrome and returns PDFs that preserve your CSS layouts and styles.
Thanks for reading – you've earned a coffee break (or three)! ☕☕☕