How to Convert HTML to PDF Using an API

In this article, we explore API-based PDF generation as a superior alternative to traditional tools like wkhtmltopdf and headless browsers like Playwright and Puppeteer. By leveraging HTML to PDF API solutions, you can streamline your development workflow by eliminating setup complexity and dependency management. Throughout this tutorial, you'll discover the key advantages of API-based conversion over headless browser alternatives and follow a complete Node.js implementation for creating professional invoice PDFs with minimal code. Our practical examples will help you integrate efficient PDF generation into your applications right away.
Why Choose API-Based HTML to PDF Conversion?
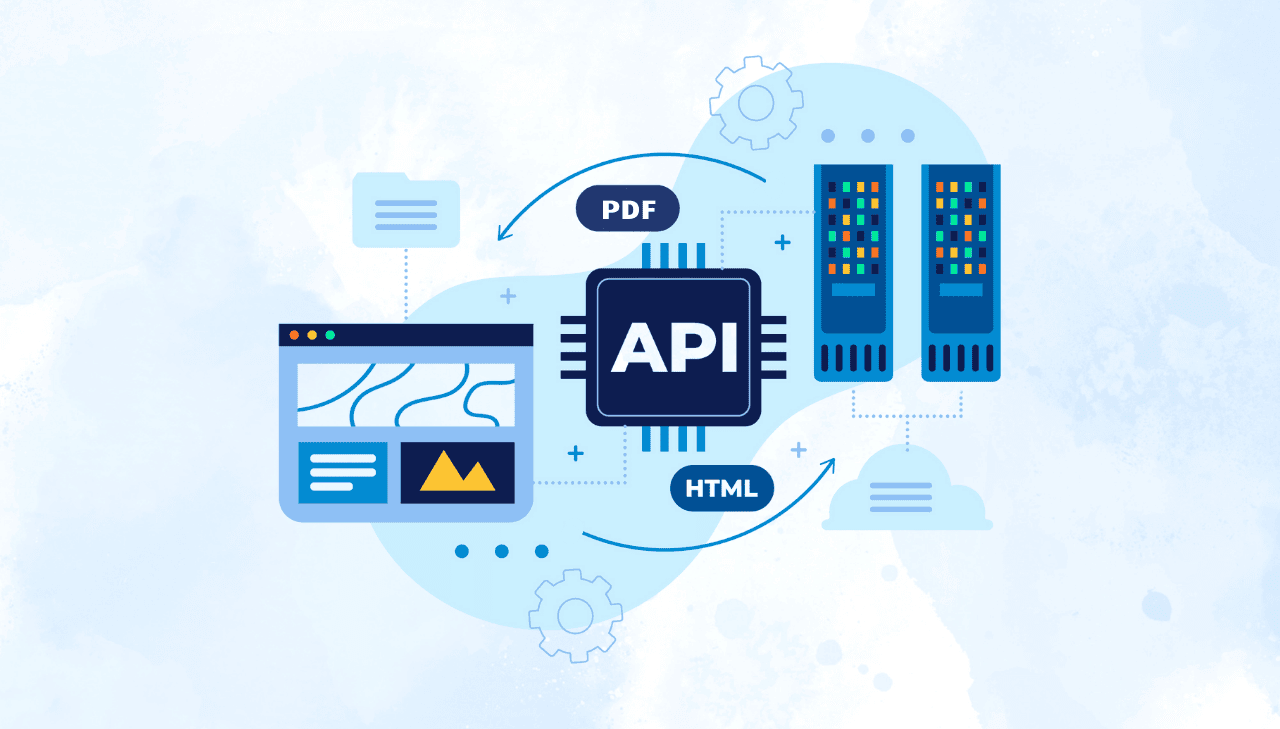
An HTML to PDF API solution streamlines document generation by outsourcing the complex rendering process to a specialized external service. This approach eliminates infrastructure concerns and provides consistently high-quality PDF output with minimal development effort.
➡️ How HTML to PDF APIs Work:
- Send HTML content – Your application sends either HTML content or a URL to the API.
- Server-side processing – The API renders the document with CSS, JavaScript, and styling.
- PDF conversion – The rendered HTML is converted to a professional PDF document.
- Receive PDF – The file is returned as a downloadable link or binary data.
✅ Key Benefits of API-Based PDF Generation:
- Zero dependency management: No need to install, configure or maintain headless browsers, CLI tools, or rendering engines.
- Superior performance: Optimized cloud infrastructure for high-volume PDF generation without local resource consumption.
- Always current technology: Updated rendering engines maintained by the API provider.
- Rapid implementation: Simple integration with just a few lines of code saves development time.
- Enterprise-grade security: Services like PDFBolt and other leading HTML to PDF APIs provide GDPR compliance and secure data handling for cloud-based PDF conversion.
- Reduced maintenance: No browser compatibility issues or software updates to manage.
❌ Potential Drawbacks:
- Network dependency: Requires internet connectivity for API communication.
- Usage-based pricing: Unlike free open-source tools, API services have tiered pricing models.
- Standardized rendering: While consistent, some highly specialized customizations may require specific configuration.
HTML to PDF API vs. Headless Browser Solutions: A Detailed Comparison�
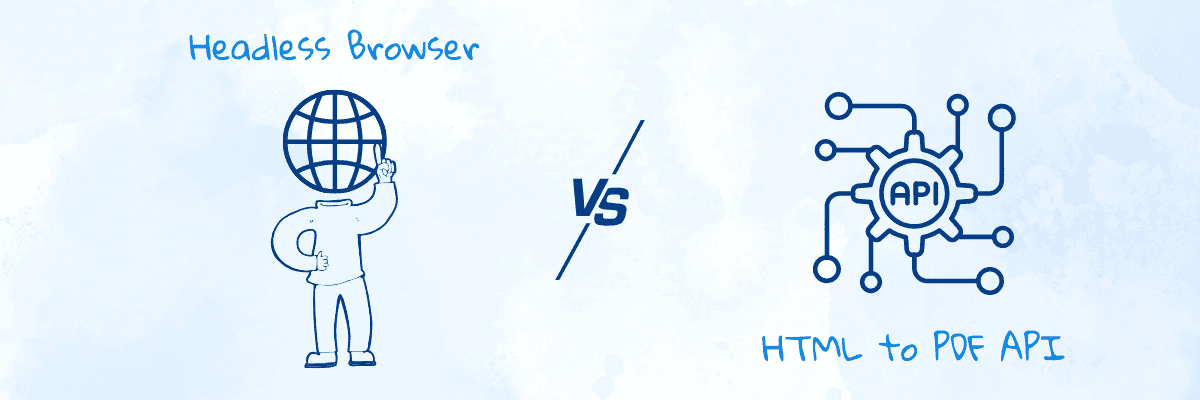
When choosing a PDF generation method, developers often consider headless browser solutions like Playwright/Puppeteer or API-based services. It's worth noting that many HTML to PDF APIs, including PDFBolt, actually utilize headless browsers like Playwright under the hood. The key difference is that these APIs handle all the complex configuration, infrastructure management, and optimization for you, allowing you to benefit from the powerful rendering capabilities without any of the implementation challenges.
This comparison helps illustrate the key differences between these approaches, using PDFBolt as an example of a typical HTML to PDF API service.
Here is a detailed comparison:
| Feature | Headless Browser (Playwright/Puppeteer) | HTML to PDF API (e.g., PDFBolt) |
|---|---|---|
| Setup Complexity | Requires installing and maintaining headless browser environment. | Simple API integration with an API key and HTTP request. |
| Infrastructure Requirements | Consumes server resources and requires optimization. | No infrastructure management - cloud-based processing. |
| Performance Under Load | High CPU/RAM usage, degrades with concurrent conversions. | Optimized for high-volume processing with consistent performance. |
| Browser Engine Updates | Manual updates for compatibility and security. | Uses latest rendering technology without developer intervention. |
| Scaling for Production | Complex infrastructure planning for high-volume needs. | Automatic scaling without additional configuration. |
| Customization Options | Programmatic page manipulation offers high flexibility. | API parameters for headers, footers, margins, and page sizes. |
| Security and Compliance | Requires implementing your own security protocols. | GDPR compliance, automated data deletion, and direct S3 upload options. |
| Implementation Time | Longer for proper setup and configuration. | Quick and easy integration. |
| Error Handling Capabilities | Custom error handling required, complex debugging. | Standardized error response formats, simpler troubleshooting. |
| Total Cost Consideration | Free software with infrastructure and maintenance costs. | Free plan available with flexible paid plans for higher volumes. |
Step-by-Step Guide: Generate Invoice PDF with Node.js and HTML to PDF API
This practical tutorial walks you through creating a complete solution for generating professional-quality invoice PDFs using Node.js, EJS templating, and the PDFBolt HTML to PDF API.
Get the complete project code with templates, sample data, and ready-to-use scripts from our GitHub repository. Clone it and get started right away!
1. Create Your HTML to PDF API Account and Get API Key
- Visit PDFBolt.com to create your free account.
- Navigate to the Admin Dashboard → API Keys section to find your unique API key.
- This key authenticates all your API requests and provides access to the conversion service.
2. Prepare Your Node.js Environment
Ensure you have Node.js installed on your system. You can download it from nodejs.org if needed.
3. Create and Initialize Your Project
mkdir invoice-pdf-generator
cd invoice-pdf-generator
npm init -y
4. Install Required Dependencies
npm install axios ejs
5. Set Up Your Project Structure
For better organization, create this folder structure:
invoice-pdf-generator/
├── data/                   // JSON data storage
│   └── invoice-data.json   // Sample invoice data
├── templates/              // HTML/EJS templates
│   └── invoice.ejs         // Invoice template
├── generate-pdf.js         // Main PDF generation script
└── package.json            // Project configuration
6. Create Your Invoice Template
- The EJS template is essentially an HTML file with placeholders that will be dynamically filled with data from a separate file.
- Save this template as
invoice.ejsin thetemplatesdirectory.
Click to view example EJS template
<!DOCTYPE html>
<html lang="en">
<head>
    <meta charset="UTF-8">
    <meta name="viewport" content="width=device-width, initial-scale=1.0">
    <title>Invoice</title>
    <style>
        :root {
                --brand-color: #0C8AE5;
                --bg-light-brand-color: #e4f3ff;
                --bg-light: #f8f9fa;
                --text-dark: #333333;
                --text-medium: #555555;
                --border: #e0e0e0;
        }

        * {
                box-sizing: border-box;
                margin: 0;
                padding: 0;
        }

        body {
                font-family: Arial, sans-serif;
                line-height: 1.5;
                color: var(--text-dark);
                padding: 20px;
        }

        .invoice {
                max-width: 800px;
                margin: 0 auto;
                padding: 40px;
        }

        .header {
                display: flex;
                justify-content: space-between;
                margin-bottom: 30px;
                border-bottom: 2px solid var(--brand-color);
                padding-bottom: 20px;
        }

        .logo {
                max-width: 200px;
                height: auto;
        }

        .invoice-title {
                text-align: right;
        }

        .invoice-title h1 {
                color: var(--brand-color);
                font-size: 32px;
                margin-bottom: 5px;
        }

        .invoice-number {
                font-size: 14px;
                color: var(--text-medium);
        }

        .dates {
                display: flex;
                justify-content: space-between;
                background-color: var(--bg-light);
                padding: 15px 25px;
                border-radius: 5px;
                margin-bottom: 30px;
        }

        .date-group h3 {
                font-size: 14px;
                text-transform: uppercase;
                margin-bottom: 5px;
                color: var(--text-medium);
        }

        .addresses {
                display: flex;
                justify-content: space-between;
                margin-bottom: 30px;
                gap: 20px;
        }

        .address {
                flex: 1;
                padding: 15px 25px;
                border: 1px solid var(--border);
                border-radius: 5px;
        }

        .address h3 {
                font-size: 18px;
                margin-bottom: 10px;
                color: var(--brand-color);
                border-bottom: 1px solid var(--border);
                padding-bottom: 5px;
        }

        .items-table {
                width: 100%;
                border-collapse: collapse;
                margin-bottom: 30px;
                margin-top: 15px;
                border: 1px solid var(--border);
        }

        .items-table th {
                background-color: var(--brand-color);
                color: white;
                text-align: left;
                padding: 10px;
        }

        .items-table td {
                padding: 10px;
                border-bottom: 1px solid var(--border);
        }

        .items-table tr:nth-child(even) {
                background-color: var(--bg-light);
        }

        .total-row {
                font-weight: bold;
                background-color: var(--bg-light-brand-color);
        }

        .total-label {
                text-align: right;
        }

        .total-amount {
                font-size: 18px;
                text-align: right;
        }

        .footer {
                margin-top: 30px;
                border-top: 1px solid var(--border);
                padding-top: 20px;
                text-align: center;
        }

        .thank-you {
                font-size: 16px;
                font-weight: bold;
                color: var(--brand-color);
                margin-bottom: 10px;
        }

        .contact {
                color: var(--text-medium);
                font-size: 14px;
        }

        .contact a {
                color: var(--brand-color);
                text-decoration: none;
        }

        @media (max-width: 768px) {
            .header, .addresses {
                flex-direction: column;
            }

            .invoice-title {
                text-align: left;
                margin-top: 15px;
            }

            .date-group {
                margin-bottom: 10px;
            }
        }
    </style>
</head>
<body>
<div class="invoice">
    <div class="header">
        <img class="logo" src="<%= logoUrl %>" alt="Company Logo">
        <div class="invoice-title">
                <h1>Invoice</h1>
                <div class="invoice-number"><%= invoiceNumber %></div>
        </div>
    </div>

    <div class="dates">
        <div class="date-group">
            <h3>Issue Date</h3>
            <div><%= issueDate %></div>
        </div>
        <div class="date-group">
            <h3>Due Date</h3>
            <div><%= dueDate %></div>
        </div>
    </div>

    <div class="addresses">
        <div class="address">
            <h3>Billed To</h3>
            <div><strong><%= customerName %></strong></div>
            <div><%= customerAddress %></div>
        </div>
        <div class="address">
            <h3>From</h3>
            <div><strong><%= sellerName %></strong></div>
            <div><%= sellerAddress %></div>
        </div>
    </div>

    <h3>Order Summary</h3>
    <table class="items-table">
      <thead>
        <tr>
            <th>Description</th>
            <th>Quantity</th>
            <th>Price</th>
            <th>Total</th>
        </tr>
      </thead>
      <tbody>
        <% items.forEach(item => { %>
        <tr>
            <td class="item-description"><%= item.description %></td>
            <td class="item-quantity"><%= item.quantity %></td>
            <td class="item-price"><%= item.price %></td>
            <td class="item-total"><%= item.total %></td>
        </tr>
        <% }); %>
      </tbody>
      <tfoot>
        <tr class="total-row">
            <td colspan="3" class="total-label">Total Amount:</td>
            <td class="total-amount"><%= total %></td>
        </tr>
      </tfoot>
    </table>

    <div class="footer">
        <p class="thank-you">Thank you for your business!</p>
        <p class="contact">If you have any questions, please contact us at <a href="mailto:<%= contactEmail %>"><%= contactEmail %></a></p>
    </div>
</div>
</body>
</html>
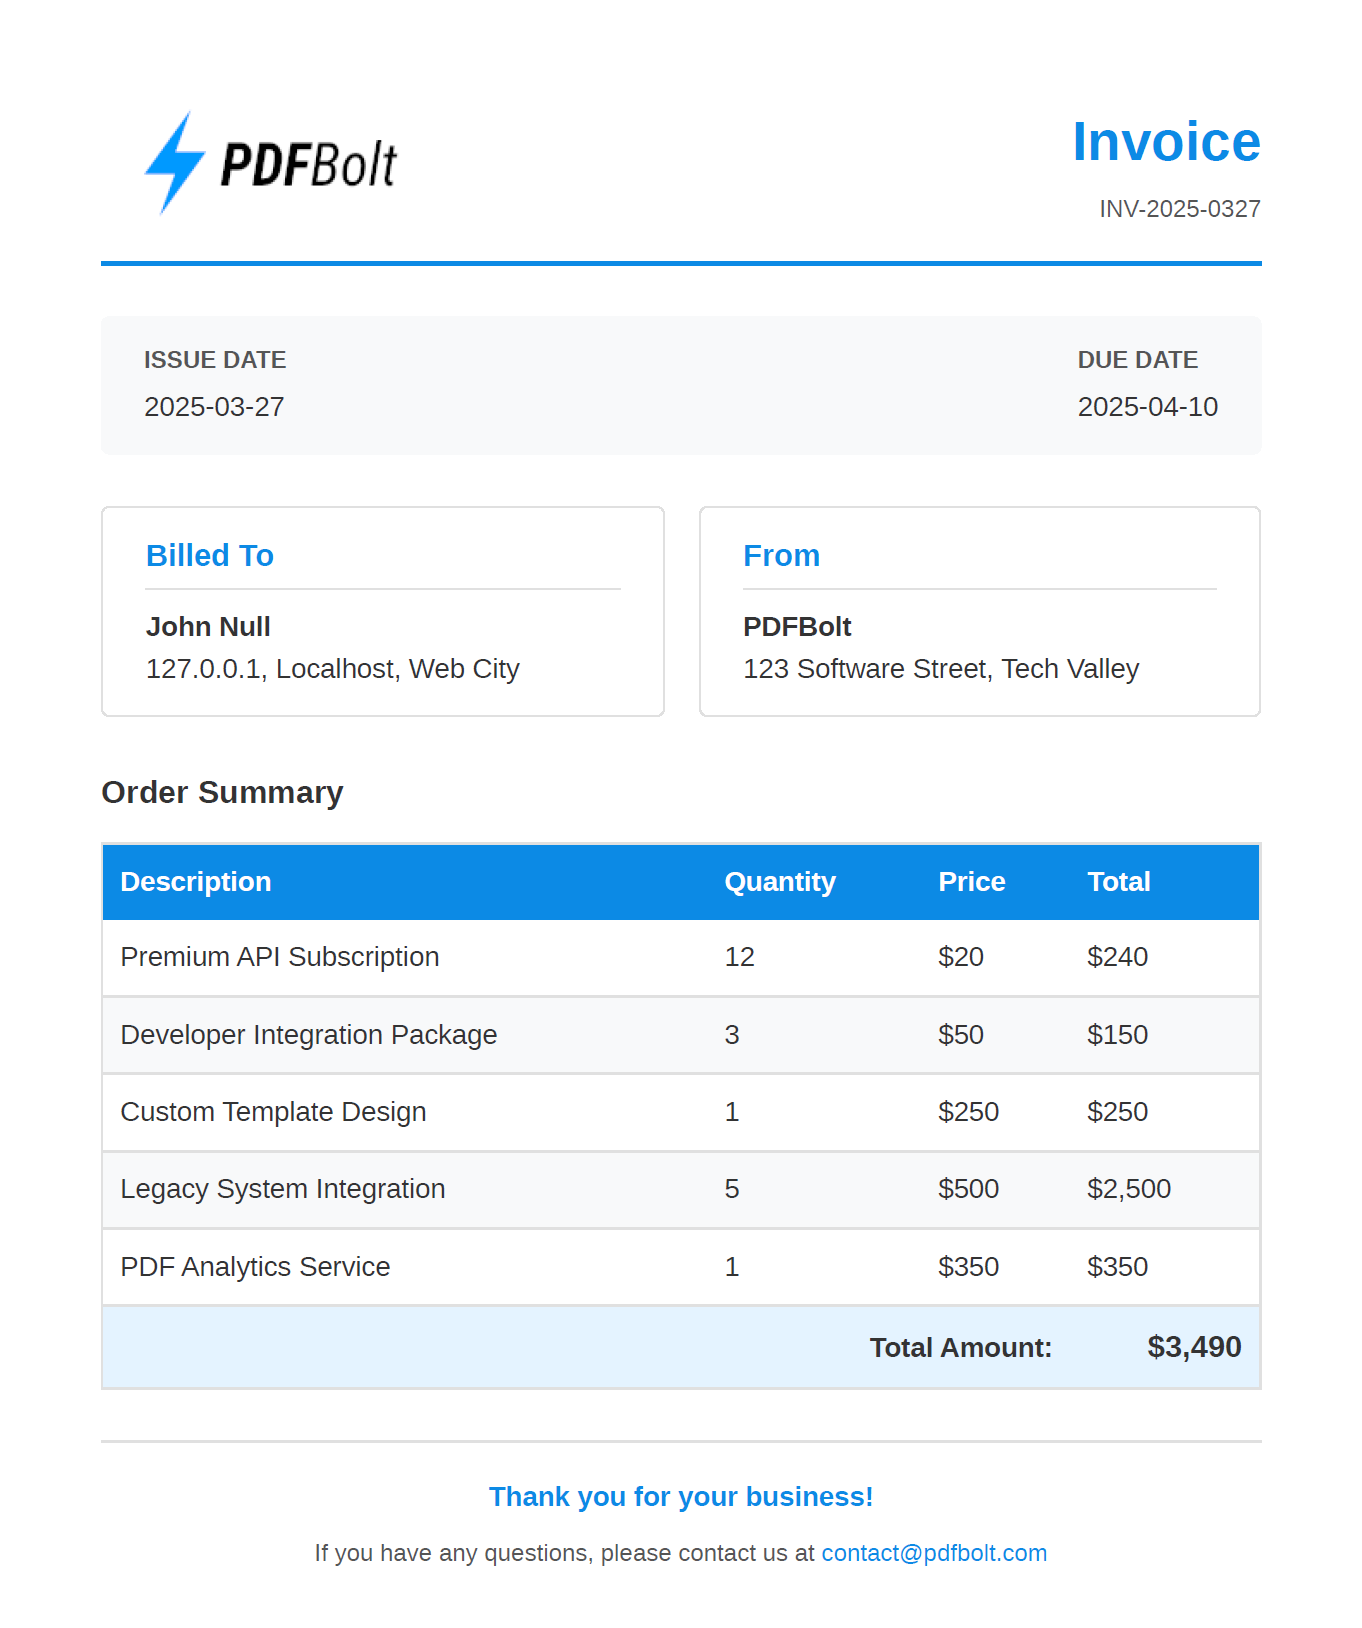
7. Create Sample Invoice Data
- Now that you have your template ready, you need data to populate it.
- Create a file named
invoice-data.jsonin yourdatadirectory.
Here's an example of the data
{
    "invoiceNumber": "INV-2025-0327",
    "issueDate": "2025-03-27",
    "dueDate": "2025-04-10",
    "customerName": "John Null",
    "customerAddress": "127.0.0.1, Localhost, Web City",
    "sellerName": "PDFBolt",
    "sellerAddress": "123 Software Street, Tech Valley",
    "contactEmail": "[email protected]",
    "logoUrl": "https://img.pdfbolt.com/logo.png",
    "items": [
{
    "description": "Premium API Subscription",
    "quantity": 12,
    "price": "$20",
    "total": "$240"
},
{
    "description": "Developer Integration Package",
    "quantity": 3,
    "price": "$50",
    "total": "$150"
},
{
    "description": "Custom Template Design",
    "quantity": 1,
    "price": "$250",
    "total": "$250"
},
{
    "description": "Legacy System Integration",
    "quantity": 5,
    "price": "$500",
    "total": "$2,500"
},
{
    "description": "PDF Analytics Service",
    "quantity": 1,
    "price": "$350",
    "total": "$350"
}
    ],
    "total": "$3,490"
}
8. Write the PDF Generation Script
Now create the main script named generate-pdf.js in your project's root directory that will bring everything together. This script will:
- Load the invoice data from the JSON file.
- Render the EJS template with this data.
- Send the rendered HTML to the PDFBolt API.
- Save the resulting PDF.
Expand to see complete code
const ejs = require('ejs');
const axios = require('axios');
const fs = require('fs');
const path = require('path');

// PDFBolt API configuration
const API_URL = 'https://api.pdfbolt.com/v1/direct';
const API_KEY = 'YOUR_API_KEY'; // Replace with your actual API key

(async () => {
    try {
        // Load invoice data from JSON file
        const invoiceData = JSON.parse(fs.readFileSync(path.join(__dirname, 'data', 'invoice-data.json'), 'utf8'));

        // Render EJS template with invoice data
        const templatePath = path.join(__dirname, 'templates', 'invoice.ejs');
        const html = await ejs.renderFile(templatePath, invoiceData);

        // Encode HTML to Base64 (required by PDFBolt API)
        const htmlBase64 = Buffer.from(html).toString('base64');

        // Generate timestamped filename for the PDF
        const timestamp = new Date().toISOString().replace(/[:.]/g, '-');

        // Send request to PDFBolt API
        const response = await axios.post(
        API_URL,
        {
            html: htmlBase64,
            printBackground: true,
            format: 'A4'
            // Add more parameters as needed from PDFBolt API documentation
        },
        {
            headers: {
                'Content-Type': 'application/json',
                'API_KEY': API_KEY
            },
            responseType: 'arraybuffer' // Receive binary PDF data
        }
    );

    // Save the generated PDF locally
    const pdfPath = `invoice-${timestamp}.pdf`;
    fs.writeFileSync(pdfPath, response.data);
    console.log(`PDF saved successfully: ${pdfPath}`);
} catch (error) {
    // This block is used to debug and log errors in case the PDF generation fails
    const responseData = error.response?.data;
    if (responseData) {
        try {
            // Try to parse the error as JSON to extract detailed error information
            const errorDetails = JSON.parse(responseData.toString('utf8'));
            console.error('API Error Details:', errorDetails);
        } catch (parseError) {
            // If not JSON, log as text
            console.error('API Error Response:', responseData.toString('utf8'));
        }
    } else {
        // If no response data is available, log the error message
        console.error('Error generating PDF:', error.message);
    }
}
})();
Customizing Your PDF Output
PDFBolt's HTML to PDF API offers extensive customization options. Here are some key parameters you can modify in your API request:
{
    html: htmlBase64,          // Base64-encoded HTML content

    // Page parameters
    deviceScaleFactor: 2,      // Improve resolution (1-4)
    emulateMediaType: 'screen', // Determines the media type: screen or print

    // PDF layout parameters
    format: 'A4',              // Page size: 'A4', 'Letter', 'Legal', etc.
    landscape: false,          // Page orientation
    scale: 1.1,                // Content scaling factor (0.1-2)
    printBackground: true,     // Include background colors and images
    preferCSSPageSize: true,   // Use CSS @page size over format parameter

    // Margins
    margin: {
        top: '10px',
        right: '10px',
        bottom: '10px',
        left: '10px'
    },

    // Headers and footers
    displayHeaderFooter: true,
    headerTemplate: 'PGRpdiBzdHlsZT0id2lkdGg6IDEwMCU7IHRleHQtYWxpZ246IGNlbnRlcjsgZm9udC1zaXplOiAxMHB4OyBjb2xvcjogZ3JheTsiPjxzcGFuIGNsYXNzPSJ0aXRsZSI+PC9zcGFuPiB8IDxzcGFuIGNsYXNzPSJkYXRlIj48L3NwYW4+PC9kaXY+',
    footerTemplate: 'PGRpdiBzdHlsZT0id2lkdGg6IDEwMCU7IHRleHQtYWxpZ246IGNlbnRlcjsgZm9udC1zaXplOiAxMnB4OyI+PHNwYW4gY2xhc3M9InBhZ2VOdW1iZXIiPjwvc3Bhbj4gb2YgPHNwYW4gY2xhc3M9InRvdGFsUGFnZXMiPjwvc3Bhbj48L2Rpdj4='
}
For a complete list of parameters and advanced options, visit the PDFBolt API Documentation.
9. Run Your PDF Generation Script
- Insert your actual PDFBolt API key in the
generate-pdf.jsfile. - Run the script using Node.js:
node generate-pdf.js
10. View Your Generated PDF
Check your project directory for the generated PDF file named invoice-[timestamp].pdf.
That's it! Simple, right? 🎉
Here's what your generated invoice PDF should look like:
Troubleshooting Common HTML to PDF Conversion Issues
When working with HTML to PDF conversion, you might encounter some common issues:
1. Missing Styles or Images
Problem: The PDF is generated but styles or images are missing.
Solution:
- Ensure all CSS is inline or within the HTML document.
- Check that image URLs are absolute and publicly accessible.
- Set
printBackground: truein your API request.
2. Incorrect Page Sizes or Margins
Problem: Content is cut off or doesn't fit properly on the page.
Solution:
- Use CSS
@pagerules to set consistent page dimensions. - Specify appropriate
marginparameters in your API request. - Test with different
formatvalues (A4, Letter, etc.).
3. API Authentication Errors
Problem: Receiving 401 or 403 errors from the API.
Solution:
- Double-check your API key.
- Verify your account status and usage limits.
- Ensure that the
API_KEYheader is included in your request.
4. Handling Large Documents
Problem: Timeout errors for large HTML documents.
Solution:
- Break large documents into multiple smaller PDFs.
- Optimize HTML content (reduce image sizes, simplify DOM).
- Increase your request timeout parameter.
For a complete guide to handling errors and troubleshooting, check our comprehensive Error Handling Documentation.
Advanced Implementation Tips for HTML to PDF Conversion
For the best PDF quality, follow these best practices when designing your HTML templates:
- Use absolute units (mm, cm, in) instead of relative units (%, vh, vw) for predictable sizing.
- Set explicit page breaks with CSS
page-break-before,page-break-after, andpage-break-insideproperties. - Optimize images by using appropriate resolutions for print (300 DPI recommended).
- Test with different paper sizes to ensure your template adapts properly.
For applications requiring high-volume PDF generation:
- Consider webhooks for asynchronous processing of large documents.
- Utilize direct S3 uploads to avoid transferring large PDFs through your application servers. See our Uploading to Your S3 Bucket Guide for details.
When to Choose Different PDF Generation Methods
Selecting the optimal PDF generation solution depends on your specific requirements, technical resources, and business needs. While HTML to PDF API services like PDFBolt are ideal for most use cases, different use cases may benefit from alternative approaches.
-
Choose HTML to PDF API when you need:
- Simple, reliable PDF generation without infrastructure headaches.
- High-quality PDFs with consistent rendering.
- Fast implementation with minimal code.
- Scalable solution for production use.
-
Consider headless browser solutions when you need:
- Complete programmatic control over the rendering process.
- To interact with page elements before capturing the PDF.
- Offline processing capabilities.
- Custom browser automation beyond PDF generation.
-
Use wkhtmltopdf when you need:
- Purely offline, self-contained solution.
- Simple command-line processing.
- Lightweight integration for basic PDF needs.
Want to dive deeper into PDF generation methods? Check out our previous articles:
Conclusion
Converting HTML to PDF with an API like PDFBolt provides significant advantages in terms of implementation speed, output quality, and maintenance requirements. By outsourcing the complex rendering process to a specialized service, your development team can focus on creating great content while delivering professional PDF documents to your users.
With the step-by-step Node.js implementation provided in this guide, you can quickly integrate HTML to PDF conversion capabilities into your applications without the headaches of managing complex rendering infrastructure.
Keep calm and API on! 😎