Templates
This guide explains how PDFBolt templates work, the ways to create and publish them, and how to generate PDFs from published versions. It also includes common use cases, troubleshooting guidance, and a complete invoice example.
What Are Templates?
PDFBolt templates are reusable HTML/CSS layouts with Handlebars placeholders. Create them in the Dashboard Template Designer, generate a draft with AI, or manage them programmatically through the Template API. Once a version is published, send its templateId and document-specific templateData to the Conversion API to generate PDFs.
Template Overview
Instead of sending HTML with every request, templates separate the document design from the data supplied for each PDF:
- Template Definition: Define the HTML/CSS layout and add Handlebars placeholders for dynamic values.
- Data Injection: Send the template's
templateIdand document-specifictemplateDatato the Conversion API. PDFBolt usestemplateDatato populate the placeholders in the latest published version, then renders the PDF.
By default, templateData is redacted from stored request logs after processing. See Data Handling for details.
Your data remains private and secure.
Handlebars
PDFBolt uses Handlebars as its template engine. It adds dynamic values and logic to HTML:
- Variables:
{{customer_name}}gets replaced with actual customer data. - Conditions:
{{#if is_paid}}...{{/if}}displays content when a condition is met. - Loops:
{{#each items}}...{{/each}}repeats content for each item in an array. - Nested objects:
{{customer.address.city}}reads a value from a nested object.
See the official Handlebars guide for more syntax and examples.
We currently support Handlebars. If you need a different engine, contact us at [email protected], and we'll consider adding it based on your needs.
Choose How to Create a Template
You can create a template in three ways: with the Dashboard Template Designer, AI Template Generation, or the Template API. Each option creates a draft that you can review and publish.
| Creation path | How it works | Best for |
|---|---|---|
| Dashboard Template Designer | Create a template from scratch or customize a design from the template gallery. Edit its HTML and sample data, configure PDF options, and check the result with built-in previews. | Hands-on editing or starting from an existing design. |
| AI Template Generation | Describe the document and attach reference files. PDFBolt uses AI to generate the HTML, Handlebars placeholders, sample data, and PDF parameters, then opens the draft in the Template Designer. | Creating a first draft quickly. |
| Template API | Create, validate, preview, compare, save, and publish templates programmatically with a Personal Access Token. | Automated workflows, CI, internal tools, and AI coding agents. |
How Templates Work
All three creation paths follow the same lifecycle:
- Create a template draft: Prepare the template HTML with Handlebars variables, representative sample data, and PDF parameters.
- Validate and preview the draft: Check for syntax and data errors, then render a PDF preview to verify the final output before publishing.
- Publish the draft: Once the draft is ready, publish it for use by the Conversion API.
- Generate PDFs: Send the
templateIdand document-specifictemplateDatato one of the Conversion API endpoints:/v1/direct,/v1/sync, or/v1/async. - Prepare the next draft: If you need to make changes, continue editing in a new draft. PDF conversions keep using the current published version until the new draft is published.
Simple Example: From Template to PDF
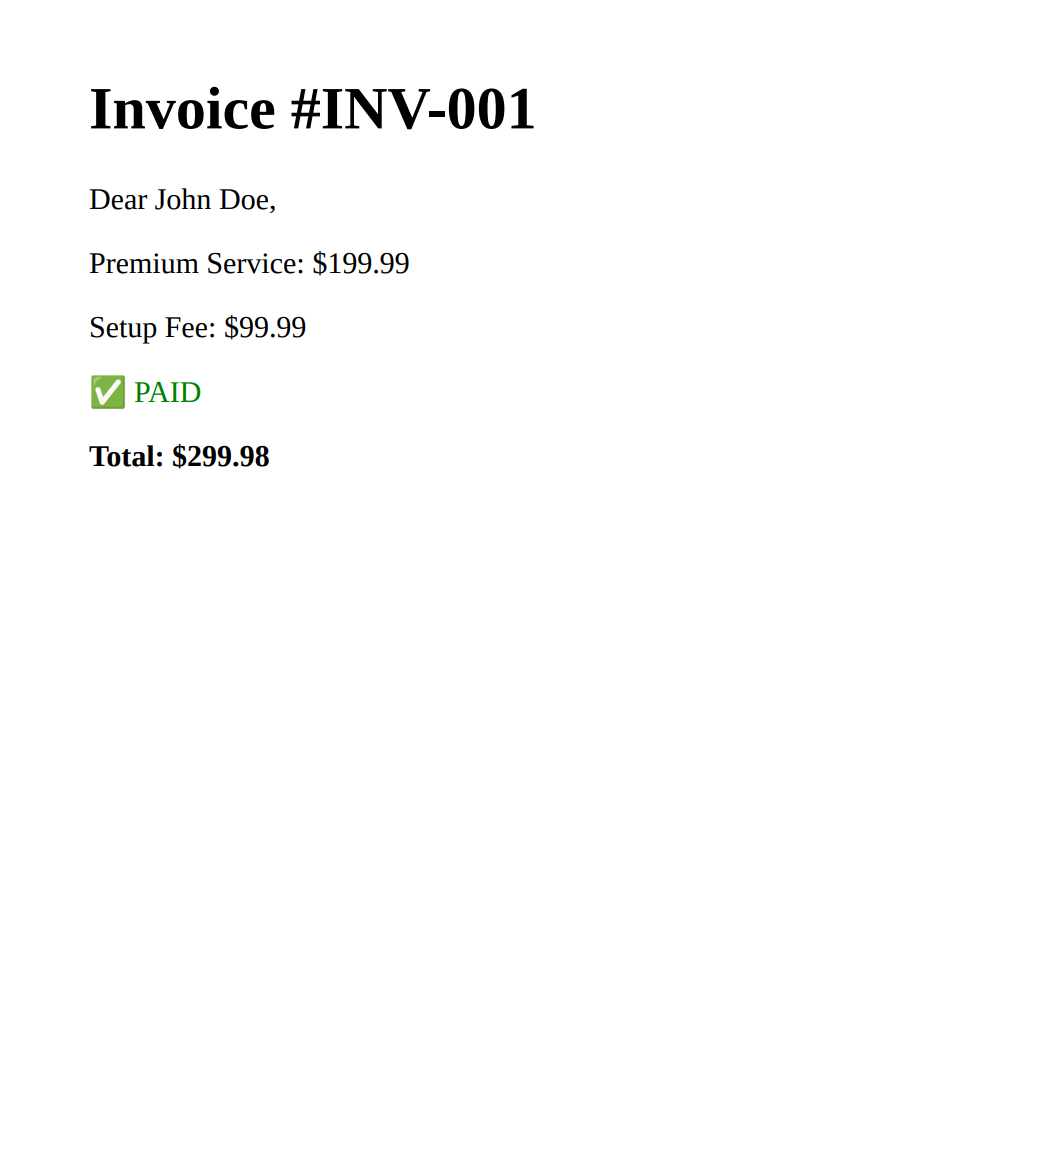
This example shows how JSON data populates Handlebars variables to produce a PDF. For a detailed walkthrough, see Template Workflow in Detail.
Template HTML (with Handlebars):
<!DOCTYPE html>
<html>
<head>
  <meta charset="UTF-8">
  <title>Invoice #{{invoice_number}}</title>
  <style>
    .invoice { margin: 40px; }
    .status.paid { color: green; }
    .status.pending { color: orange; }
  </style>
</head>
<body>
  <div class="invoice">
    <h1>Invoice #{{invoice_number}}</h1>
    <p>Dear {{customer.name}},</p>
    <div class="items">
      {{#each items}}
      <p class="item">
        {{name}}: ${{price}}
      </p>
      {{/each}}
    </div>
    {{#if is_paid}}
      <p class="status paid">PAID</p>
    {{else}}
      <p class="status pending">PENDING</p>
    {{/if}}
    <p><strong>Total: ${{total}}</strong></p>
  </div>
</body>
</html>
JSON Data:
{
 "invoice_number": "INV-001",
 "customer": {"name": "John Doe"},
 "items": [
  {"name": "Premium Service", "price": "199.99"},
  {"name": "Setup Fee", "price": "99.99"}
 ],
 "is_paid": true,
 "total": "299.98"
}
Final PDF Result:
Why Use Templates?
Templates separate reusable design from data, so you can reuse one HTML layout instead of sending it with every request.
Simplified API Calls
- Cleaner code – Send
templateIdandtemplateDatainstead of full HTML on every request. - Easier debugging – Troubleshoot the template layout and request data separately.
Consistent Design
- Single source of truth – Publish an updated version once; future API-generated PDFs use that version.
- Version history – Compare versions or restore a previous version as a new draft. The current published version remains unchanged until you publish the draft.
Faster Development
- AI-powered creation – Generate templates with AI from a description or reference files.
- Ready-to-use gallery – Start with ready-made designs for invoices, reports, certificates, resumes, and more.
- Template Designer – Build and test templates with built-in previews.
- Template API – Create, validate, preview, compare, save, and publish templates programmatically.
- Developer-friendly – Use Handlebars syntax and ready-to-use code snippets.
Flexible Data Handling
- Nested data – Handlebars handles arrays and nested objects (
{{customer.address.city}},{{#each line_items}}). - Conditional logic – Show or hide content based on data values (
{{#if}},{{#unless}}).
Team Efficiency
- Team collaboration – Manage templates with your team.
- No infrastructure overhead – Handle growing document volume through the API; PDFBolt manages the rendering infrastructure.
Common Use Cases
Templates work well for document workflows that combine a reusable layout with variable data. Common examples include:
Business Operations
Invoices, receipts, purchase orders, quotes, statements
Analytics & Reporting
Financial reports, KPI dashboards, performance reports, executive summaries
Education & Human Resources
Certificates, training records, employee handbooks, offer letters, performance evaluations
Customer Communications
Personalized letters, product catalogs, support tickets, shipping labels
Legal & Compliance
Contracts, agreements, policy documents, audit reports
Sales & Marketing
Sales proposals, product sheets, marketing brochures, event materials
Template Workflow in Detail
Follow these four steps to create a draft, publish it, generate a PDF, and receive the result:
1. Create a Template
- Create a draft in the Template Designer, generate one with AI, or start with a design from the template gallery. You can also create and manage drafts programmatically through the Template API.
- Add Handlebars variables such as
{{variable_name}}for dynamic values. - Use conditions such as
{{#if}}and loops such as{{#each}}when needed. - Test the template with sample data in Quick HTML Preview, then generate a Real PDF Preview to verify the rendered output.
- Save the draft manually or enable auto-save.
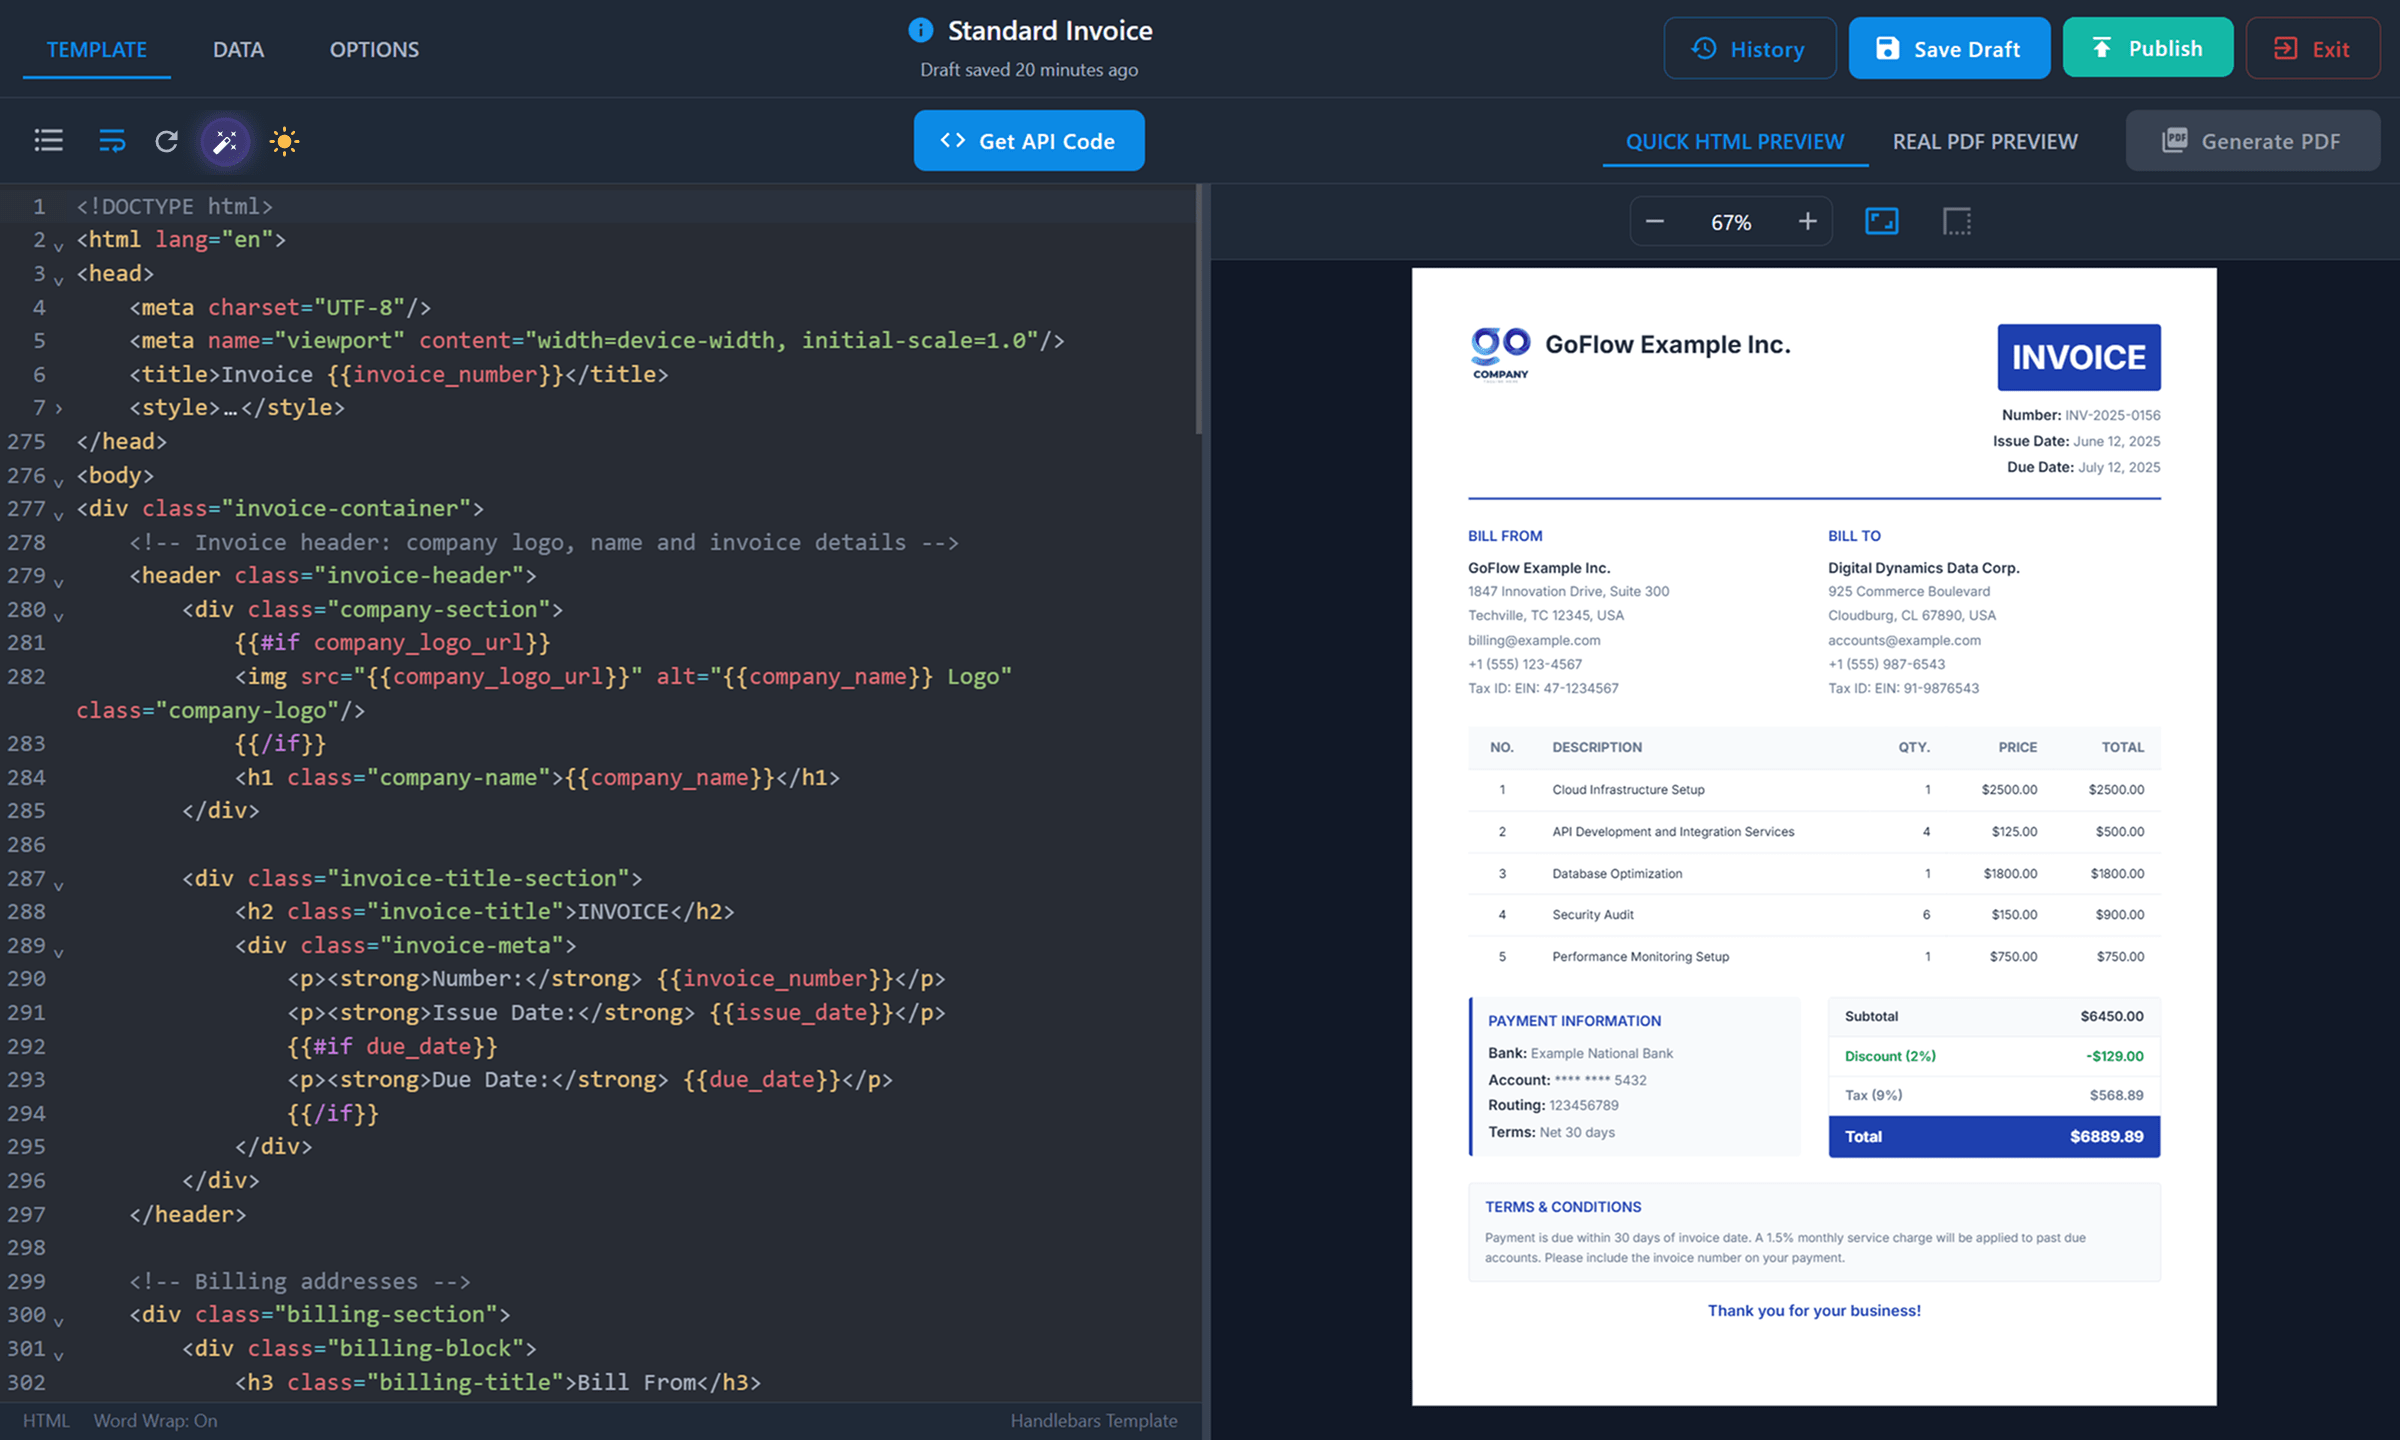
See the full template creation and management guide.
To work programmatically, use POST /v1/templates/drafts, POST /v1/templates/validate, and POST /v1/templates/preview. Compare changes with POST /v1/templates/{templateId}/diff.
2. Publish the Template
- Publish the draft to make that version available to the Conversion API.
- Copy its unique template ID and include it in Conversion API requests.
- Use built-in version history to compare changes or restore a previous version.
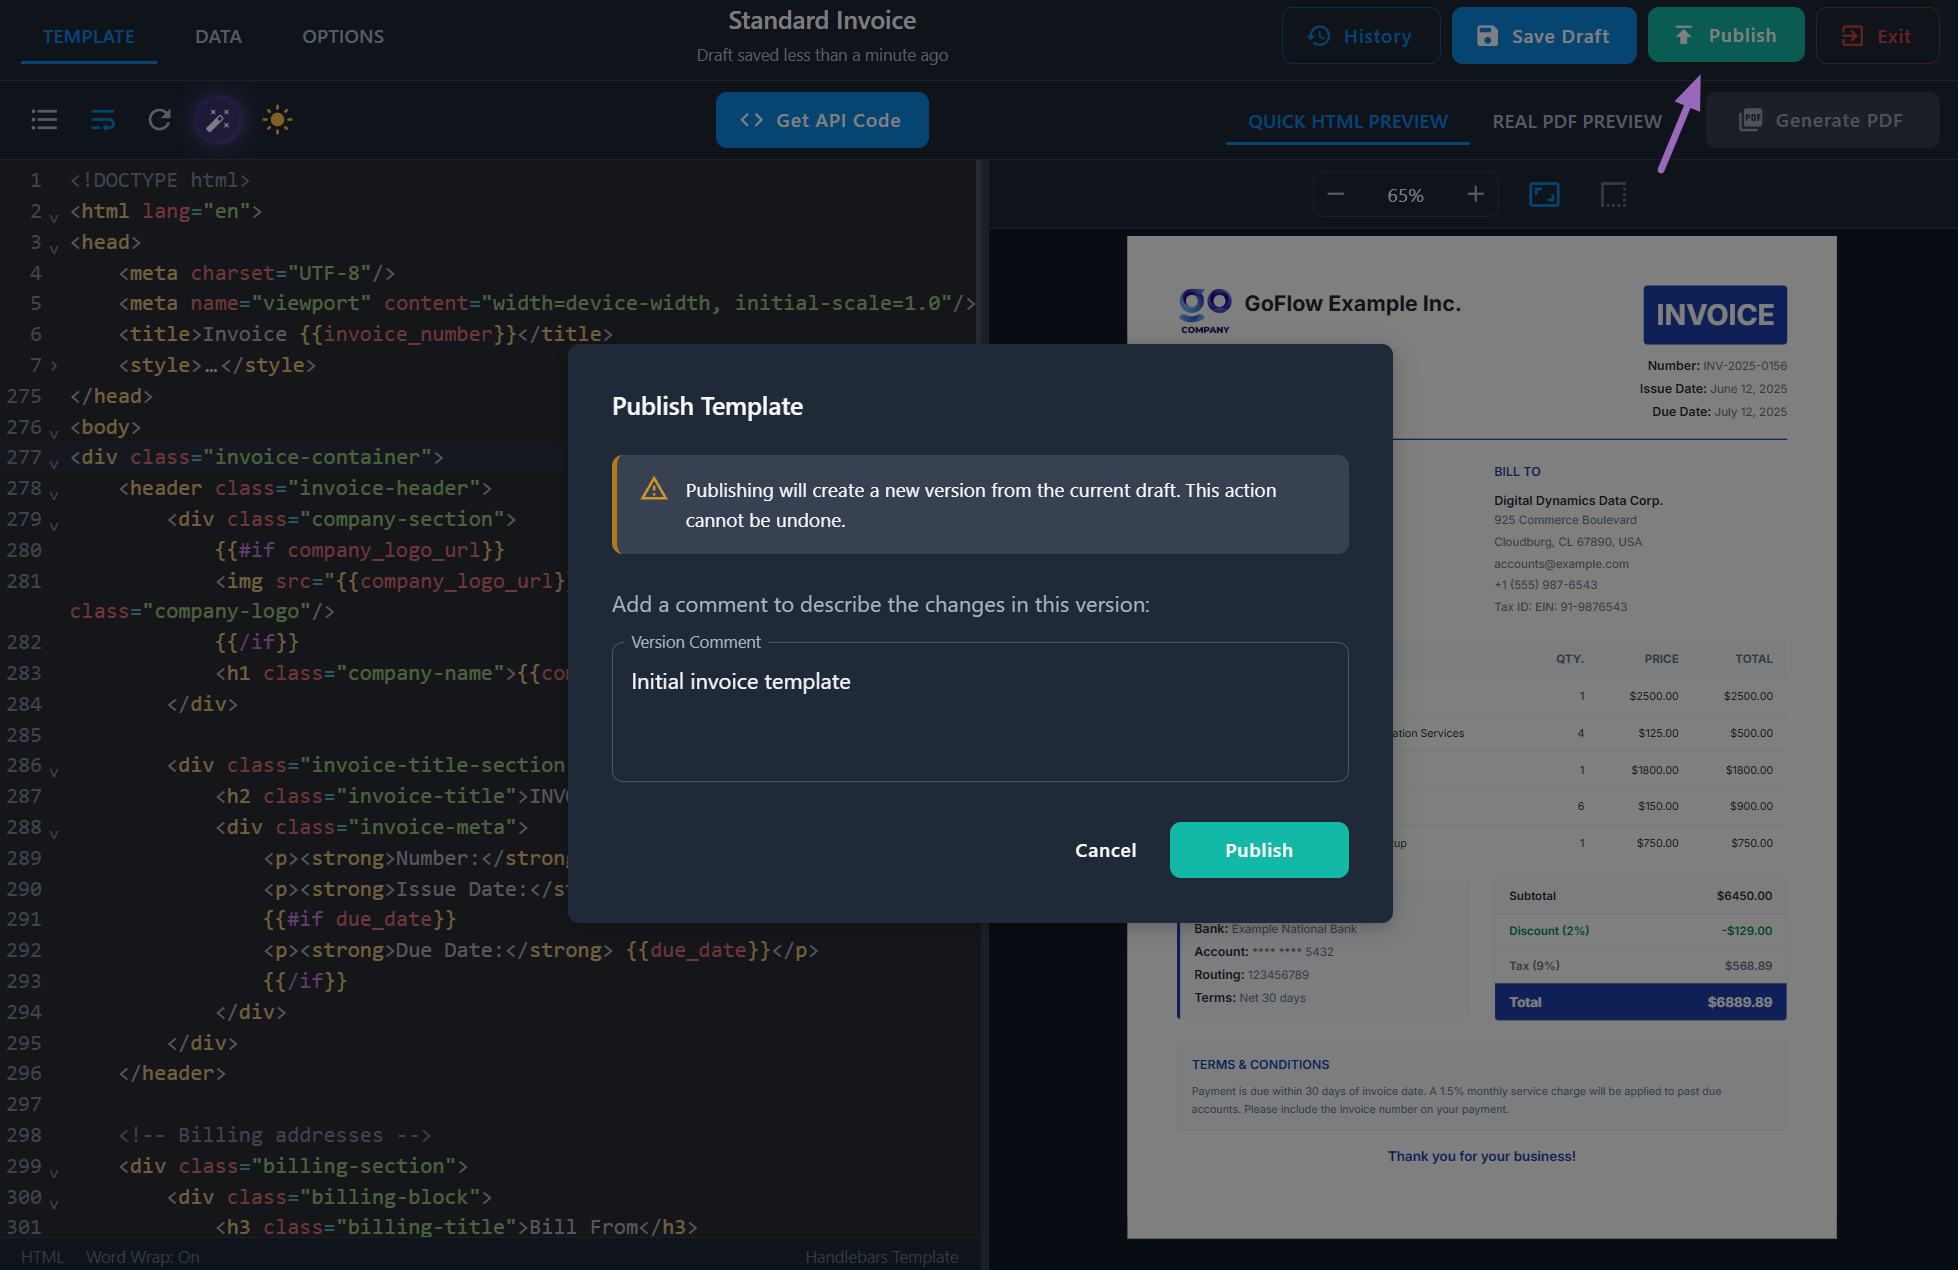
See more about template publishing, or publish programmatically with POST /v1/templates/{templateId}/publish.
3. Generate a PDF
- In the Template Designer, click Get API Code to copy an integration snippet for the current template.
- Use an official Node.js, Python, or PHP SDK, or call the REST API from any HTTP client.
- Send the template's
templateIdand the JSON data for the document astemplateData. - PDFBolt applies the data to the latest published version and renders the PDF.
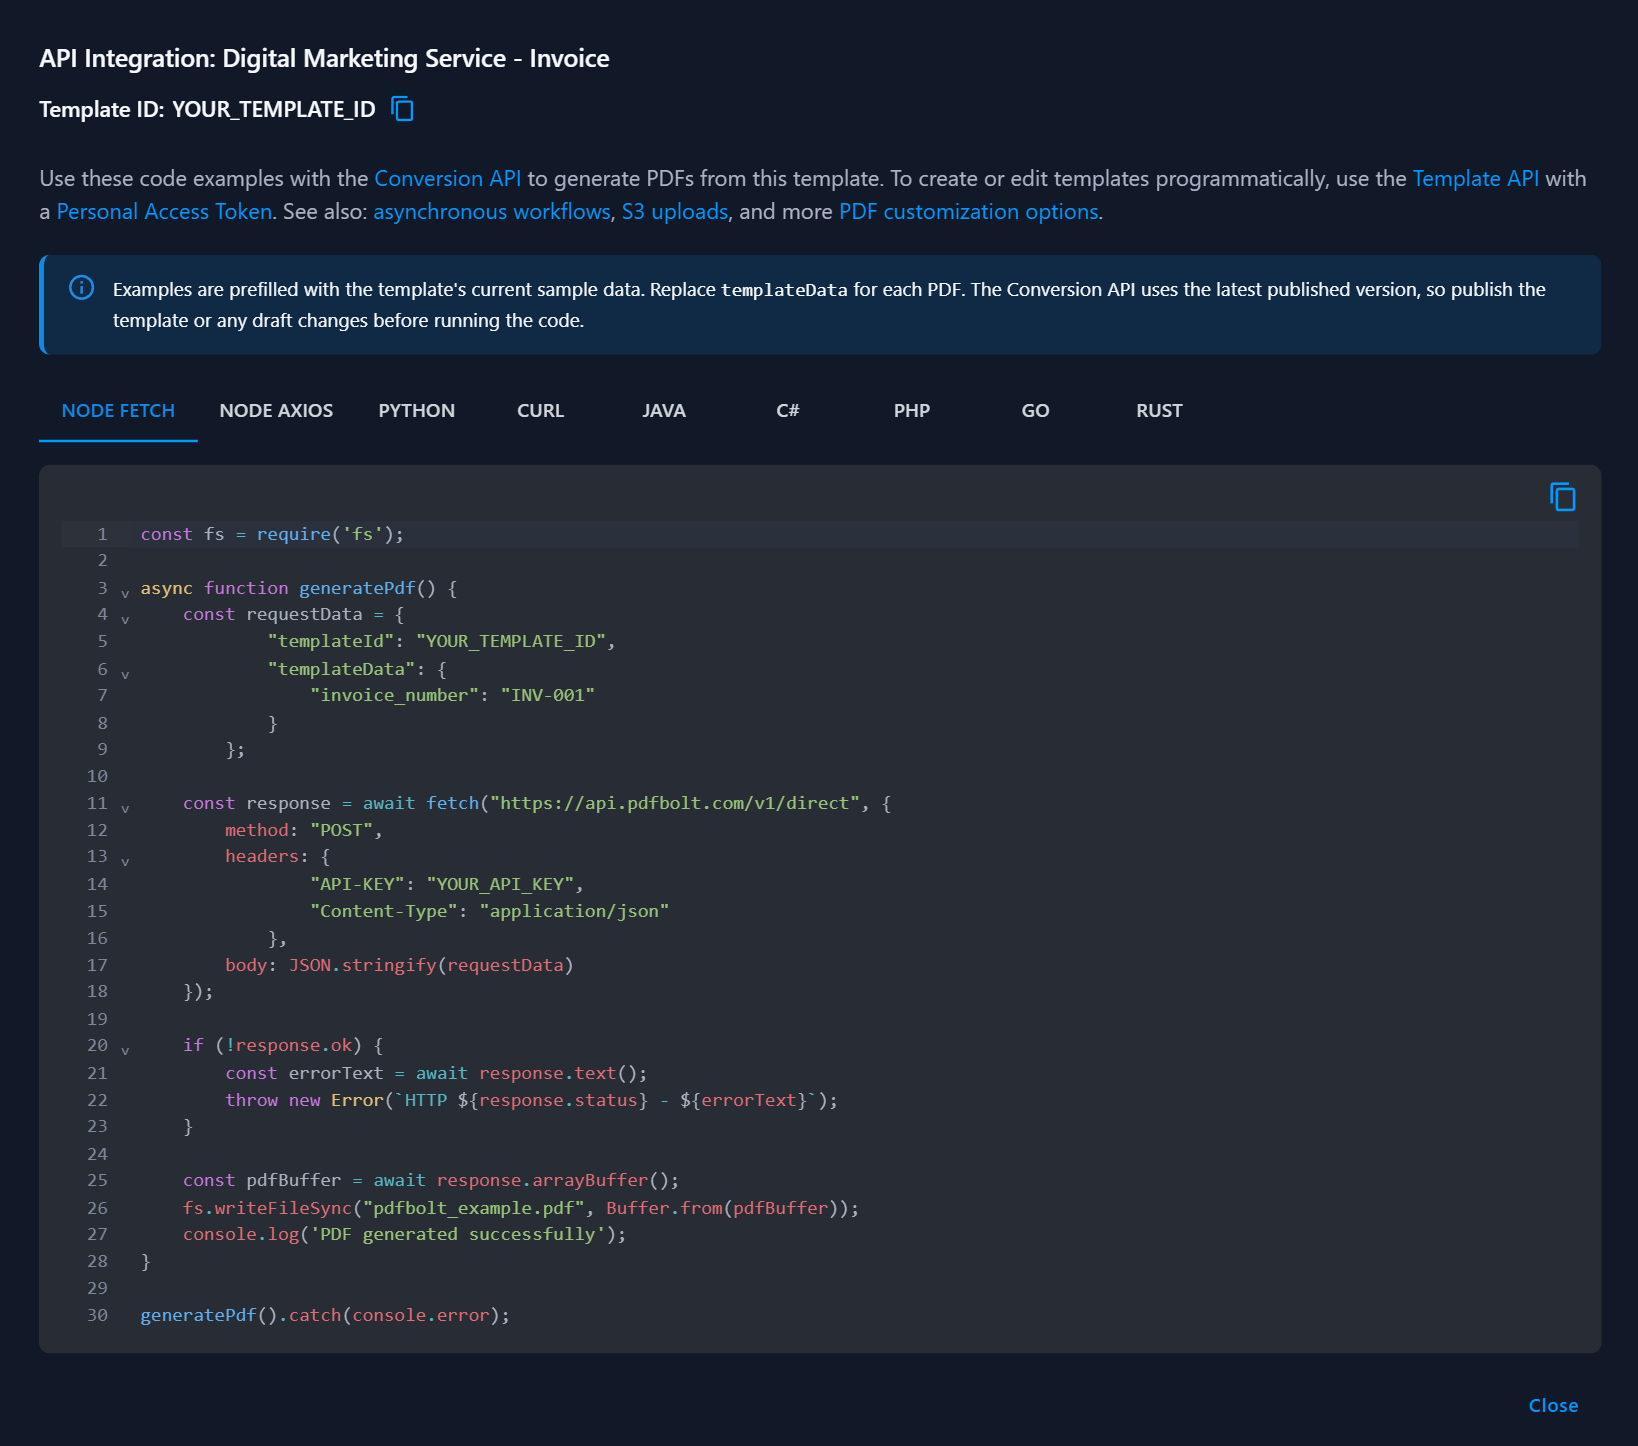
Generate PDFs from a published template with POST /v1/direct, POST /v1/sync, or POST /v1/async.
Explore the SDK and integration guides for code examples.
4. Receive the Result
- Receive PDF bytes, a temporary download URL, or an async webhook result, depending on the endpoint.
- Download, email, or store the generated PDF.
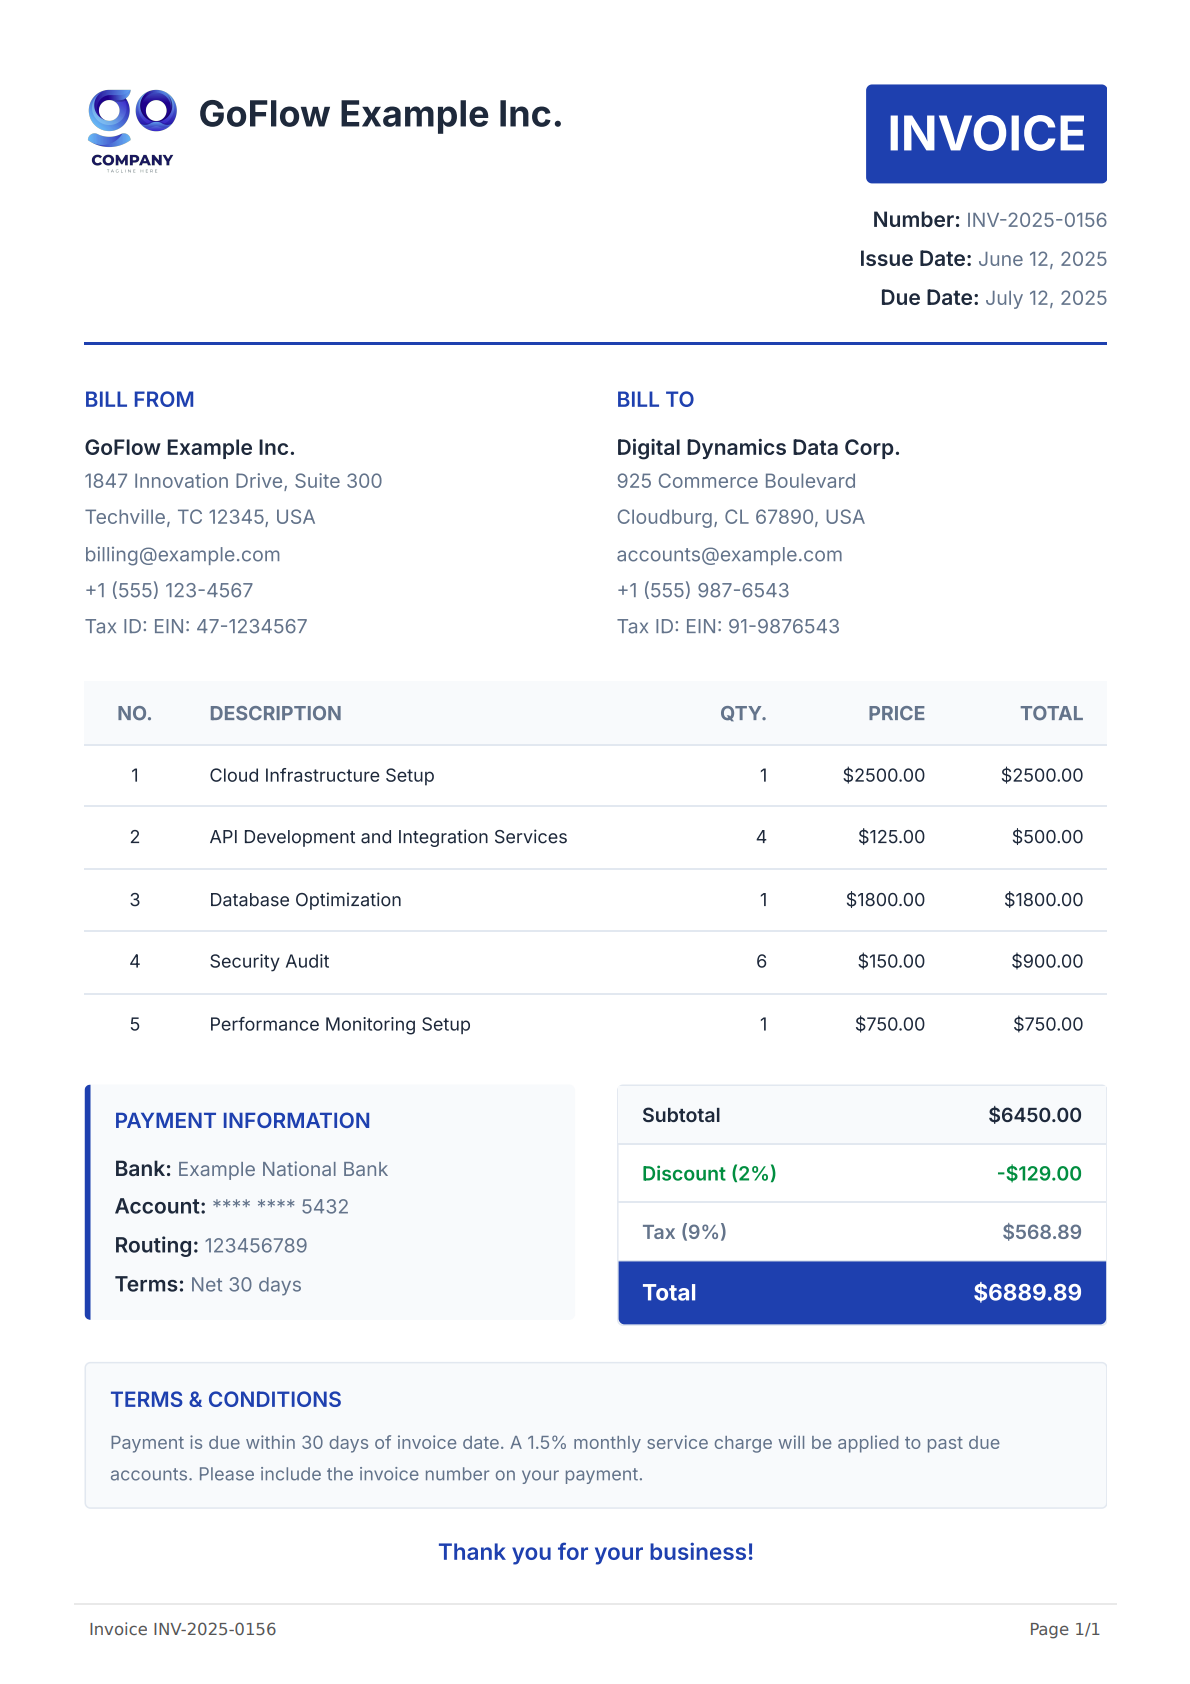
See Conversion API endpoints for response formats and delivery modes.
Before Calling the Conversion API
Keep these rules in mind when generating a PDF from a template:
- Authenticate the request with a conversion API key in the
API-KEYheader. - A template must have a published version before it can be used with the Conversion API.
templateIdmust be the template's UUID. Copy it from the Dashboard or retrieve it through the Template API.- When
templateIdis provided,templateDatais required. - The top-level
templateDatavalue must be a JSON object, for example{"key": "value"}. Its properties may contain arrays and other JSON values. - Send exactly one content source per request:
html,url, ortemplateId. - If a conversion request includes a PDF parameter that is also saved with the template, the request value takes priority over the saved value for that PDF. The template is not changed.
- Templates work with all conversion endpoints:
/v1/direct,/v1/sync, and/v1/async.
Complete Invoice Example
This example includes a complete Handlebars template, the document data sent to the Conversion API, and the generated PDF.
Template HTML:
Example Template Code
<!DOCTYPE html>
<html lang="en">
<head>
    <meta charset="UTF-8"/>
    <meta name="viewport" content="width=device-width, initial-scale=1.0"/>
    <title>Invoice - {{invoice_number}}</title>
    <style>
        @import url('https://fonts.googleapis.com/css2?family=Inter:wght@300;400;500;600;700&family=Dancing+Script:wght@700&display=swap');

        :root {
            /* Brand Colors */
            --accent-color: #b8577e;

            /* Text Colors */
            --text-primary: #333;
            --text-secondary: #555;
            --text-white: #fff;
            --text-muted: #777;

            /* Background Colors */
            --bg-primary: #ffffff;
            --bg-secondary: #fafafa;
            --bg-accent: #f9f9f9;

            /* Border Colors */
            --border-light: #e9e9e9;
            --border-medium: #ddd;
            --border-dark: #ccc;

            /* Font Sizes */
            --font-size-xs: 12px;
            --font-size-sm: 13px;
            --font-size-base: 14px;
            --font-size-lg: 16px;
            --font-size-xl: 18px;
            --font-size-2xl: 20px;
            --font-size-3xl: 24px;
            --font-size-4xl: 54px;
            --font-size-5xl: 72px;
        }

        * {
            margin: 0;
            padding: 0;
            box-sizing: border-box;
        }

        body {
            color: var(--text-primary);
            font-family: 'Inter', sans-serif;
            line-height: 1.7;
            font-size: var(--font-size-base);
        }

        .invoice-container {
            background: var(--bg-primary);
            padding: 55px;
        }

        .invoice-header {
            display: flex;
            justify-content: space-between;
            align-items: flex-start;
            margin-bottom: 25px;
            gap: 20px;
        }

        .company-section {
            display: flex;
            flex-direction: column;
            align-items: flex-start;
        }

        .company-logo {
            max-width: 80px;
            height: auto;
            object-fit: contain;
        }

        .company-name {
            margin-top: 8px;
            font-size: var(--font-size-2xl);
            font-weight: 600;
            text-transform: uppercase;
            letter-spacing: 2px;
        }

        .invoice-title-section {
            text-align: right;
        }

        .invoice-title,
        .thank-you-message {
            font-family: 'Dancing Script', cursive;
            color: var(--accent-color);
            font-weight: 700;
            line-height: 1;
        }

        .invoice-title {
            font-size: var(--font-size-5xl);
            margin-bottom: 10px;
        }

        .invoice-meta,
        .billing-details,
        .payment-info-item,
        .total-label {
            font-size: var(--font-size-base);
            color: var(--text-secondary);
        }

        .invoice-meta-label,
        .payment-info-label,
        .billing-name,
        .total-amount {
            font-weight: 600;
            color: var(--text-primary);
        }

        .billing-section,
        .summary-section {
            display: flex;
            justify-content: space-between;
            margin-bottom: 20px;
            gap: 30px;
            flex-wrap: wrap;
        }

        .billing-block {
            padding: 0 8px;
            flex: 1;
            color: var(--text-secondary);
        }

        .billing-title,
        .payment-info-title {
            color: var(--accent-color);
            font-size: var(--font-size-lg);
            font-weight: 600;
            margin-bottom: 8px;
            text-transform: uppercase;
            letter-spacing: 0.5px;
        }

        .invoice-meta,
        .billing-name,
        .payment-info-item {
            margin-bottom: 4px;
        }

        .items-table {
            width: 100%;
            border-collapse: collapse;
            margin-bottom: 20px;
            color: var(--text-secondary);
        }

        .table-header {
            background: var(--accent-color);
            color: var(--text-white);
        }

        .items-table th {
            font-weight: 600;
            text-transform: uppercase;
            letter-spacing: 0.5px;
        }

        .items-table th,
        .items-table td {
            padding: 10px 14px;
            font-size: var(--font-size-base);
            border-bottom: 1px solid var(--border-medium);
            text-align: right;
        }

        .items-table th:first-child,
        .items-table td:first-child {
            text-align: left;
        }

        .payment-info-section {
            flex: 1;
            margin-top: 12px;
        }

        .payment-info-section,
        .totals-section {
            width: 48%;
        }

        .total-row {
            display: flex;
            justify-content: space-between;
            padding: 10px 4px;
            font-size: var(--font-size-base);
            align-items: center;
            border-bottom: 1px solid var(--border-medium);
        }

        .total-row-final {
            font-weight: 700;
            color: var(--accent-color);
            border-top: 1.5px solid var(--accent-color);
            font-size: var(--font-size-lg);
        }

        .totals-section .total-row:last-child {
            border-bottom: none;
        }

        .total-row-final .total-amount {
            color: var(--accent-color);
        }

        .thank-you-section {
            text-align: center;
            margin: 20px 0;
        }

        .thank-you-message {
            font-size: var(--font-size-4xl);
        }

        @page {
            margin: 1.5cm;
        }

        @media print {
            .invoice-container {
                padding: 0;
            }

            .invoice-header,
            .billing-section,
            .summary-section,
            .items-table tr {
                page-break-inside: avoid;
            }
        }
    </style>
</head>
<body>
<div class="invoice-container">
    <!-- Header section - company logo, name, and invoice details -->
    <div class="invoice-header">
        <div class="company-section">
            {{#if company_logo_url}}
            <img src="{{company_logo_url}}" alt="{{company_name}} Logo" class="company-logo"/>
            {{/if}}
            <div class="company-name">{{company_name}}</div>
        </div>
        <div class="invoice-title-section">
            <h1 class="invoice-title">Invoice</h1>
            <div class="invoice-meta">
                <p><span class="invoice-meta-label">Invoice No:</span> {{invoice_number}}</p>
                <p><span class="invoice-meta-label">Issue Date:</span> {{issue_date}}</p>
                {{#if due_date}}
                <p><span class="invoice-meta-label">Due Date:</span> {{due_date}}</p>
                {{/if}}
            </div>
        </div>
    </div>

    <!-- Billing section -->
    <div class="billing-section">
        <div class="billing-block">
            <h2 class="billing-title">Billed from</h2>
            <p class="billing-name">{{company_name}}</p>
            <div class="billing-details">
                {{#if company_address_street}}
                <p>{{company_address_street}}</p>
                {{/if}} {{#if company_address_line2}}
                <p>{{company_address_line2}}</p>
                {{/if}}{{#if company_city}}
                <p>
                    {{company_city}}{{#if company_state}}, {{company_state}}{{/if}}{{#if company_postal_code}}
                    {{company_postal_code}}{{/if}}{{#if company_country}}, {{company_country}}{{/if}}
                </p>
                {{/if}} {{#if company_email}}
                <p>{{company_email}}</p>
                {{/if}} {{#if company_phone}}
                <p>{{company_phone}}</p>
                {{/if}} {{#if company_tax_id}}
                <p>Tax ID: {{company_tax_id}}</p>
                {{/if}}
            </div>
        </div>

        <div class="billing-block">
            <h2 class="billing-title">Billed to</h2>
            <p class="billing-name">{{client_name}}</p>
            <div class="billing-details">
                {{#if client_address_street}}
                <p>{{client_address_street}}</p>
                {{/if}} {{#if client_address_line2}}
                <p>{{client_address_line2}}</p>
                {{/if}}{{#if client_city}}
                <p>
                    {{client_city}}{{#if client_state}}, {{client_state}}{{/if}}{{#if client_postal_code}}
                    {{client_postal_code}}{{/if}}{{#if client_country}}, {{client_country}}{{/if}}
                </p>
                {{/if}} {{#if client_email}}
                <p>{{client_email}}</p>
                {{/if}} {{#if client_phone}}
                <p>{{client_phone}}</p>
                {{/if}} {{#if client_tax_id}}
                <p>Tax ID: {{client_tax_id}}</p>
                {{/if}}
            </div>
        </div>
    </div>

    <!-- Products/services table -->
    <table class="items-table">
        <thead class="table-header">
        <tr>
            <th>Description</th>
            <th>Quantity</th>
            <th>Price</th>
            <th>Total</th>
        </tr>
        </thead>
        <tbody>
        {{#each line_items}}
        <tr>
            <td class="item-description">{{this.description}}</td>
            <td>{{this.quantity}}</td>
            <td>{{../currency_symbol}}{{this.unit_price}}</td>
            <td>{{../currency_symbol}}{{this.total_amount}}</td>
        </tr>
        {{/each}}
        </tbody>
    </table>

    <!-- Payment Details -->
    <div class="summary-section">
        <div class="payment-info-section">
            <h3 class="payment-info-title">Payment Information</h3>
            {{#if payment_info.bank_name}}
            <div class="payment-info-item">
                <span class="payment-info-label">Bank Name:</span> {{payment_info.bank_name}}
            </div>
            {{/if}} {{#if payment_info.account_number}}
            <div class="payment-info-item">
                <span class="payment-info-label">Account No:</span> {{payment_info.account_number}}
            </div>
            {{/if}} {{#if payment_info.routing_number}}
            <div class="payment-info-item">
                <span class="payment-info-label">Routing:</span> {{payment_info.routing_number}}
            </div>
            {{/if}} {{#if payment_info.payment_terms}}
            <div class="payment-info-item">
                <span class="payment-info-label">Terms:</span> {{payment_info.payment_terms}}
            </div>
            {{/if}}
        </div>

        <!-- Invoice totals and calculations -->
        <div class="totals-section">
            <div class="total-row">
                <span class="total-label">Subtotal</span>
                <span class="total-amount">{{currency_symbol}}{{subtotal_amount}}</span>
            </div>
            {{#if discount_amount}}
            <div class="total-row">
                <span class="total-label">Discount{{#if discount_percentage}} ({{discount_percentage}}%){{/if}}</span>
                <span class="total-amount">-{{currency_symbol}}{{discount_amount}}</span>
            </div>
            {{/if}} {{#if tax_amount}}
            <div class="total-row">
                <span class="total-label">Tax{{#if tax_percentage}} ({{tax_percentage}}%){{/if}}</span>
                <span class="total-amount">{{currency_symbol}}{{tax_amount}}</span>
            </div>
            {{/if}}
            <div class="total-row total-row-final">
                <span class="total-label">Total Amount</span>
                <span class="total-amount">{{currency_symbol}}{{total_amount}}</span>
            </div>
        </div>
    </div>

    <div class="thank-you-section">
        <h3 class="thank-you-message">Thank you!</h3>
    </div>
</div>
</body>
</html>
Conversion Request:
Example cURL Request
curl 'https://api.pdfbolt.com/v1/direct' \
  -H 'API-KEY: XXXXXXXX-XXXX-XXXX-XXXX-XXXXXXXXXXXX' \
  -H 'Content-Type: application/json' \
  -d '{
    "templateId": "YOUR_TEMPLATE_UUID",
    "templateData": {
      "invoice_number": "INV-2026-014",
      "issue_date": "June 13, 2026",
      "due_date": "June 27, 2026",
      "company_name": "Pink Brand Studio",
      "company_email": "[email protected]",
      "company_phone": "+1 (555) 222-3344",
      "company_address_street": "22 Rose Garden Lane",
      "company_city": "Blushville",
      "company_state": "CA",
      "company_postal_code": "90210",
      "company_country": "USA",
      "company_tax_id": "PB-2026-001",
      "company_logo_url": "https://img.pdfbolt.com/business-logo-template.png",
      "client_name": "Luxe Beauty Co.",
      "client_email": "[email protected]",
      "client_phone": "+1 (555) 667-8899",
      "client_address_street": "88 Glamour Ave",
      "client_city": "Glowtown",
      "client_state": "NY",
      "client_postal_code": "10001",
      "client_country": "USA",
      "client_tax_id": "LB-9988",
      "line_items": [
        {"description": "Brand Identity Package", "quantity": 1, "unit_price": "600.00", "total_amount": "600.00"},
        {"description": "Custom Instagram Templates", "quantity": 1, "unit_price": "200.00", "total_amount": "200.00"},
        {"description": "Product Photography Session", "quantity": 1, "unit_price": "350.00", "total_amount": "350.00"},
        {"description": "E-commerce Banner Design", "quantity": 2, "unit_price": "75.00", "total_amount": "150.00"},
        {"description": "Email Newsletter Template", "quantity": 1, "unit_price": "120.00", "total_amount": "120.00"}
      ],
      "payment_info": {
        "bank_name": "Example Bank",
        "account_number": "1234567890123456",
        "routing_number": "110099001",
        "payment_terms": "Due in 14 days"
      },
      "currency_symbol": "$",
      "subtotal_amount": "1420.00",
      "discount_percentage": "10",
      "discount_amount": "142.00",
      "tax_percentage": "20",
      "tax_amount": "255.60",
      "total_amount": "1533.60"
    }
  }' \
  --output invoice.pdf
Generated PDF:
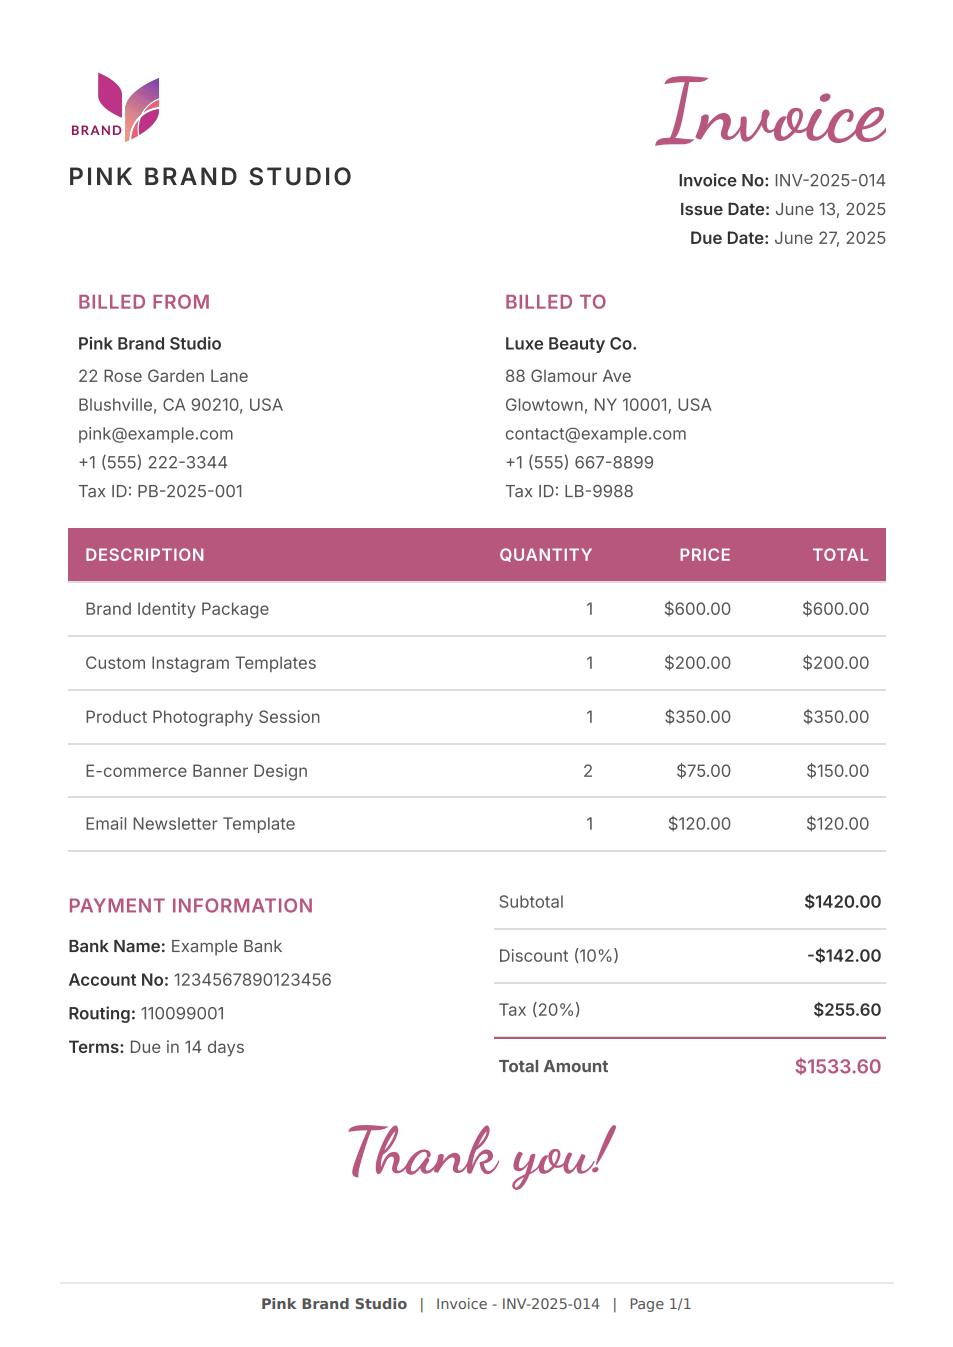
Generated invoice PDF with dynamic data and branded styling.
Troubleshooting
If your request returns an error or the rendered PDF doesn't look right, check these common causes:
| Problem | Cause / Fix |
|---|---|
templateId is not a valid UUID | Copy the UUID from the Dashboard or retrieve it through the Template API. Do not use a custom name such as my-template. |
Template with ID ... has no active version | Publish the template draft. |
'templateData' must also be provided | When using templateId, include templateData as a JSON object in the same request. |
| Variables show as blank in the PDF | Field names in templateData don't match Handlebars placeholders such as {{customer_name}} – check spelling and case. |
| Images or fonts missing in PDF | Assets must be reachable by PDFBolt's renderer (no localhost). For slow-loading assets, use waitUntil: "networkidle". |
| JavaScript-rendered content missing | Use waitUntil: "networkidle" or waitForFunction. |
| Header/footer variables don't work | Use Chromium placeholder classes, not Handlebars variables. See headerTemplate and footerTemplate. |
For a complete list of API errors and recommended actions, see Error Handling.
Template FAQ
Do I need coding knowledge to use templates?
Not necessarily. You can:
- Use AI Template Generation to create templates from descriptions or reference files – no coding required.
- Start with ready-made templates from our gallery and customize them for your brand.
- Handlebars syntax is simple – use
{{variable_name}}for data insertion.
Can I modify published templates?
Yes. Editing a published template creates a new draft. The published version remains available to the Conversion API until you publish the draft. Use version history to compare changes or restore a previous version as a new draft.
What happens to my template data during PDF generation?
Template data is used to render the PDF. After processing is complete, its value is redacted from stored request logs by default and is not stored or logged in those records. See Data Handling for details.
Can I use custom fonts in my templates?
Yes. Import custom fonts from Google Fonts or another publicly reachable HTTPS stylesheet or font URL. For example, using CSS @import:
@import url('https://fonts.googleapis.com/css2?family=Inter:wght@400;500;600;700&display=swap');
Or using a <link> tag in your template's <head>:
<link href="https://fonts.googleapis.com/css2?family=Titillium+Web:wght@400;600;700&display=swap" rel="stylesheet" />
Can I pass HTML content in template data?
Yes. By default, Handlebars escapes HTML in variables for security. To render raw HTML from your data, use triple curly braces {{{variable}}} instead of double {{variable}}. For example:
{
  "description": "<strong>Bold text</strong> and <em>italic</em>"
}
<!-- Unescaped (renders actual HTML) -->
<p>{{{description}}}</p>
Result in the generated PDF:
Bold text and italic
Triple braces bypass Handlebars escaping. User-generated HTML can change document structure, load resources, or run scripts if your template allows it. Only use {{{variable}}} with content you control or that has been sanitized server-side.
Can I use images in my templates?
Yes. You can include images using:
- External URLs – reference any publicly accessible image:
<img src="https://example.com/logo.png" /> - Base64 encoding – embed images directly in your template:
<img src="data:image/png;base64,..." /> - Dynamic images – pass image URLs in your template data using Handlebars:
<img src="{{company_logo}}" /> - Inline SVG – embed SVG graphics directly in your HTML for sharp, scalable icons and logos.
How do I control page breaks in templates?
Use CSS print properties to control page breaks:
/* Force a page break before an element */
.new-page { page-break-before: always; }

/* Prevent an element from being split across pages */
.keep-together { break-inside: avoid; }

/* Force a page break after an element */
.section-end { page-break-after: always; }
This is especially useful for long tables or multi-section documents. See our optimizing HTML for PDF guide for more examples.
Can I add headers and footers to template PDFs?
Yes. Enable Display Header & Footer in the template's PDF Options tab. Header and footer HTML uses Chromium placeholder classes such as pageNumber, totalPages, date, title, and url – these are separate from Handlebars variables in the main template body. See headerTemplate and footerTemplate for the full list.
How do I style my templates?
Write your styles directly in the template using one of these approaches:
<style> block in your template's <head>:
<style>
  .invoice-title { font-size: 24px; font-weight: bold; color: #333; }
  .total { text-align: right; border-top: 2px solid #000; }
</style>
Inline styles directly on HTML elements:
<h1 style="font-size: 24px; font-weight: bold; color: #333;">Invoice</h1>
You can combine both approaches in the same template.
Can I use JavaScript in my templates?
Yes. Templates are rendered by a full browser engine, so JavaScript works. Use waitUntil: "networkidle" to wait for all external scripts to load, or waitForFunction for more precise control over when the PDF is generated.
For example, generating a QR code with an external library:
{{#if qr_code_data}}
<canvas id="qr-code"></canvas>
<script src="https://cdnjs.cloudflare.com/ajax/libs/qrious/4.0.2/qrious.min.js"></script>
<script>
  new QRious({
    element: document.getElementById('qr-code'),
    value: {{{json qr_code_data}}}
  });
</script>
{{/if}}
Use the built-in {{{json value}}} helper when embedding templateData into JavaScript. It serializes the value as JSON. Because the output is inserted without HTML escaping, use it only with trusted or sanitized data.
How can I test my template before going live?
The Template Designer offers two preview modes:
- Quick HTML Preview – instant visual feedback as you edit.
- Real PDF Preview – generates an actual PDF using the same rendering engine as the Conversion API, so you can verify the final output including page breaks, fonts, and print styles.
Your template stays in draft until you publish it, so testing does not affect the current published version. Successful Real PDF Preview renders use your available document conversions.
Do you support other templating engines besides Handlebars?
We currently support Handlebars. If you need a different engine, contact us at [email protected] and we'll consider adding it based on user needs.
Additional Resources
Continue with these guides and API references:
📄️ Dashboard Template Designer
Create, preview, publish, and manage templates in the Dashboard
📄️ AI Template Generation
Generate and edit template drafts from prompts and reference files
📄️ Template Gallery
Start with a ready-to-use design for a common document
📄️ Template API
Create and manage templates through the REST API
📄️ Conversion Parameters
Use templateId, templateData, and request-level PDF options
📄️ Quick Start Guide
Official SDKs and REST examples for template PDF generation